Manual Exchange to Office 365 migration methods consume a lot of time and effort. Only technically adept Exchange administrators can perform such migrations. Also, chances of errors cannot be avoided. That is why automated tools like Exchange Migrator are important in Exchange to Office 365 migrations.
Exchange-to-Office-365-Migration-using-Cutover-Migration-Part-1
Exchange-to-Office-365-Migration-using-Cutover-Migration-Part-2
Exchange-to-Office-365-Migration-using-Cutover-Migration-Part-3
Exchange-to-Office-365-Migration-using-Cutover-Migration-Part-4
It is a professional solution that offers automated migration from all Exchange versions to Office 365. This Exchange Migration software fulfills the Office 365 migration requirements of all types of Exchange organizations, including small, mid-sized, and large.
Automated Exchange to Office 365 Migration Using Exchange Migrator
In the tool, all migration-related tasks are created as Jobs and are executed at the desired time. To perform Exchange to Office 365 migration, you have to create a Project first. Then mailbox and public folder migration jobs are created inside this Project.
Steps of Exchange to Office 365 mailbox migration
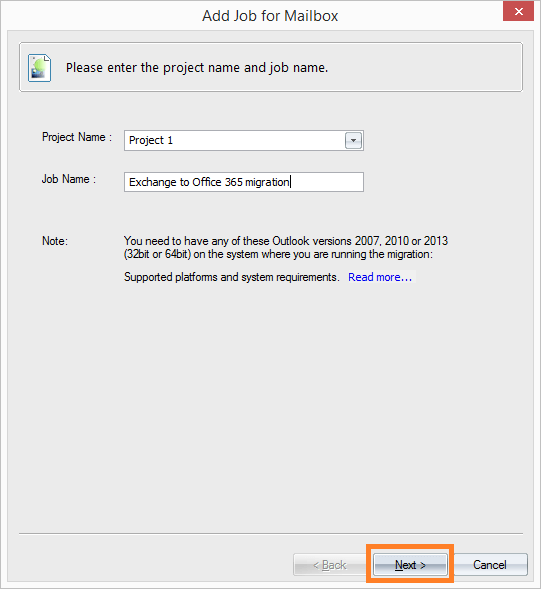
Step 1: To create a mailbox migration job, click Add Job under the Project. In the new dialogue box, select Exchange Server as the source and provides its credentials.
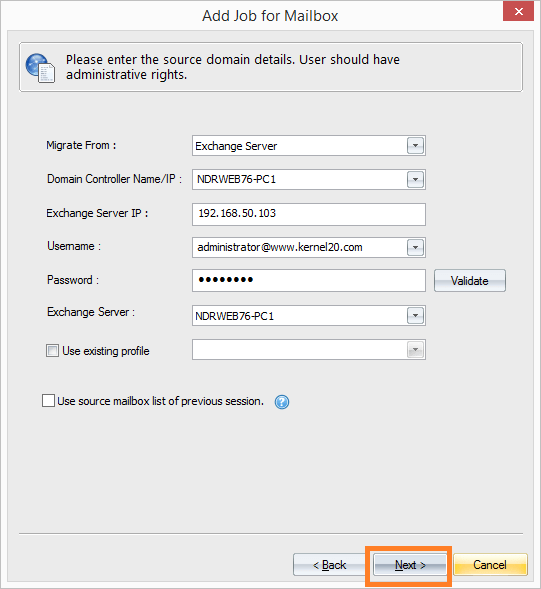
Note: Make sure that the mailbox has full administrative rights on all mailboxes. Otherwise, you cannot perform the migration.
Step 2: After adding the Exchange Server, select the mailboxes that you want to migrate to Office 365. Select the mailboxes manually or add them using a CSV file.

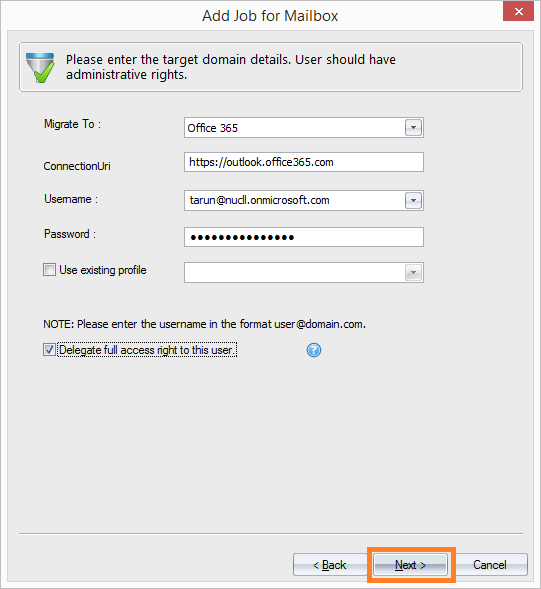
Step 3: Here, you need to select Office 365 as the target. Provide the username and credentials. You can also Delegate full access right to this user by checking the checkbox. Click Next to move further.
Step 4: Apply filters (Message Classes, Date Range, and Folders) to migrate only the required folders and items from Exchange mailboxes.
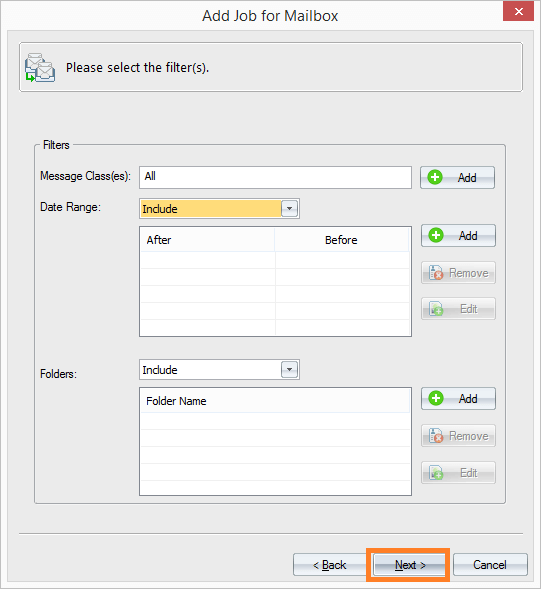
Note: With Message Classes, you can filter the data of Exchange mailboxes. Select the item types that you want to migrate. Similarly, you can refine data based on date range and folder type.
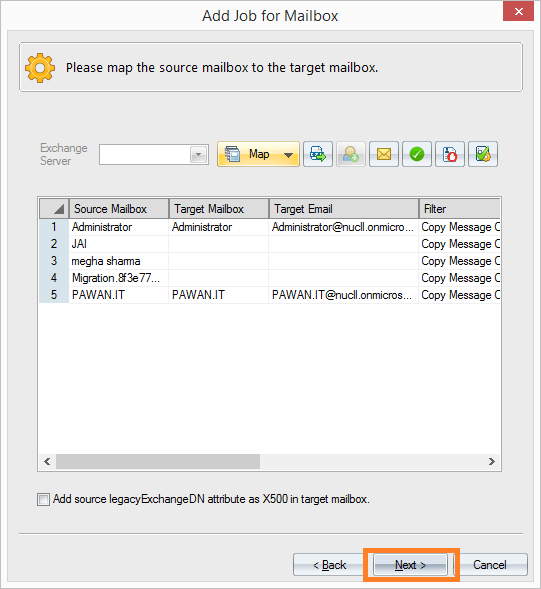
Step 5: Map the mailboxes between the source and target manually or using a CSV file. After mapping, click Next to continue.
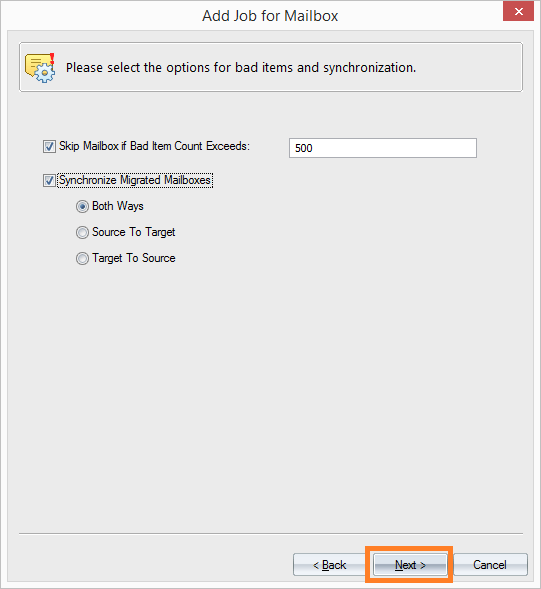
Step 6: You can skip mailbox migration if the bad item count exceeds a specified value. Also, you can provide the synchronization options here.
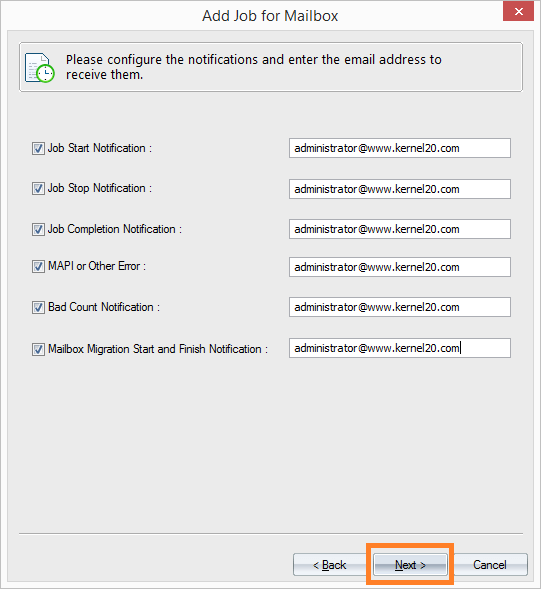
Step 7: To stay updated with the migration project, you can set notifications (for start, stop, completion, bad count notification, etc.).
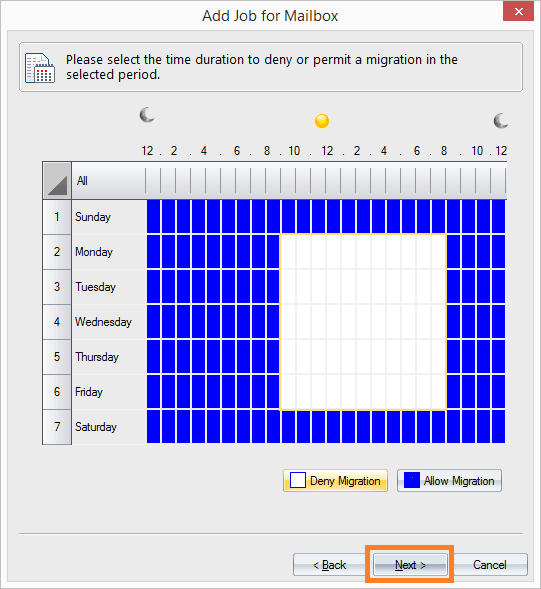
Step 8: Now, select the days & hours in which you Allow or Deny migration.
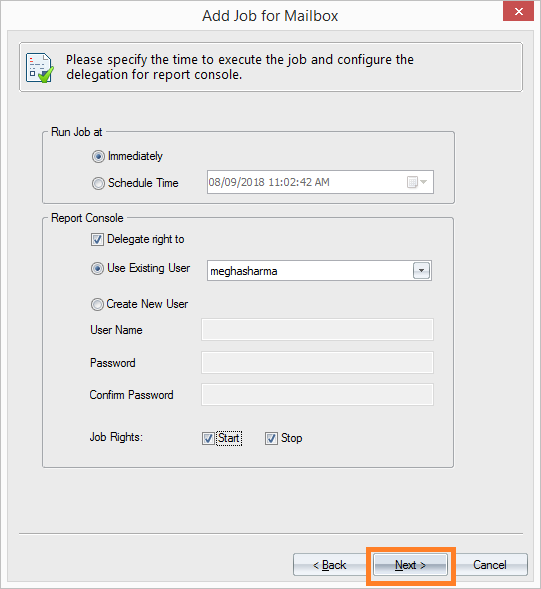
Step 9: Start the migration job immediately or schedule it to start at a specified time. Also, you can delegate the report console rights to an existing user or a new user.
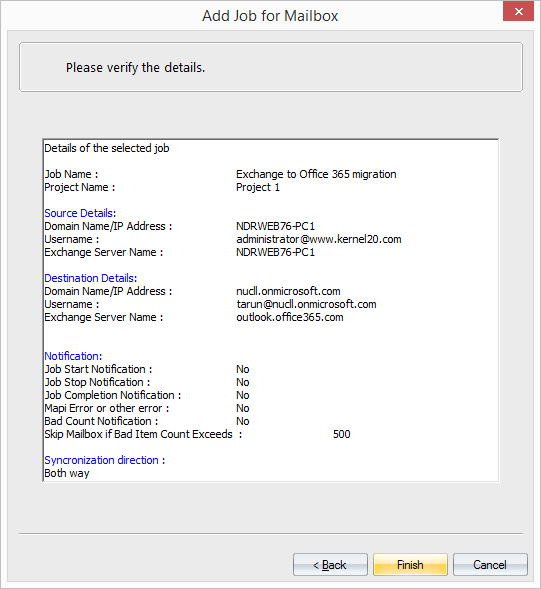
Step 10: Once the migration job is created, it provides the complete summary of the job.
Final Word
With it, migrating mailboxes from Exchange Server to Office 365 becomes more convenient (no matter how big the organization is). It ensures complete migration of mailboxes and public folders without any flaws. Also, it ensures total co-existence between the migrated and un-migrated mailboxes for a smooth migration.