To manage emails, Outlook users create additional folders and subfolders in their mailbox. But, after some time these folders become bulky, and the user might feel the need to create a new PST to add new emails. But data structure and folder hierarchy are important in Outlook mailbox, and so the users want the same folder structure in the new PST file to avoid confusions.
This blog is going to describe the whole procedure involved in copying a folder structure to a new PST. There is a manual and an automated way to do it. Let’s discuss what are they and how to perform them.
Manual Method to Copy PST Folder Structure with Outlook
Although, there is no direct manual method to perform this, by using the archive feature one can copy the folder structure. Let’ see how:
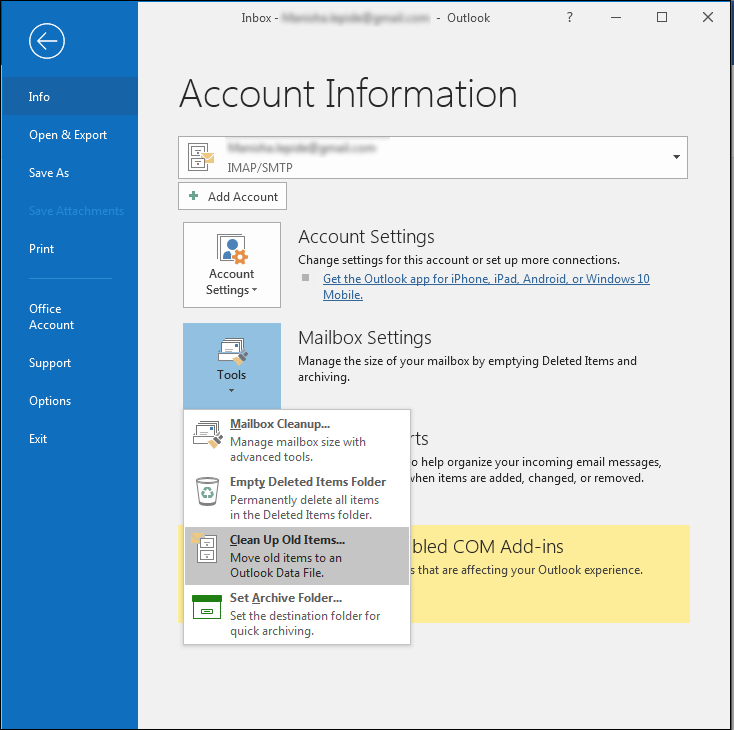
- Open Outlook and click on File option.
- In the Info section, click on the Tools menu and select Clean Up Old Items.
- In the Archive dialogue box select ‘Archive this folder and all subfolders,’ and select the root folder. In Archive items older than option select the date (a date recent enough so that the newly created structure contains no emails). To provide a destination to the folder, click on the Browse button and click on OK.
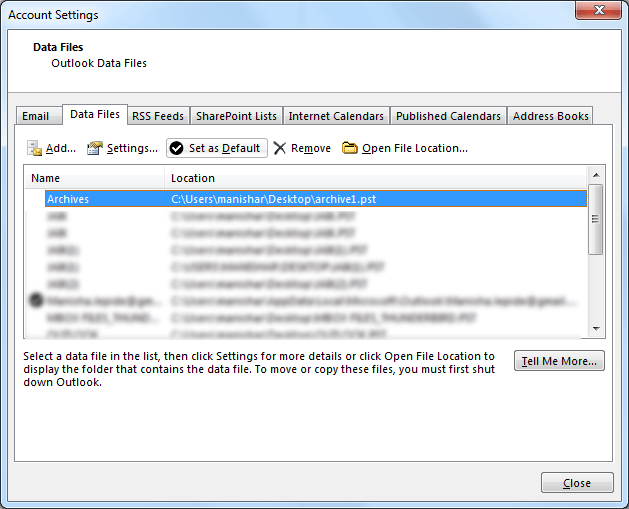
- Now, click on File, in Info category, click on Account Settings drop-down and select Account Settings. Further, in Account Settings dialogue box, select the Archives folder and click on Set as Default and restart Outlook.
- Once everything is synched properly, you can see the new archived folder with the same structure in your Outlook account.

Automated Method to Copy Folder Structure
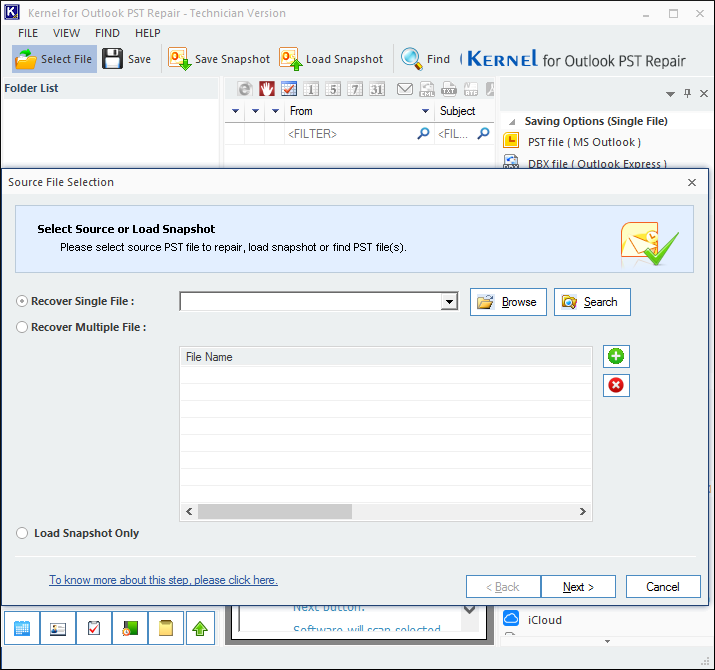
Outlook PST Recovery is an effective and direct solution for copying the folder structure. The tool can easily create a new PST with the exact folder structure in no time. Let’s see how:
![]()
- Click Browse and select a file and click on Next.
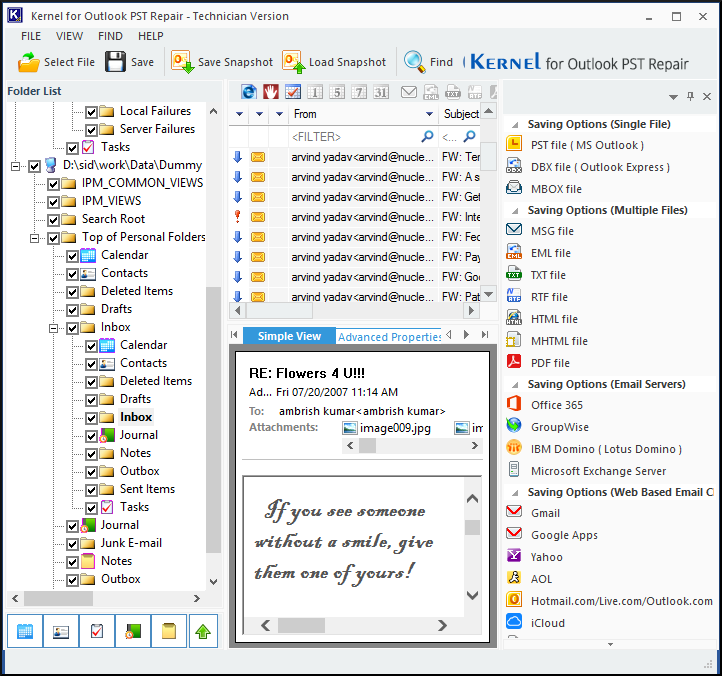
- This page allows you to have the preview of the items that your file contains. Check the content and hierarchy and click on the Save button on the top.
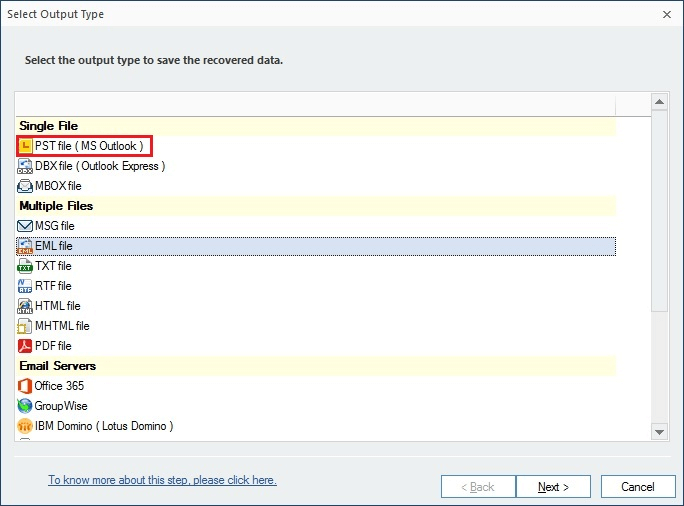
- Select the output type as PST file (MS Outlook) and click on Next.
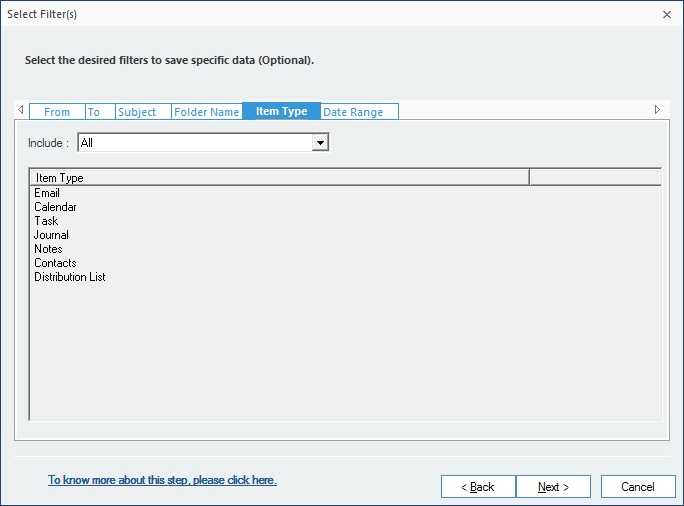
- Here you can apply filters as per your requirement and click on Next.
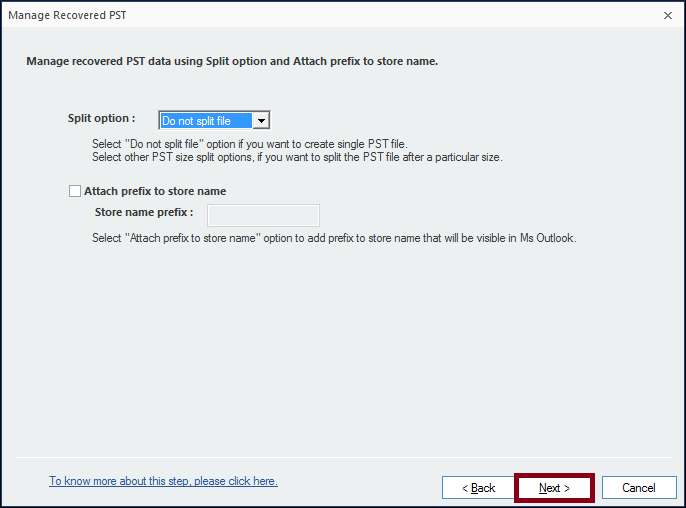
- At this stage, manage the PST by selecting the split preference and by adding an optional prefix. Now, click on Next to proceed.
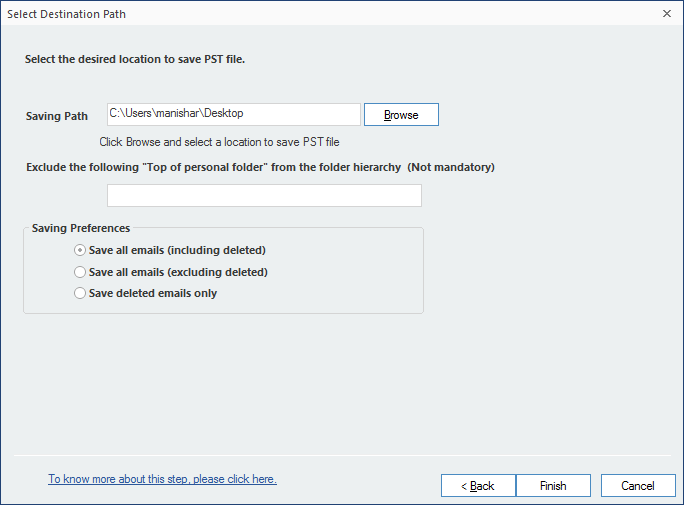
- Now, click on the Browse button and select a path for the saving purposes of the new PST. Make selections on the basis of your saving preferences of the deleted emails. Click on Finish.
- Once the saving process is done, click on OK.
NOTE: Apply Filters wisely and try to not include anything from the previous file, so that the newly created PST will only have the copied structure.

As we can see that how easily we created a copy of folder structure with Outlook PST Recovery without much trouble or facing any difficulty. With this tool, you can also convert a PST file to many other formats. Apart from this, there are many other exciting features of the tool, download the trial version now and avail all the benefits.
![]()