
Color categories in Outlook allow users to differentiate between their different groups of emails. With the help of categories, the user can separate various items and quickly track and organize them. There are default categories available for this purpose, or the user can create their own.
Add Color categories to emails in Outlook
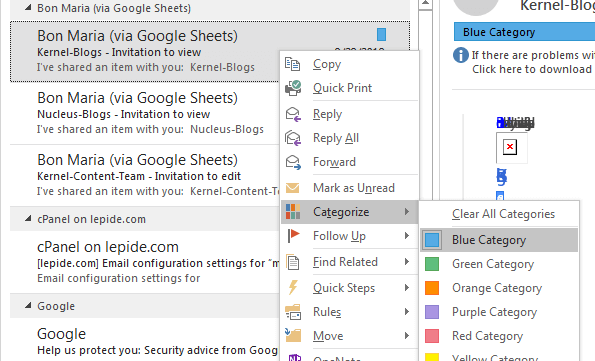
It is very easy to assign categories to the mails. For this, you just need to right click on the mail section and in the Categorize option, select a color (refer the image).

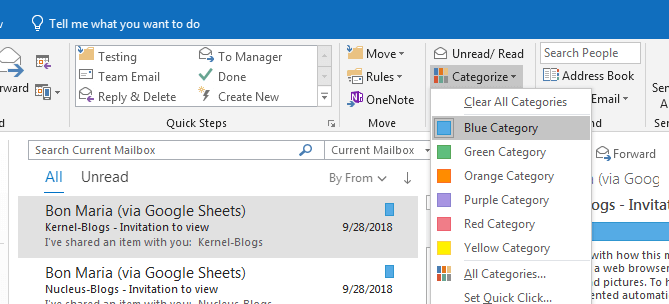
If the Categorize option doesn’t show up by the right click, then select the particular mail folder, and under the tags section, click on Categorize option. Select the color.

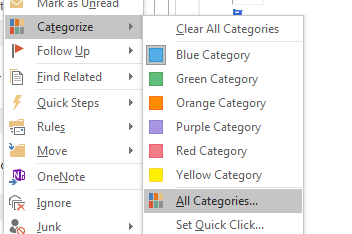
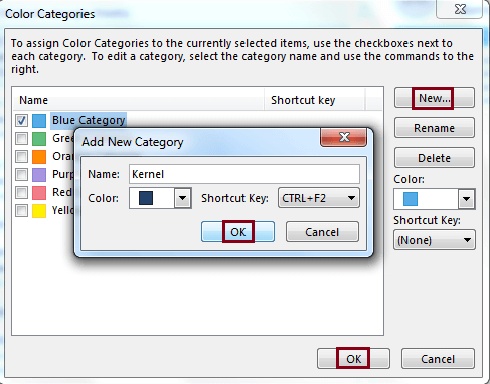
So, this is how you can categorize your items on Outlook. If you want to create a category of your own, then it is also easy. Click on the same Categorize option and select All Categories.

Now, click on New and assign a name, color and shortcut key to your category and click on OK. After finalizing, click on OK again.

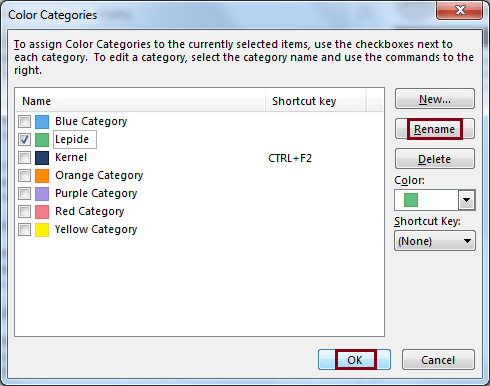
This is how you can customize your Categories. If you want to change the rest of the names of other categories and assign a new one, then you need to click on Rename option and set the desirable name. Click on OK to finalize.

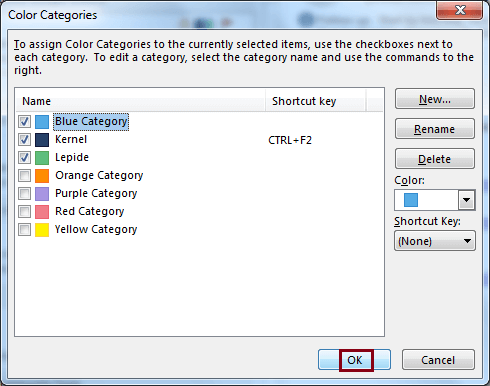
So, now we know how easy it is to customize the categories and assign a color and category name according to your understanding. If you want to assign two or more than one colors to for any of the items, then you need to select the category in color Categories menu. For this, again select the particular item and click on Categorize option and select All categories from the menu. Select as many categories as you want and click on Ok.
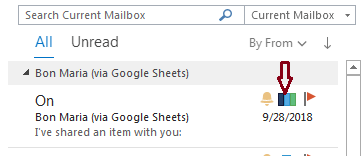
Once you have successfully followed the whole process, then your item should look something like this (refer the image).

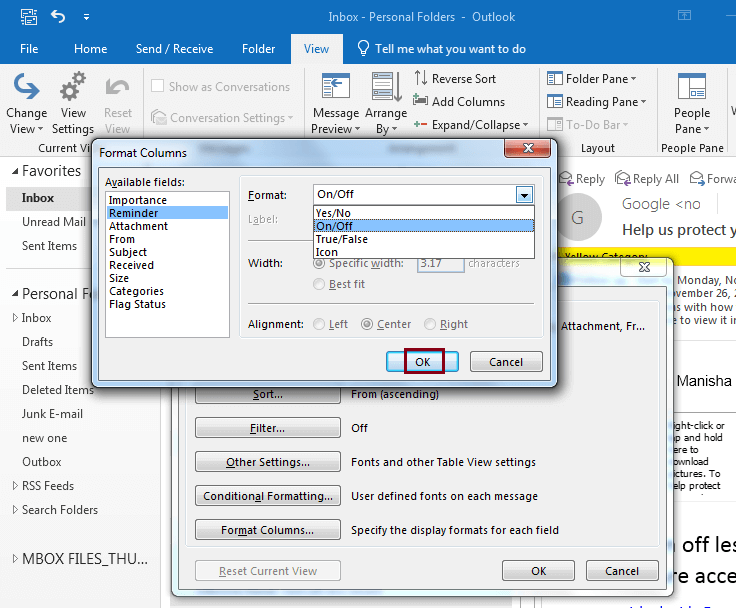
Now the concern is, what if when these category colors do not display in Inbox? Well, there could be the possibility that you have moved the category column to the left of the From field. Another case is that you have moved the categories column to the immediate right side which uses icons.
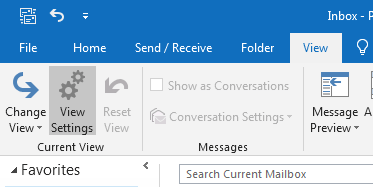
Change the View Settings in Outlook
If you too are facing this issue, then try resetting your view. While resetting the view you can decide, what do you want and where. If you want to keep your color categories to left, then you need to change the left side to use text instead of icons. Let’s say that if you have set a reminder, then you will see a bell icon on the left side, but if you have turned it off, then you will see On/Off text for it.
For this, go to the View section and click on View Settings.

Select Format Columns and click on Reminder and select the text format instead of Icon. Click on Ok to apply changes.

Are you facing other Outlook related Issues?
There are other Outlook related issues like to restore or repair a PST, recover deleted messages and attachments, repair encrypted, and password protected files and much more. These problems may seem easy to solve but are very complicated when it comes to the action. In this case, we recommend you the best possible way to deal with such issues, which is Outlook PST Recovery. Kernel provide solutions for almost every Outlook related problem in quick and easy steps.
![]()

Conclusion:
With the help of the color category, you can separate your emails and other items. It helps you to identify them and take a quick action. However, there are other glitches in Outlook which can create a problem in your working experience. For the rest of your Outlook problems, you can install Outlook PST Recovery, which is quick and easy to use. This automated software allows you to export, search, restore, repair even password protected PST Files; retain meta properties, recover deleted data, save emails in different formats, etc. The software comes in a trial version and is compatible with all versions of MS Outlook and Windows.