

Outlook is the most advanced and ever-changing platform with the number of features and options it provides to its users. The diverse features of Outlook help users to manage emails efficiently and in different ways. This lets the user to keep track of several emails as per the requirement.
One of the easiest ways to manage emails is to change its delivery location. This way you can have emails in a particular folder. It will save you from the storage issues you might be facing or saving the emails in a specific folder makes it easier to have them in the case of formatting.
How to Change Default Mail Delivery Location If Outlook is Not Running?
It is very easy to change the default mail delivery location in the Outlook, follow these simple steps to execute it.
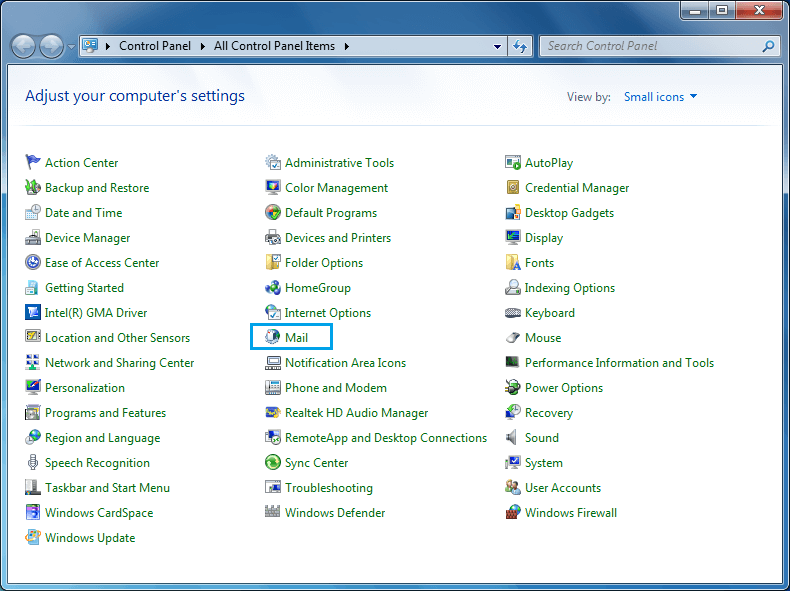
- Open the Control panel and click on the Mail icon over there.
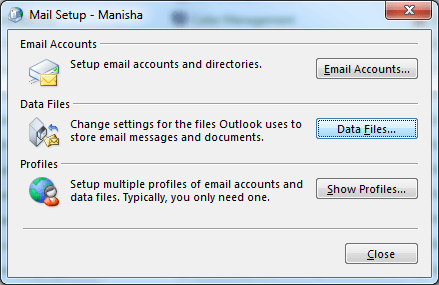
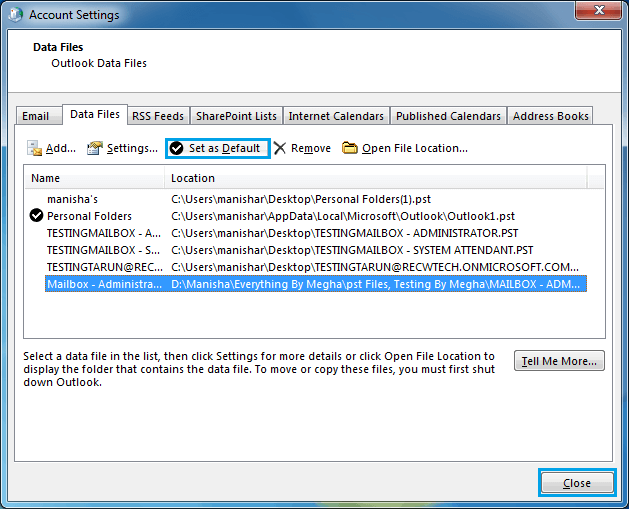
- Now click on the Data files.
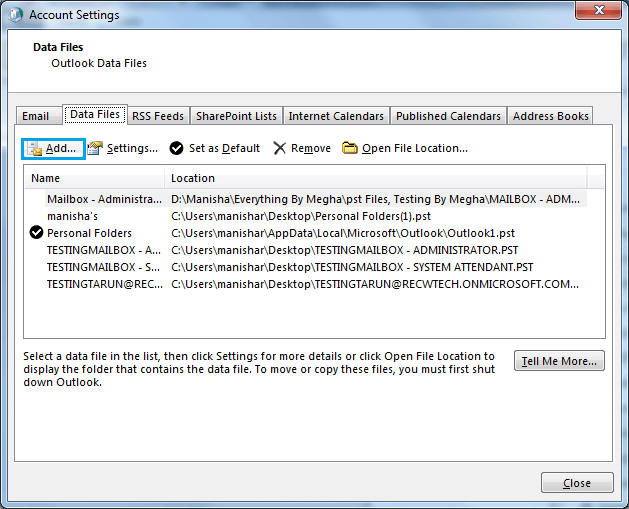
- On the next window, select your account and click on the Add button
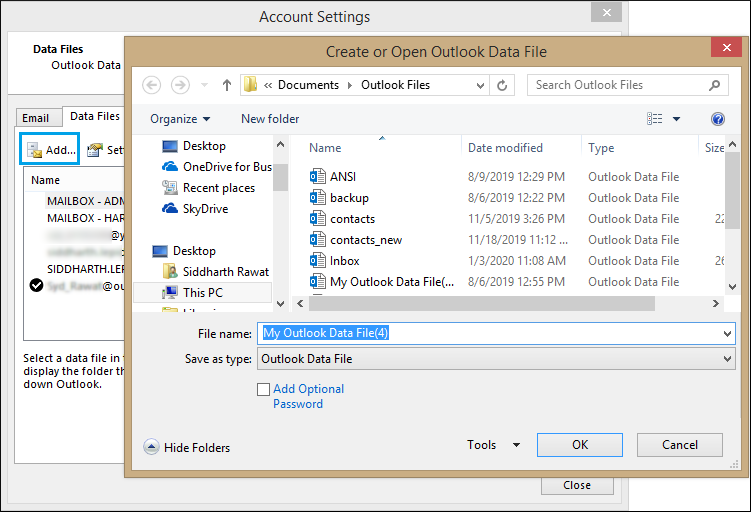
- Select the data file which you want to use in Outlook and click on OK
- Now highlight the selected file and click on the ‘set as default’ option. Finally, click on the Close tab.
- Once you have followed all the steps mentioned above successfully, restart the Outlook program. The default mail delivery location has been changed.


How to Change Default Mail Delivery Location If Outlook is Running?
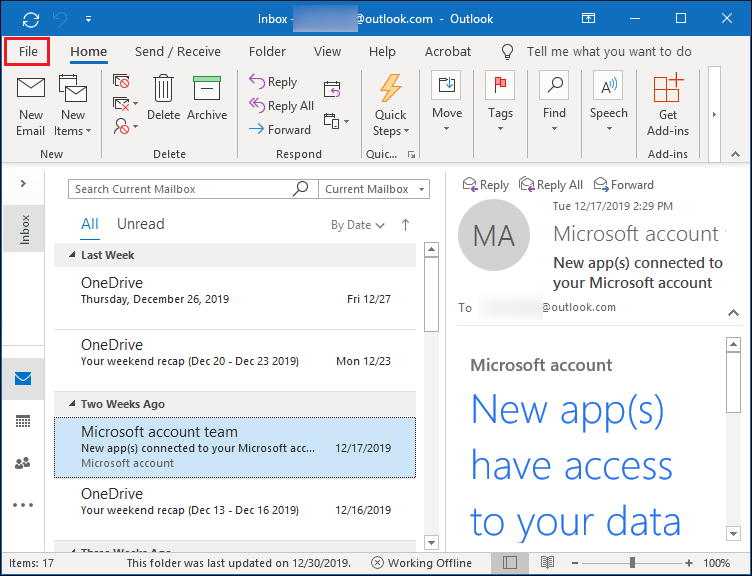
- Click on the File tab in the upper left corner.
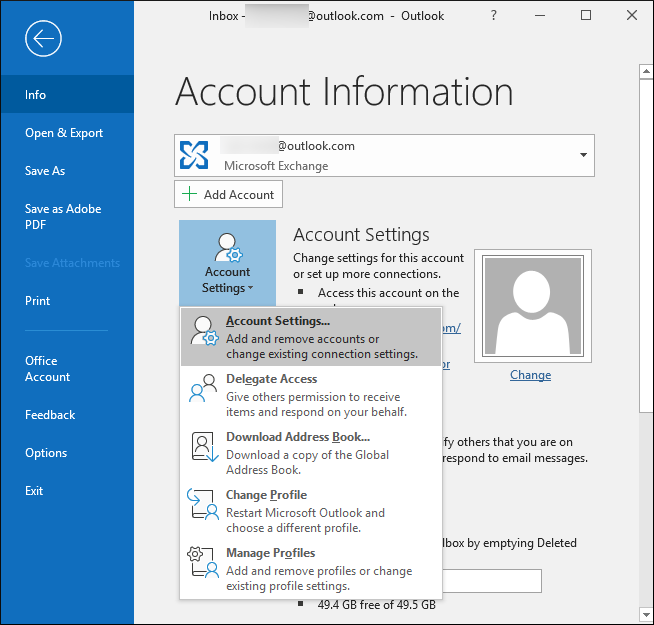
- Click on Account Settings and select the Account Settings option.
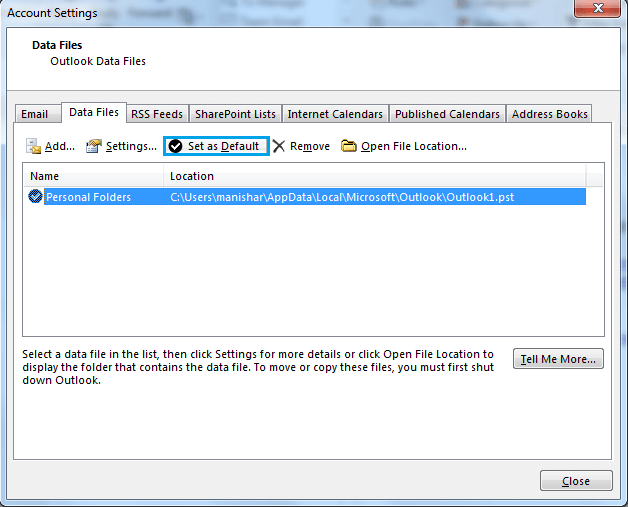
- Now, click on the Data Files option, highlight the desired PST file and click on the Set as Default option.
- Grant permission by clicking on Yes if it asks and click on Close.
- Users can also go to the Email tab in the same Account Settings dialogue box, select the Email account and click on the Change Folder option at the bottom to specify the new system folder or PST file destination for the delivery of new messages from the selected account.


Note: Outlook users can make use of the Manage Rules and Alerts option to specify a certain folder as a rule (Apply rule on messages I sent/Apply rule on messages I receive) for incoming and outgoing messages from a certain email address.
Can’t Receive Mails after Moving PST file to a New Location?
Many users face this problem; there can be several reasons why you are not receiving the emails after moving the PST file. When you move a PST file, Outlook creates a separate folder where the emails get saved. Every time, when you open Outlook it will suggest you save the file at the new location, save it at your desired location and you can access those emails.
Another scenario is that even after moving the folder, a .dat file still exists which is not letting you receive those emails. There can be more than one Outlook profile where the information of each email account is saved. Sometimes knowingly or unknowingly people change their profiles or create a new one. In that case, you can always check this by going to Control Panel. Open Control Panel, click on emails and then click on show profiles. You will get to see the lists of profiles where you can switch the profile to the desired one.
Conclusion
It may also happen that your PST file is corrupted due to which you are unable to receive emails. Outlook PST Repair is the easiest way to repair corrupt PST files. While changing the mail delivery location, it may happen that you have opted for a corrupt PST file. So, to receive emails, first, you need to fix it and then perform the process all over again. Besides this, the tool also helps to repair password protected PST files and saves PST files to the Exchange server, Lotus Domino (IBM Domino), and exports your PSTs to the cloud-based Office 365 platform.
![]()
