

The public folder in Exchange Server is one of the most exciting features where users can share useful information with their colleagues and groups. With this, Exchange users get the flexibility of sharing the information without sending an email, message, or attachment. Exchange Administrators can create public folders and assign permissions to other users. The administrator can also delegate permissions to reduce the administrative burden also.
How are Public Folders Useful for the Business Organization?
The limited collaboration and sharing features of the public folder have increased its importance. Here are some benefits of using the Public Folder in Exchange-
- The user can organize project information in Public Folder.
- The subfolders can be created in the Public folder to organize a different kind of files further.
- The mail-enabled folder and receive the emails directly in them.
- A calendar folder can be created as the team tracking calendar.
- In the mail-enabled folder, the user can create custom templates to generate the replies automatically.
As the public folders hold business-critical data, you should take regular backups using either manual or professional assistance. As public folders are available in the Outlook application, you can easily export them to PST using the import/export job. Here is the complete process-
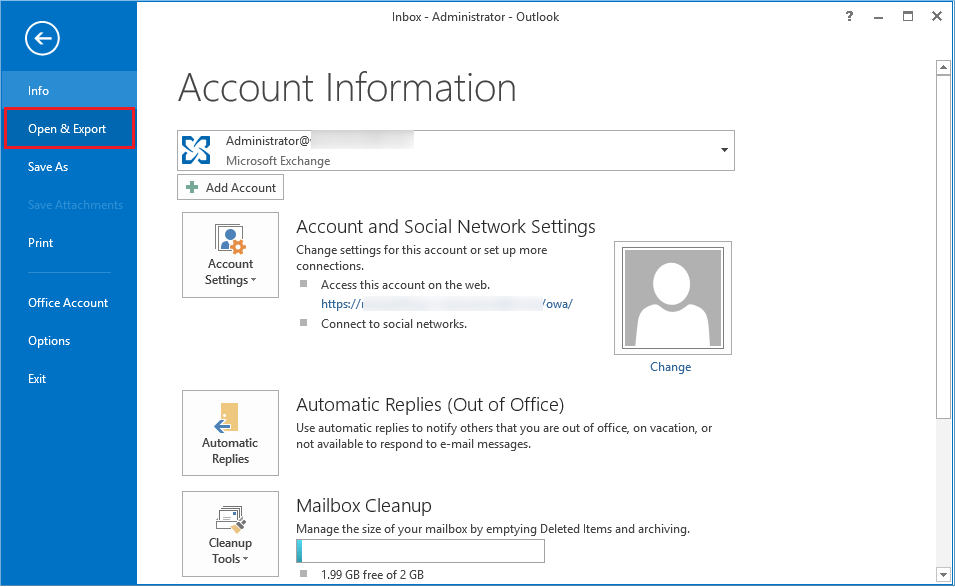
- First, open Outlook and click the File option. Later, click Open & Export.
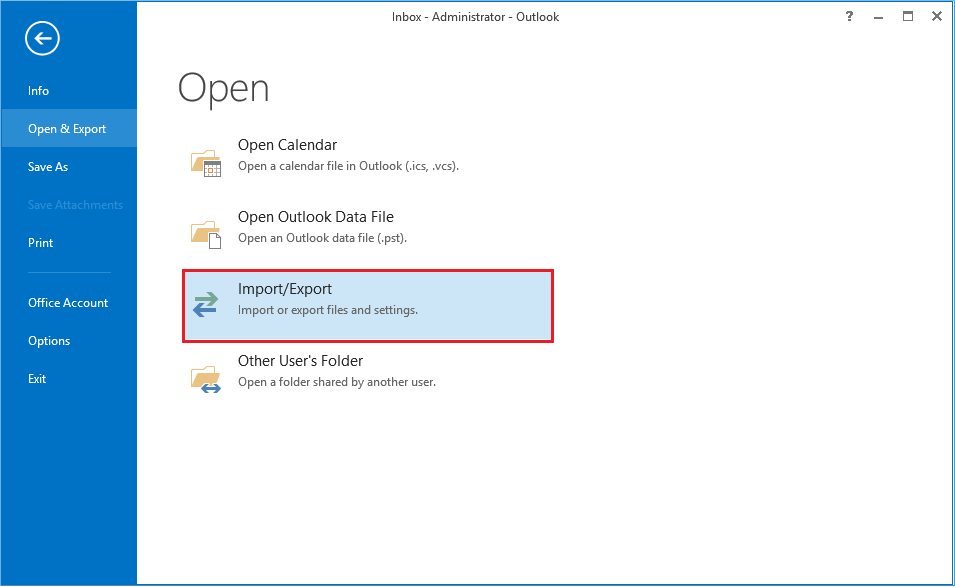
- Click the Import/Export option.
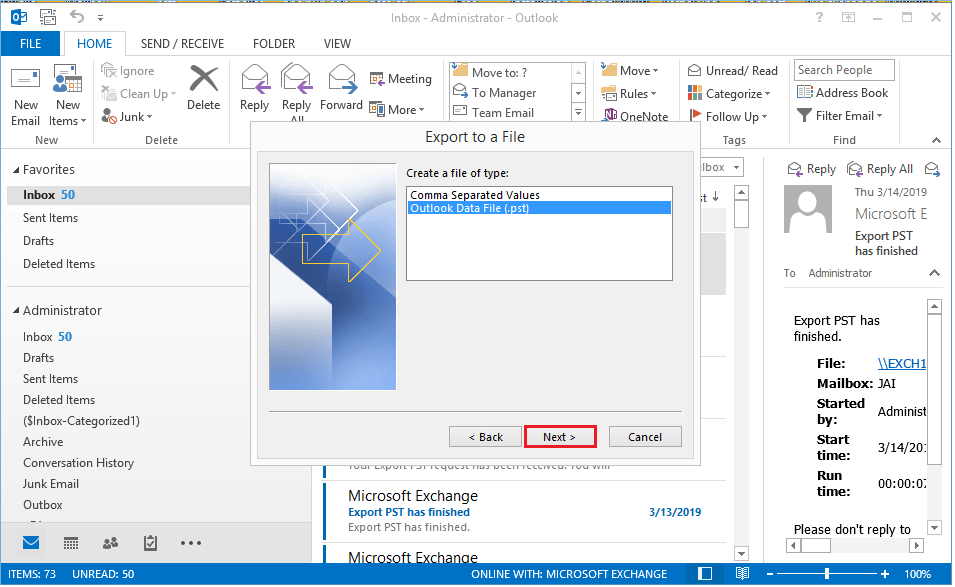
- Choose the option ‘Export to a file’ and click Next.

- Select Outlook Data File (PST) as the file type and click Next.
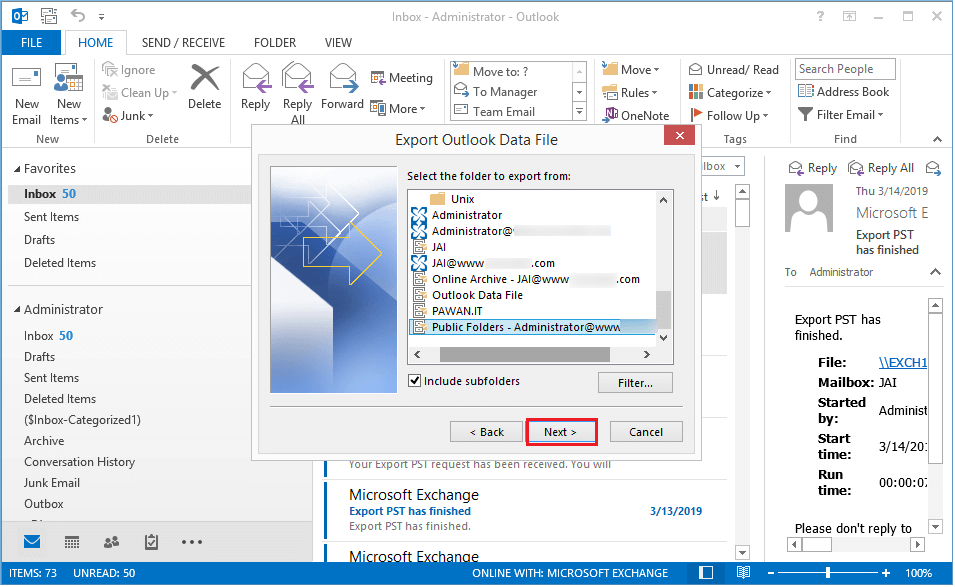
- Select the public folders and use the checkbox to include the subfolders. Then click Next.
- Make use of the Browse button to select the new PST file folder and use the Options to handle the duplicate items before export. Then click Finish.

This method helps you take the backup of limited data only. If you want to do the backup on a large scale and in a minimum time, you need to use professional software that supports the backup of Exchange data, including the public folder.
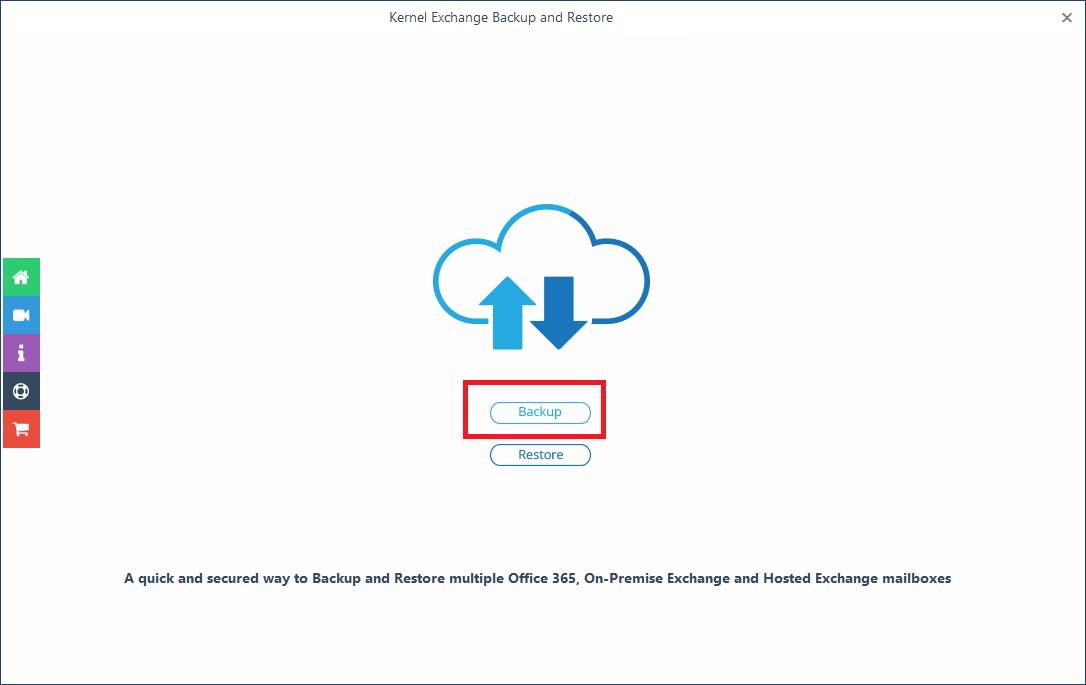
Exchange Backup & Restore software can help you in selecting the contacts and calendar of an Exchange account and export them to a PST file easily.
![]()

Here is the Total Process of the Software-
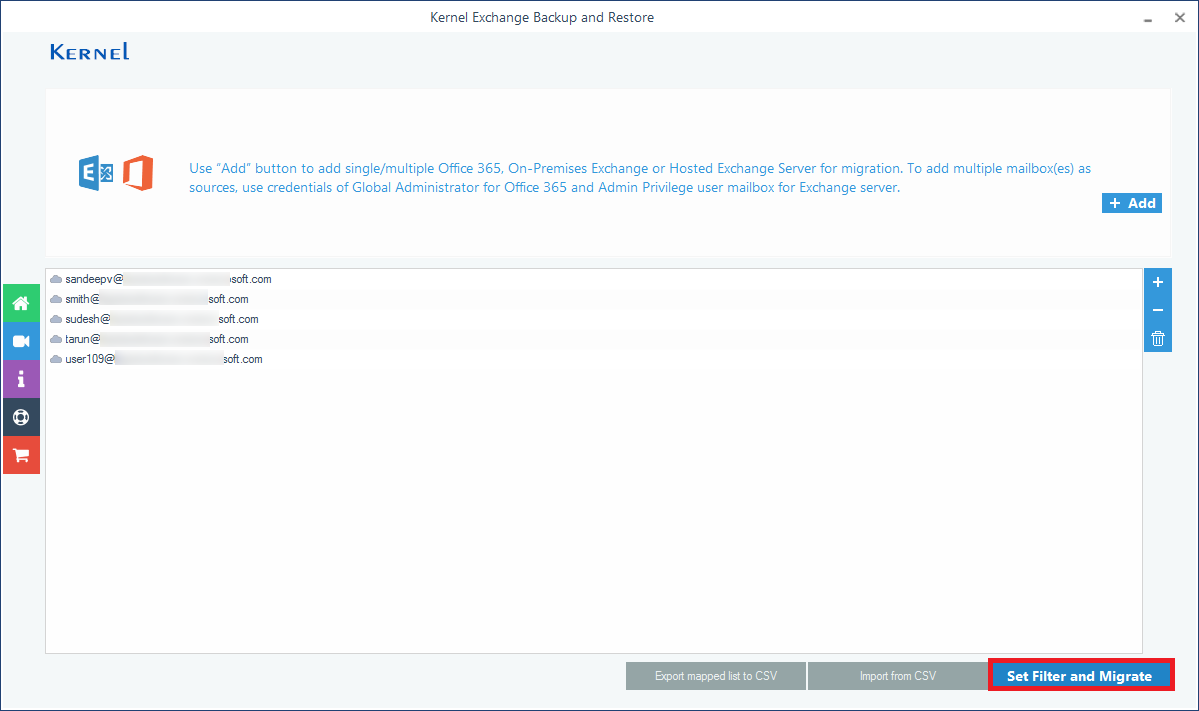
- When you open the software, the home screen shows two options – Backup and Restore. Choose Backup.
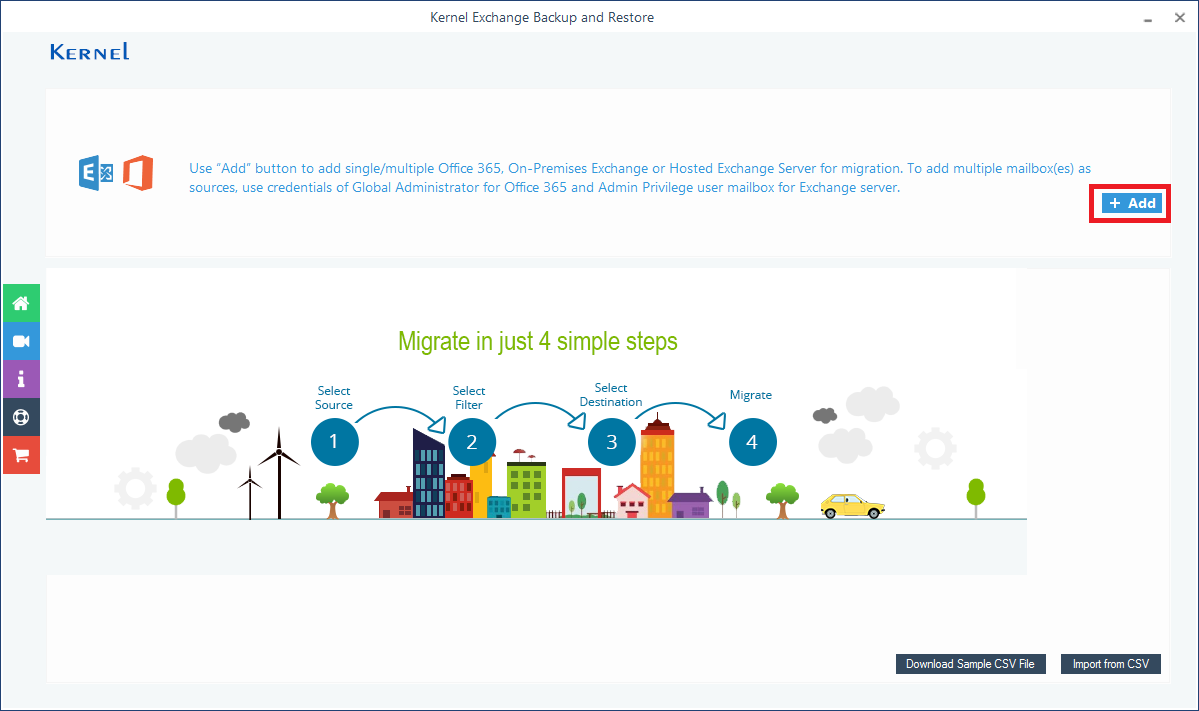
- Click the Add button to add the Exchange account.
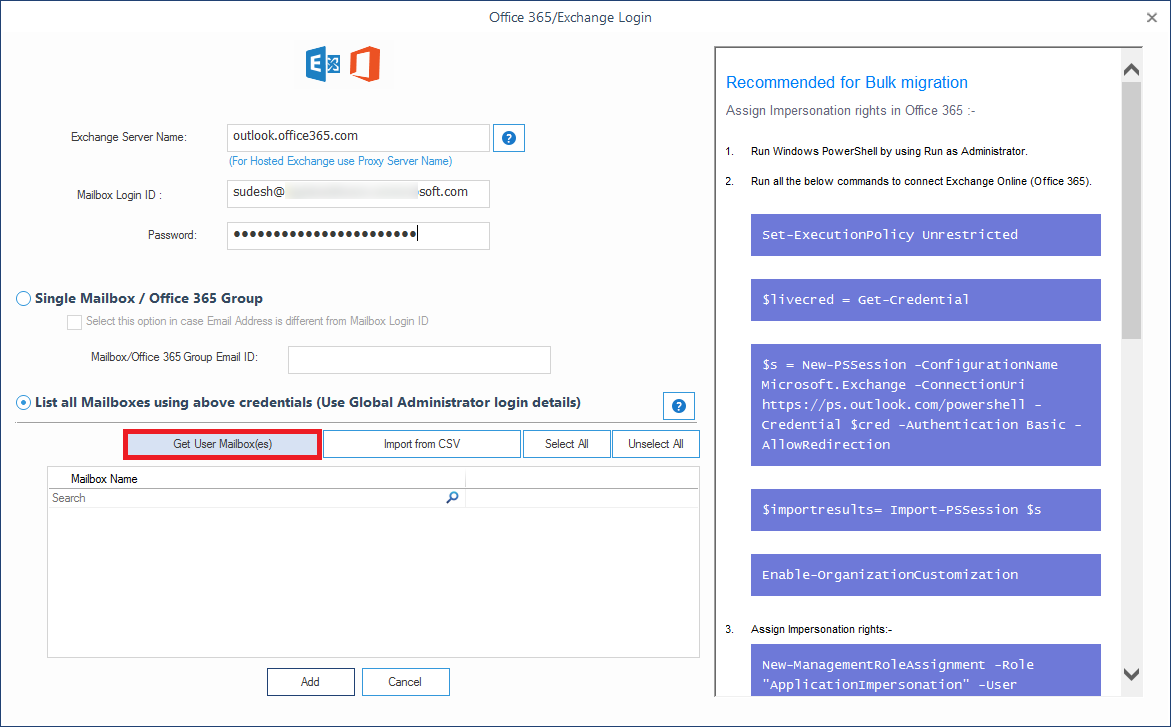
- Input the Exchange Server IP address or Exchange server name. Then input the Exchange Server account name and the password. Then choose the second option to list all the mailboxes using the given credentials. Click the button Get User Mailbox(es).
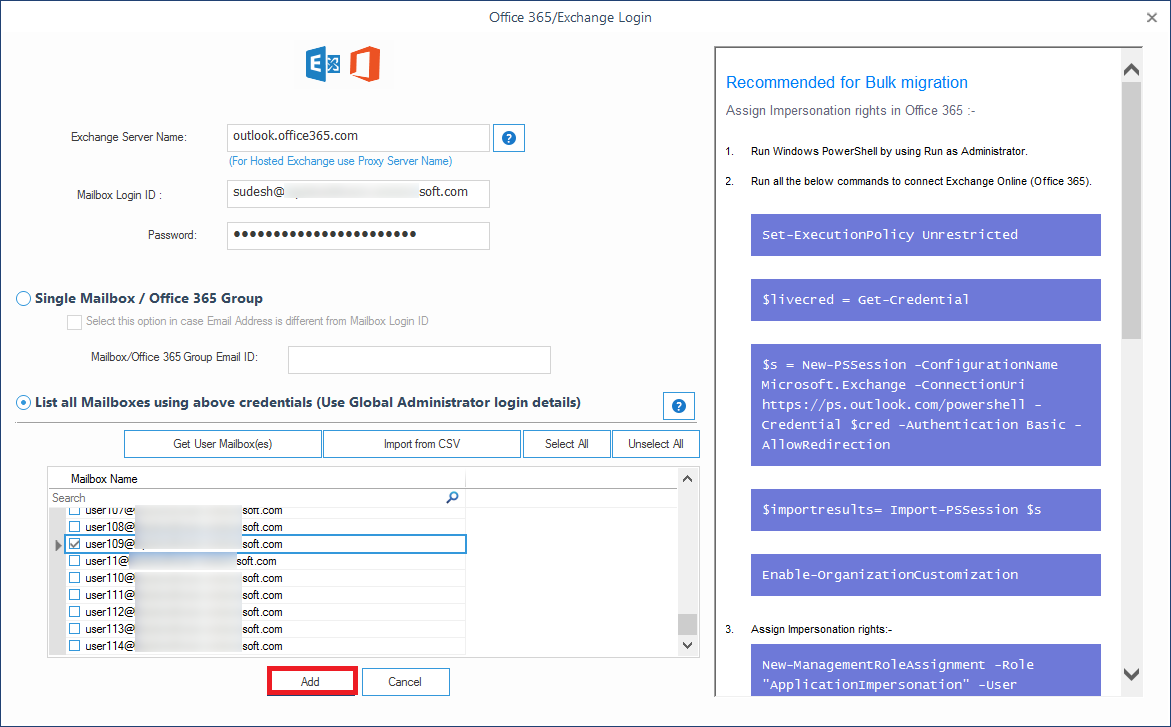
- Select the accounts with a public folder and click the Add button.
- The tool has selected the accounts, and you can add/reduce more accounts. Then click Set Filter and Migrate button.
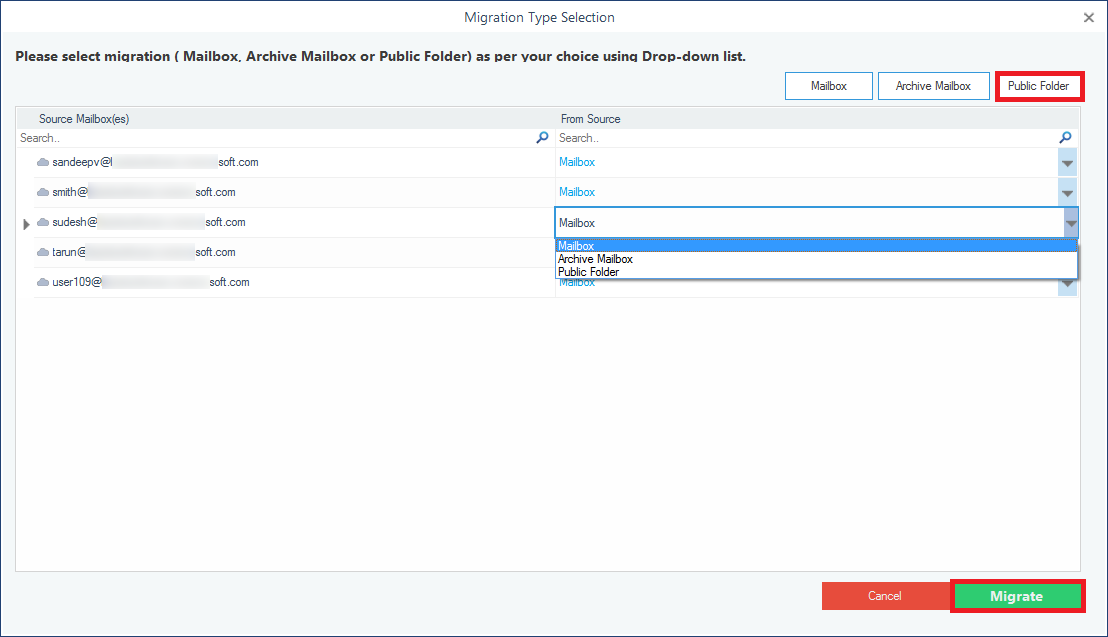
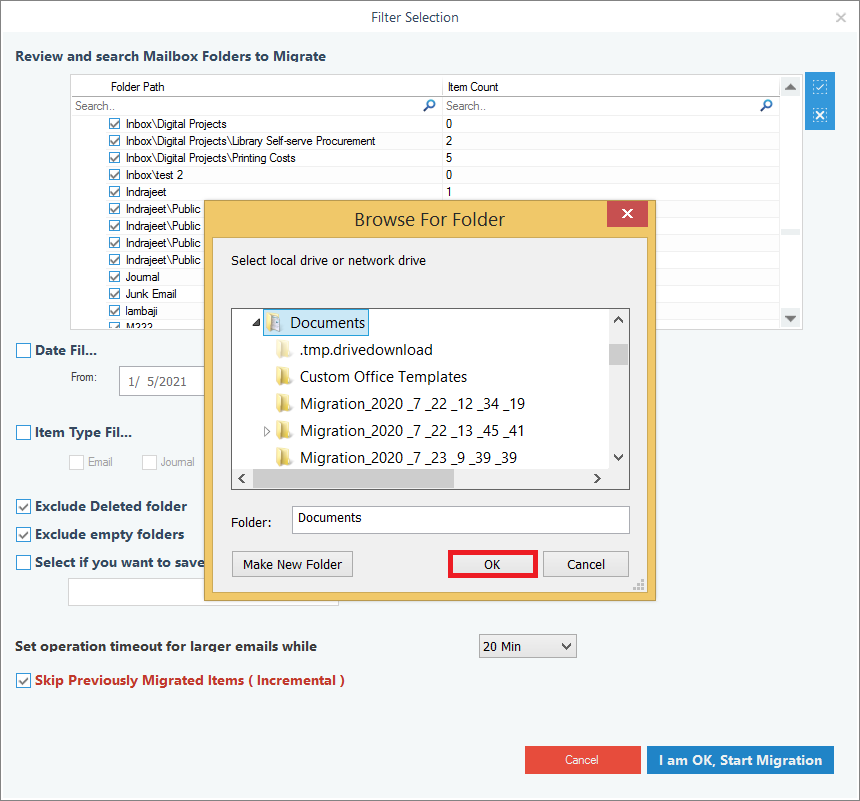
- You can click the Public Folder button to select the public folder for all accounts or use the drop-down menu to select the public folders of individual accounts in the list. Then click the Migrate option.
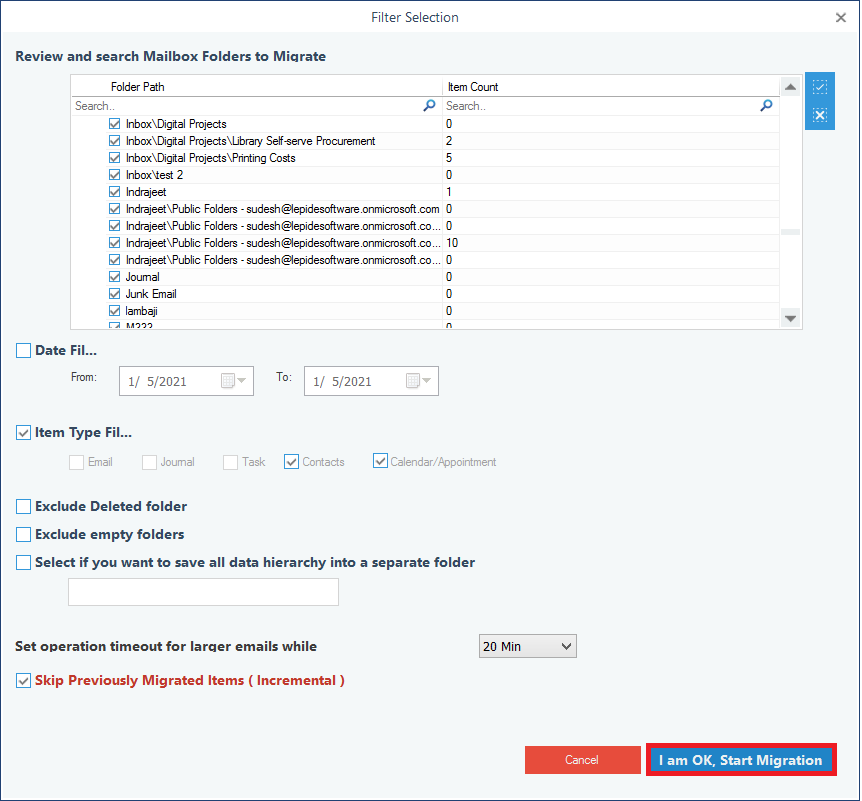
- On the filter page, apply all the useful filters, especially the Item Type filter, to select Contacts and Calendar. Then use I am OK, Start Migration.
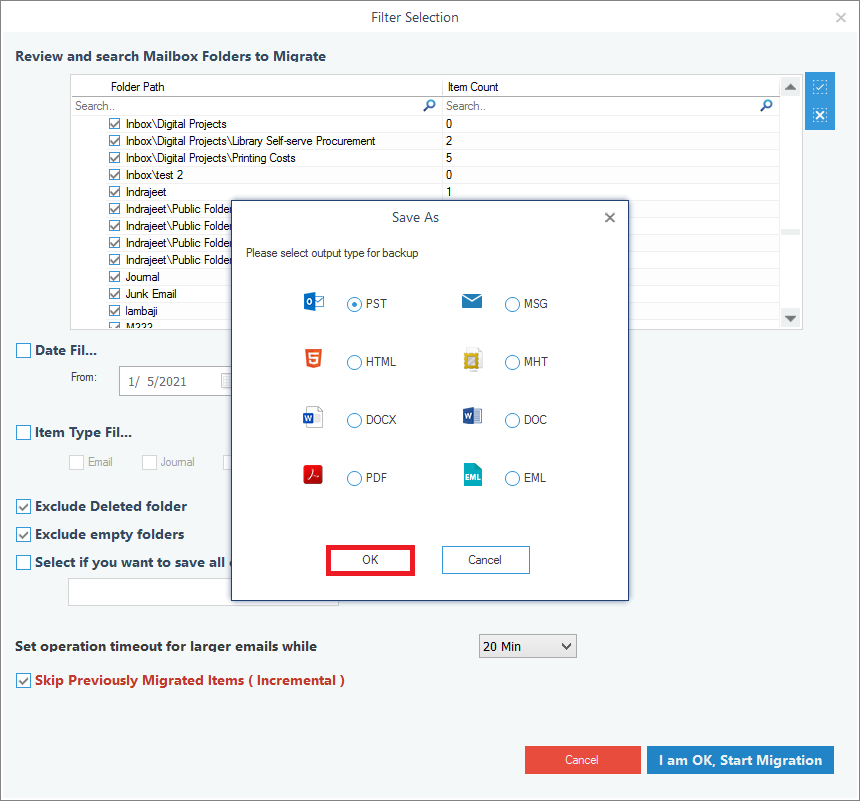
- Select PST as the Output type and click OK.
- Provide the destination for the PST file, and then click OK.
- The tool will save all the selected items in the PST file, and after the completion of the export job, it will show the successful message. Click OK.
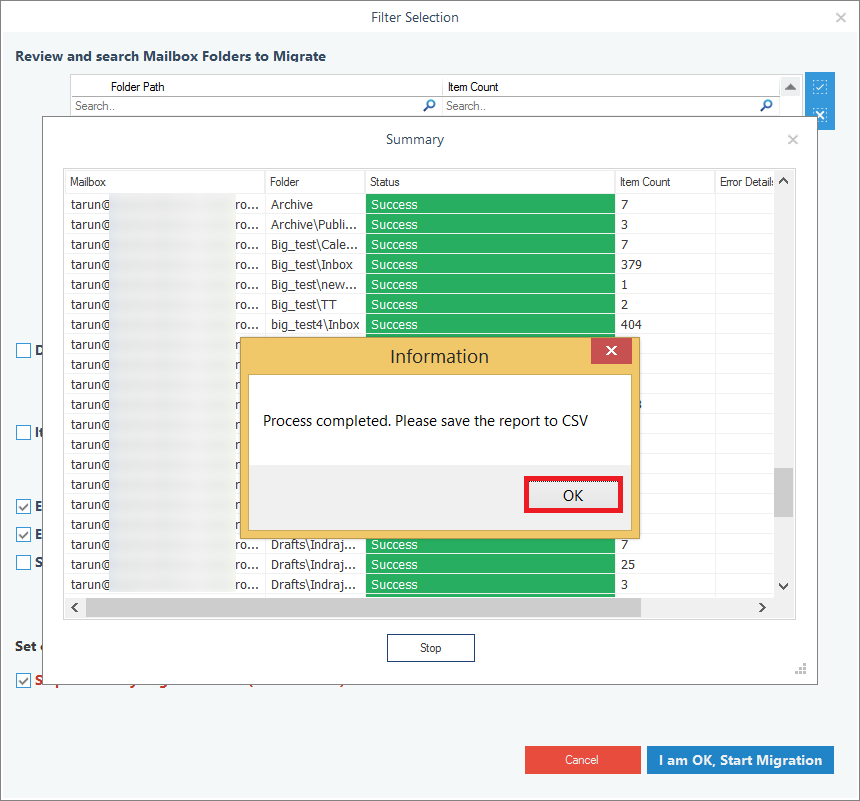
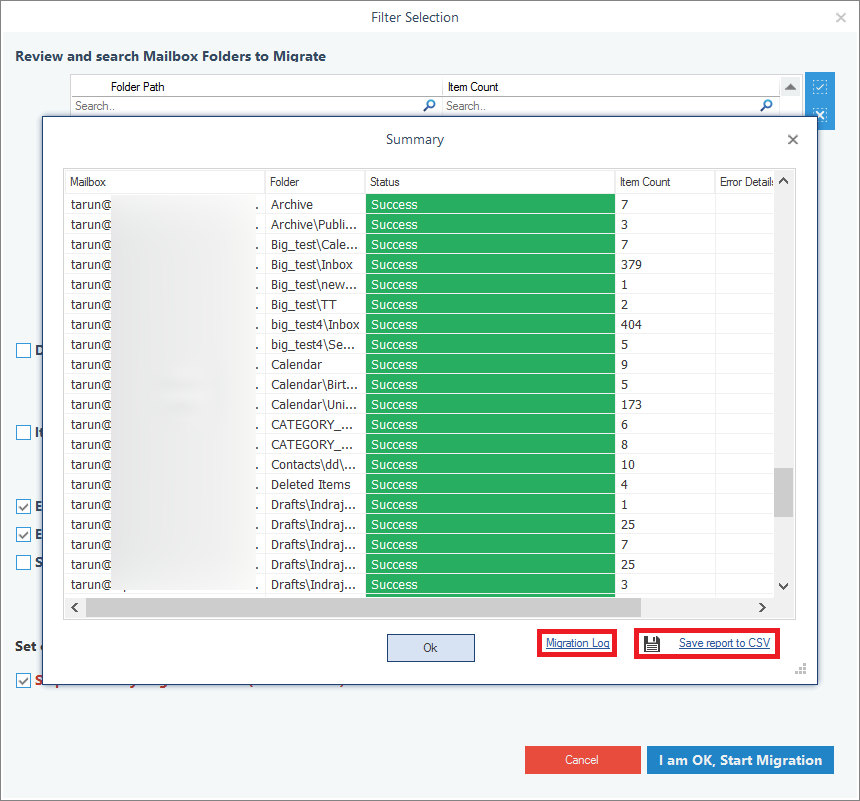
- Finally, you can see the Migration Log and the report in the CSV file. Then click the OK option.


All the mailboxes will be saved in separate PST files with the same name as the mailboxes.
Conclusion
Exchange mailboxes consist of multiple folders and public folders. Public folders have some important information saved in them. If you don’t want to lose such data, you need to back up public folders regularly. The manual export from Outlook is suitable when the volume of data is small. For a huge volume of data, you can use the Exchange Backup & Restore tool. It can back up public folders, contacts, or calendar, etc., and later restore them. Also, this tool automates the backup process with a CSV file.
![]()