
Exchange Server 2016 is a robust platform that can conduct all the administrative jobs with the help of cmdlets in the Exchange Management Shell. At the Shell platform, the Administrator can run the Export Mailbox job using required cmdlets. To export an EDB mailbox to PST, follow these steps:
- Assign Mailbox Import Export role to the user
- Share the destination PST folder over the network
- Export EDB mailbox to the PST file in the shared folder

1. Assign Mailbox Import Export role to the user
Even Exchange administrators don’t have the authority to export a mailbox unless they are assigned a Mailbox Import Export Role. So a user must have this role assigned prior to starting the mailbox export.
New-ManagementRoleAssignment –Role "Mailbox Import Export" –User "<user name>”
To assign the Mailbox Import Export role to the Administrator account, use:
New-ManagementRoleAssignment -Role "Mailbox Import Export" -User "Administrator"
Note- Mailbox Import Export role can be assigned to a security group too:
New-ManagementRoleAssignment -Role "Mailbox Import Export" -SecurityGroup “<security group name>”
Adding a user or Administrator to this security group will give them the rights to export mailboxes.
2. Share the target PST folder over the network
The folder that contains the target PST file needs to be shared over the network. Follow the steps given below:
- Right-click the folder and select Properties.
- In the Properties window, click Advanced Sharing under the Sharing tab.
- In the Advanced Sharing window, choose Share this folder option and click Permissions.
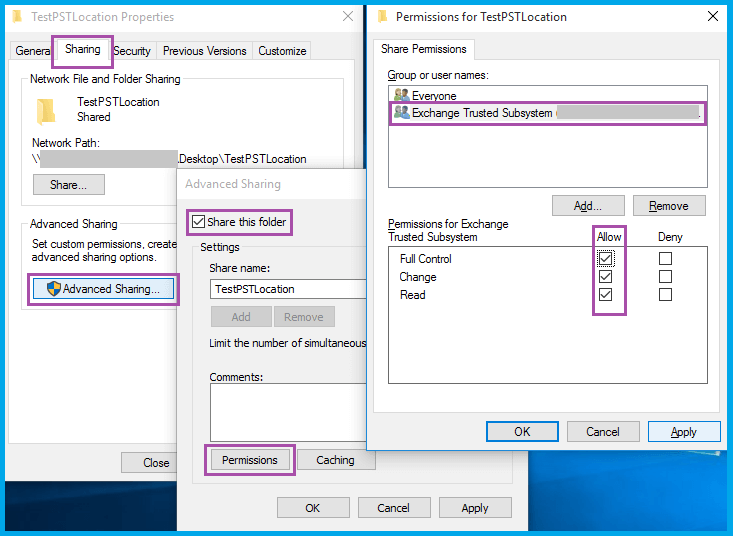
- Add Exchange Trusted Subsystem to Group or user names, and choose the option to allow full control.
- Close all the open windows after clicking Apply and OK.
3. Export Exchange EDB mailbox to a PST file
One can move primary mailboxes as well as archive mailboxes to PST using the cmdlets. Use the following syntax:
New-MailboxExportRequest -Mailbox <MailboxName> -FilePath “<Path to the PST file>”
To export an archive mailbox, use the following syntax.
New-MailboxExportRequest -Mailbox <MailboxName> -FilePath “<Path to the PST file>” -IsArchive
After exporting the mailbox to the PST, the mailbox and items can be accessed using MS Outlook.
Note: To view the status of an ongoing mailbox export, you can use the cmdlet GetMailboxExportRequest. And to remove a mailbox export request, you can use the cmdelet Remove-MailboxExportRequest
The alternative for converting EDB to PST
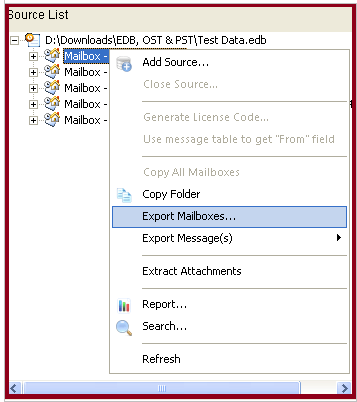
Converting EDB to PST using PowerShell is not the first choice for many administrators due to its technical and time-consuming nature. That is why solutions like Exchange Server Recovery software are often preferred. Using this solution, converting EDB files to PST is easy; you just have to select Export Mailboxes option from the right-click menu after selecting the mailbox. There is also a separate option to export individual messages to PST.
![]()
The advantages of Exchange Server Recovery software:
- Converts online and offline EDB files to PST
- Moves multiple mailboxes to PST at a time
- Supports simple copy & paste migration of EDB files to PST
- Saves mailbox data to new PST files or existing ones
- Converts EDB files from all versions of Exchange including Exchange 2016
- Allows selective conversion of items by filtering by date range and item type
- Displays mailboxes and items for preview before saving to PST
- Recovers deleted EDB items to PST and highlights them in red
- Extracts email attachments (with or without hierarchy), and allows to filter by date or item type
Here is the step-by-step process of exporting the entire mailboxes from an Exchange database to a PST file –
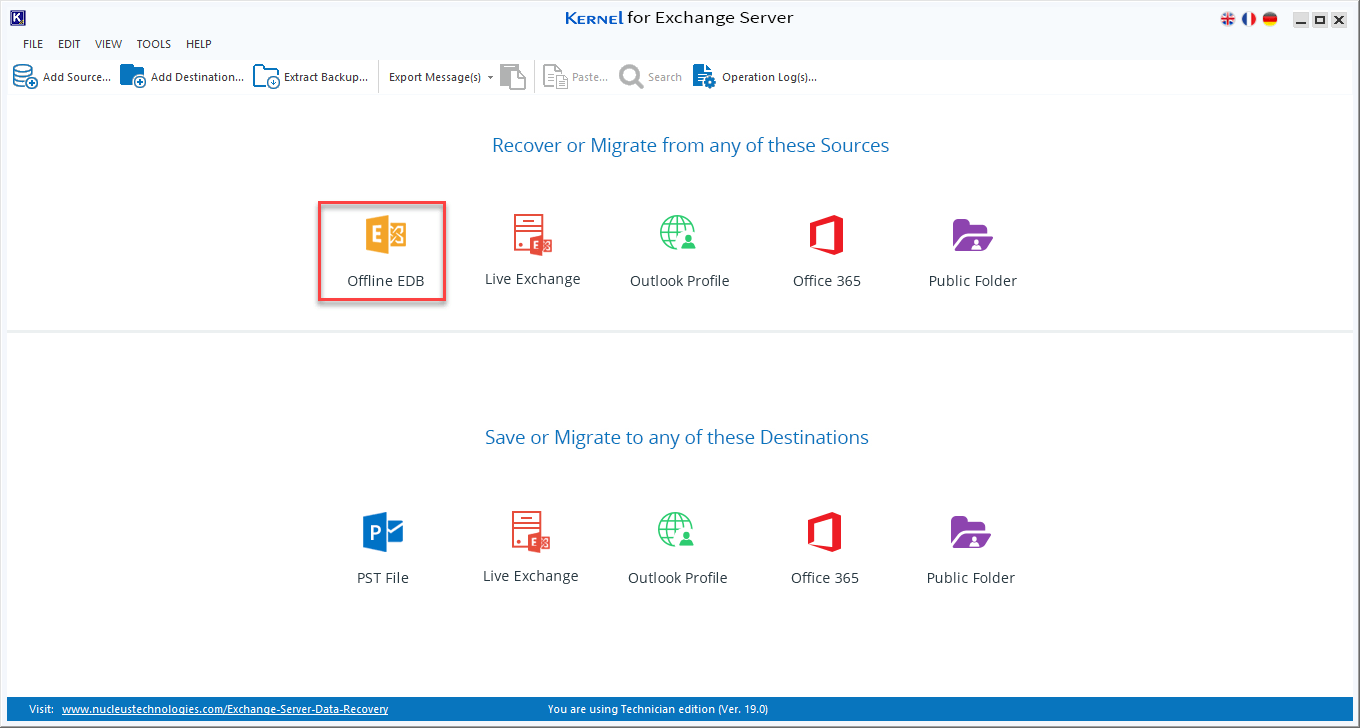
- Step – 1. Initiate the software and select the first option ‘Offline EDB.’
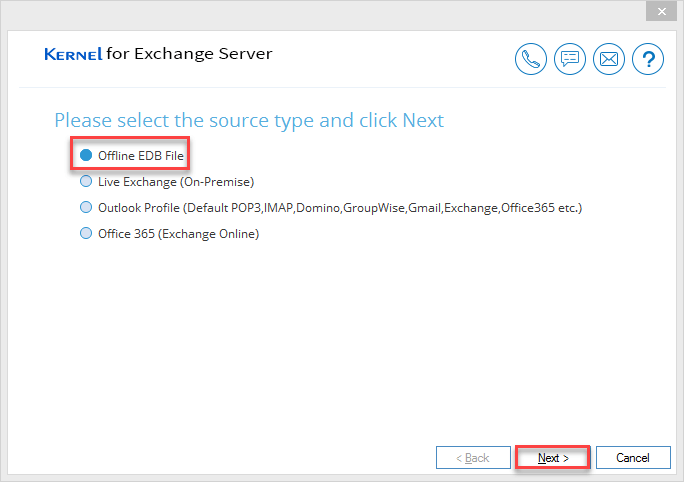
- Step – 2. Choose the option ‘Offline EDB file.’ Then click Next.
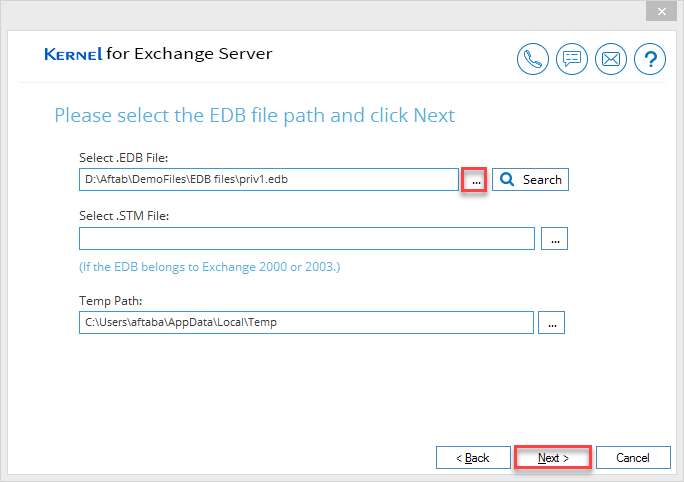
- Step – 3. Click the (•••) button to browse the EDB file. You can also use the Search option to find the EDB file from a drive or folder. After Selecting the file, click Next.
- Step – 4. Select the scan mode among Standard and Deep Scan. Then Click Next.

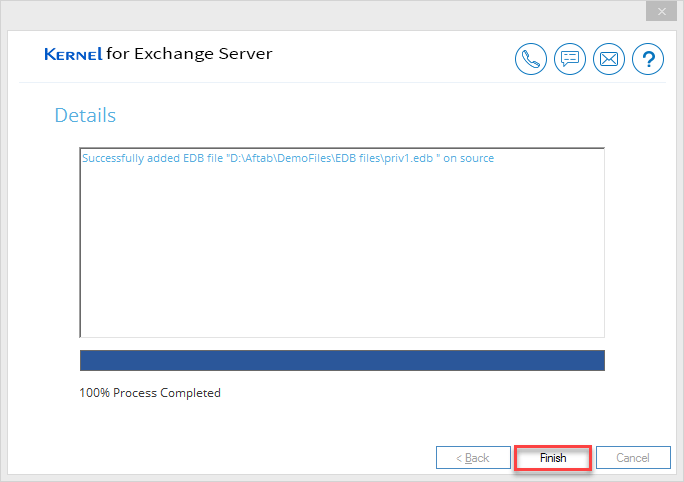
- Step – 5. The EDB file is scanned successfully. Click the Finish button.
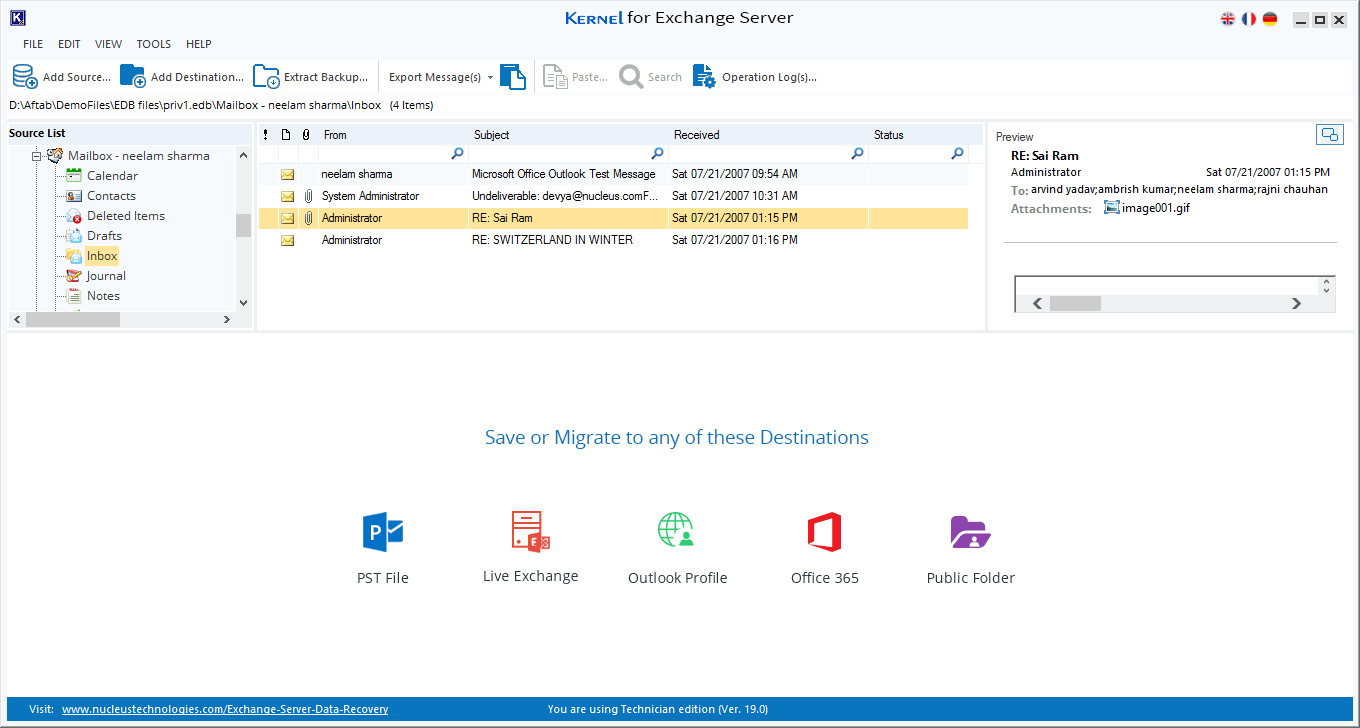
- Step – 6. The recovered EDB file is presented in the Source List. Here, you can select any mailbox item by clicking the Preview button.
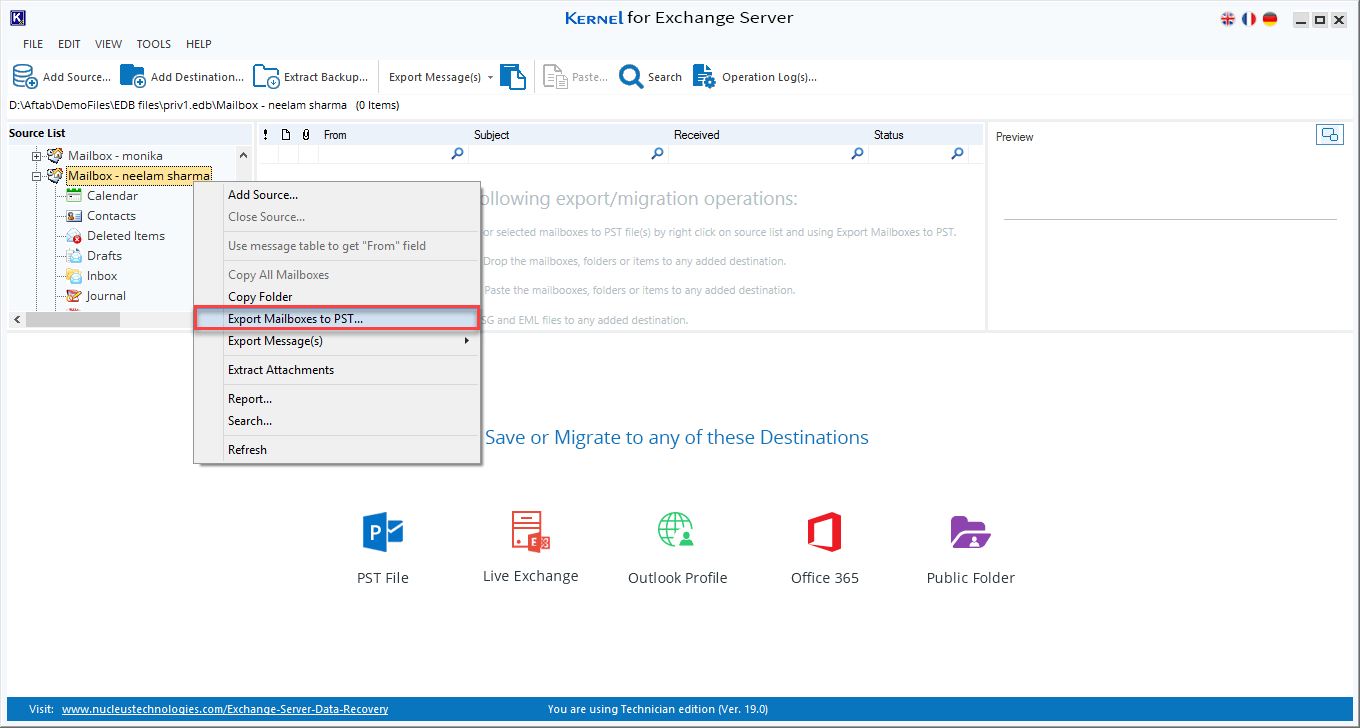
- Step – 7. To export an entire mailbox from the database, you only need to select a mailbox and right-click it. Select the option ‘Export Mailboxes to PST.’
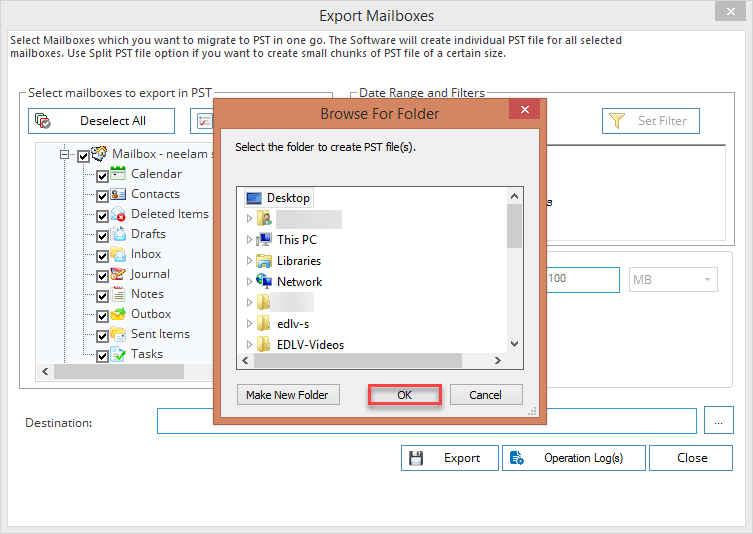
- Step – 8. In the Export Mailboxes wizard, select the folders to migrate, date range and filters, and Split PST file. Finally, (•••) browse the destination for the PST file.

- Step – 9. Browse the destination folder to the PST file. Then click OK.
- Step – 10. After selecting the destination, click the Export button.
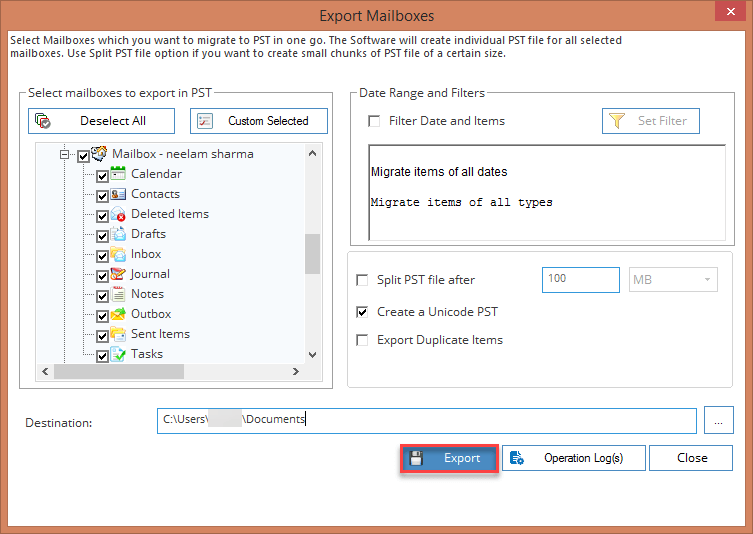
- Step – 11. After a successful export, the tool will provide a message. Click OK.

Blog Summary
Exporting Exchange data to PST or converting the EDB file to PST is a valuable method to complete several jobs like recovery, backup, and employee relocations. Running the cmdlets at the Exchange Management Shell is an excellent method, but only a seasoned Administrator can complete the last. If an export job is stuck in the queue, it will be hard to remove it from the system. To remove any chance of complexity, you should use Exchange Server Recovery software to convert the EDB file to PST ultimately..
![]()
