

When a business is upgrading the Exchange Server to a newer version, then the existing data from the mailbox must be migrated to new one through batch migration. In batch migration, the user selects a limited number of mailbox and migrate them separately in it. If you want to migrate only a Public Folder that does not consist large data, then you can use another method that is easier to follow and completes in lesser time too. It is divided into 4 major steps which need to be followed in order carefully:
- Export public folders to PST using MS Outlook
- Create a new public folder mailbox and public folder in the destination Exchange
- Configure the destination Exchange account in Outlook
- Import the PST file to the destination public folder
How to export public folders to PST using Outlook?
The export feature of Outlook helps to export the public folder to an Outlook Data File (PST). This option is available in the File menu. Before exporting, ensure that the account have the full permissions on the database holding the public folders.


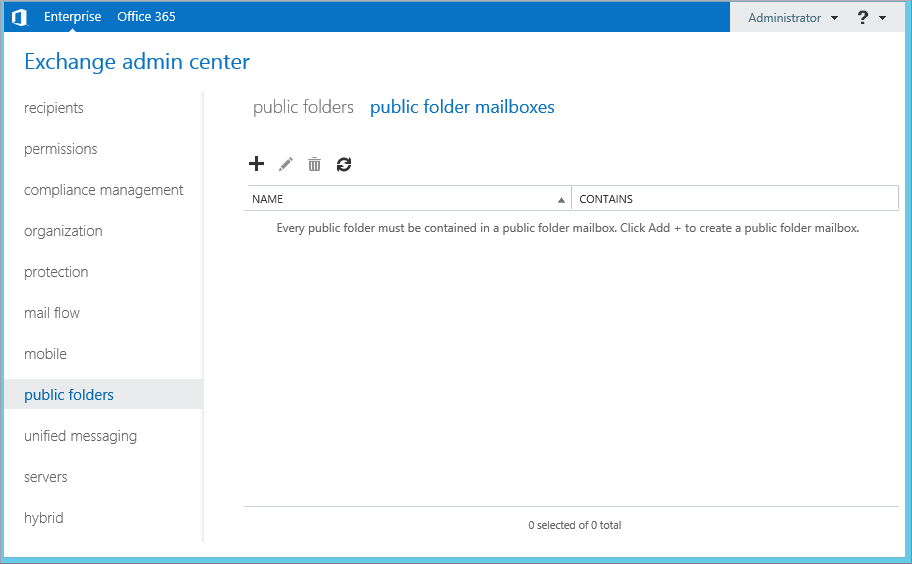
How to create a new public folder in Exchange?
In Exchange 2013/2016, a new public folder can be created from Exchange admin center (EAC). First create a public folder mailbox, and then a public folder.
To create a public folder mailbox, follow these steps –
- Go to public folders and then, public folder mailboxes and click Add +.
- Give a name for the public folder mailbox and save.
- Next, create a public folder. For this, go to public folder tab and click Add +.
- Give a name, verify the path for the public folder, and finally save. In the end, refresh the EAC to view this new public folder in the list.

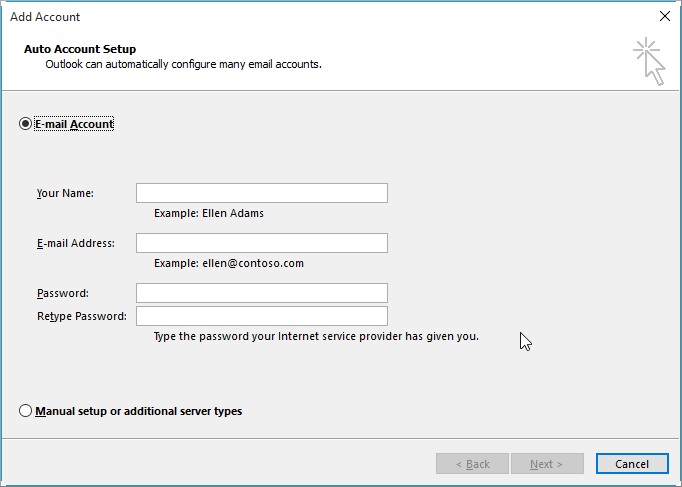
How to configure an Exchange account in Outlook?
A new Exchange account can be added to Outlook from the File menu (the Add Account button). After this, add the newly created Exchange public folder to the Favorites list.

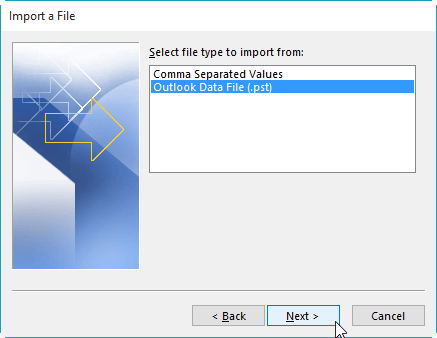
How to import PST file to a public folder in Outlook?
Just as the export feature, the import features are available in the File menu (in Outlook 2013/2016, Open & Export > Import/Export). Now, import the PST file to the public folder created in the new Exchange.

How to assign public folder permissions to Exchange users?
Public folder permissions (Create items, Read items, Create subfolders, Edit own, Edit all, Folder owner, Folder contact, Folder visible, Delete own, and Delete all) are managed from the Exchange admin center (public folders > public folder). When a public folder is selected, the Manage option becomes visible under Folder permissions (on the right side).
What to do when there a large number of public folders?
When there are a large number of public folders for migration, it is better to follow the batch migration method < https://technet.microsoft.com/en-us/library/dn912663%28v=exchg.160%29.aspx > as suggested by Microsoft. Another option is to use third-party tools like convert edb to pst that accomplish quick and easy migration. The advantages of this tool are:
- Migrates public folders quickly and easily
- Allows filtering of items for selective migration
- Displays public folder content for preview
- Is reliable and easy to use
- Supports all versions of Exchange
Conclusion
It involves a few steps- Export public folders to PST in Outlook, create a new profile folder mailbox and public folder in the destination exchange, configure the destination Exchange account in Outlook and finally, import the PST file to the destination public folder. To save yourself from any complexity, you can also use Exchange Server software that will smoothly migrate complete Exchange mailbox including primary mailbox, archive mailbox, and public folder single handedly without taking much time and efforts from the user.
![]()
