

Computer crashes can surface suddenly, which will put you under the heft of hassles to find a solution, especially when you belong to the average user category.
Figuring out why the computer crashed is a tricky task most of the times, but in all the similar cases it’s possible that you might lose data, or the file(s) & folder(s) stored on the hard drive turn inaccessible, and users keeps searching on how to fix Windows 10 corruption issues?
Thus, in this write-up, we’ll show you how to recover Outlook data from a crashed computer and discuss the top five reasons why your PC (personal computer) might crash.
Why do Computers Crash?
- Unorganized Files
- Low Memory
- Corrupt System Registry Files
- Overheating
- Malicious Items
Windows 10 breaks up files and fits them into gaps in the system’s memory, and these unorganized files can cause frequent and sudden system crashes. To overcome this, you can make use of a utility that comes built-in, Disk Fragmentation. Using the utility, you can clean up the spread pieces of data on your hard drive.
Its one of those basic issues which all the mid-tier users face, computer systems with fewer Gigs of RAM at some point of time will surely go through this. The number of programs you run on your system, temporary internet files and specifically chrome tabs, are those things that eat up a lot of memory leaving not much for the system to run smoothly.
Windows 10 registry files are important for the performance and operation of the computer and over time the registry files can become corrupt or unavailable, thus due to this recurring system crashes can be seen.
If you’re running your PC for longer time frames and pushing the system beyond the boundary of its capabilities, then, you may observe system crashes. Extensive gaming, improper CPU fan functioning, and more can cause the system to overheat, resulting in system crash.
It’s nothing new, malicious software or programs can not only cause the Windows 10 system crash but even more than that. It’s recommended roaming carefully inside the internet realm, as for the else cases small mining programs can make way to your system through other programs/software which you may download. These mining software get installed automatically and couldn’t be taken off the system unless the whole system re-install is performed.
Recover Data from Crashed Hard Drive Using Data Recovery Software
To recover Outlook Data and other data that was available on the system before the crash, using Windows Data Recovery, go through the steps given below:
- Open Windows Data Recovery Software.
- Select Quick Scan mode.
- All drives both internal & external connected to the system will be listed in this window.
- Once you select the hard drive partition, drive details will be shown on-screen.
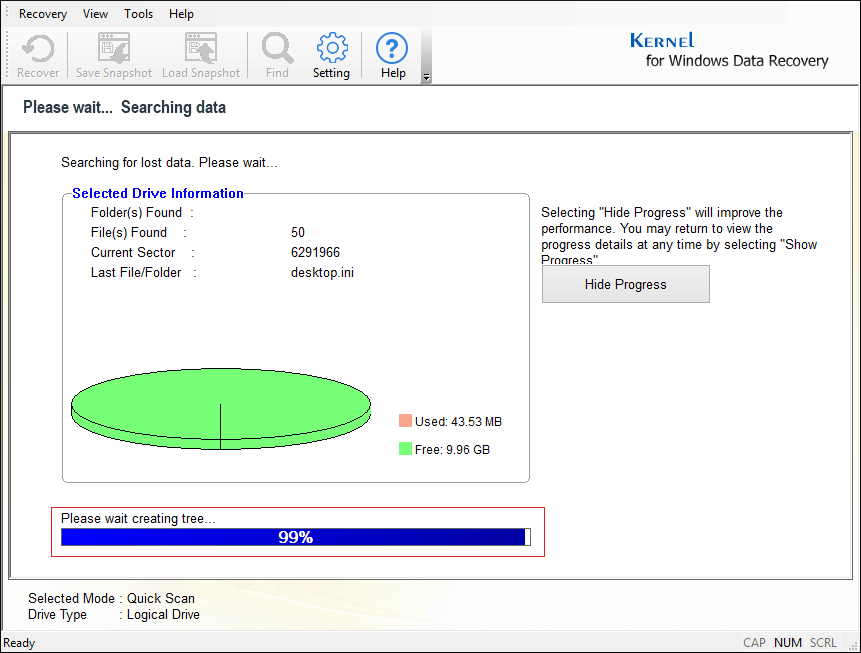
- Wait while Windows Data Recovery Software scans the hard drive partition.
- Acknowledge the information in the pop-up and click Ok.
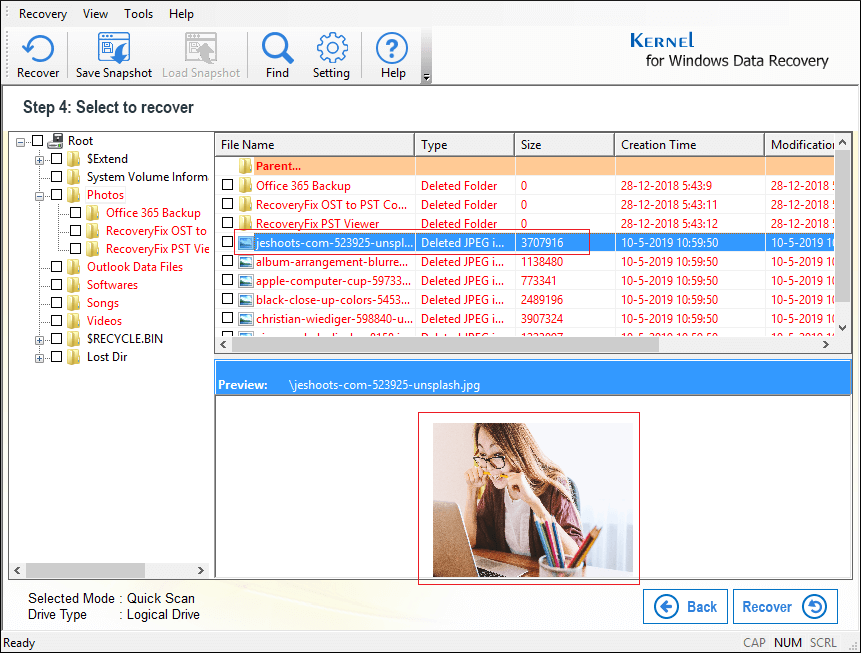
- Upon successful drive scan completion, lost file(s)/folder(s) will now be available as below:
- Before you proceed with data recovery, you can preview image(s) and check other folder sub items by double-clicking on it.
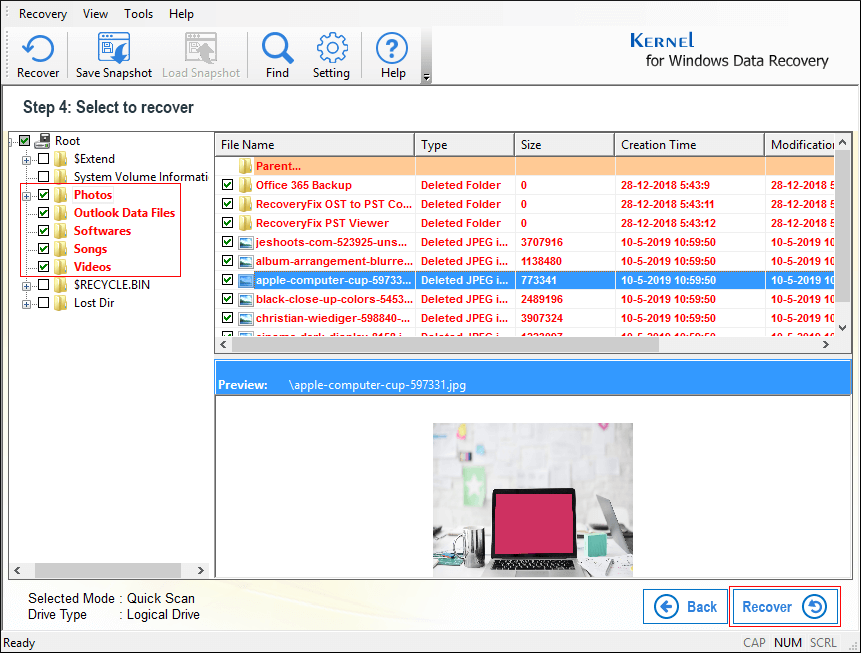
- Checkmark the folder(s) you wish to recover, as shown below and click Recover.
- Select a location/path to save the file after recovery and click Ok.
- Wait while data recovery is going on.
- Click Ok.
![]()


Note: Select Deep Scan or File Trace if Quick Scan doesn’t find the file(s)/folder(s).

Select any drive (say, Logical Drive E) and click Next.
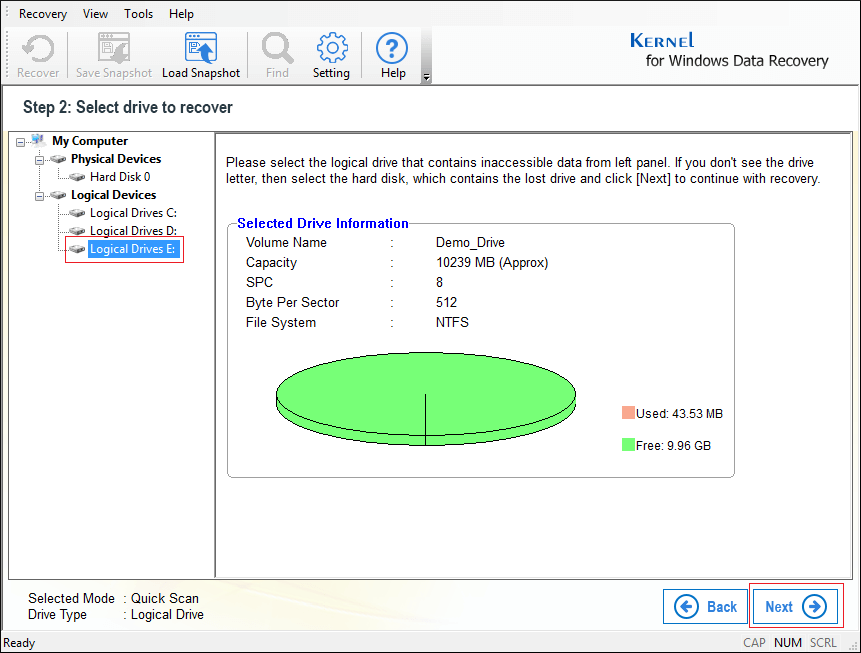
Note: Replace the drive letter in this step with the drive letter on your Windows system.
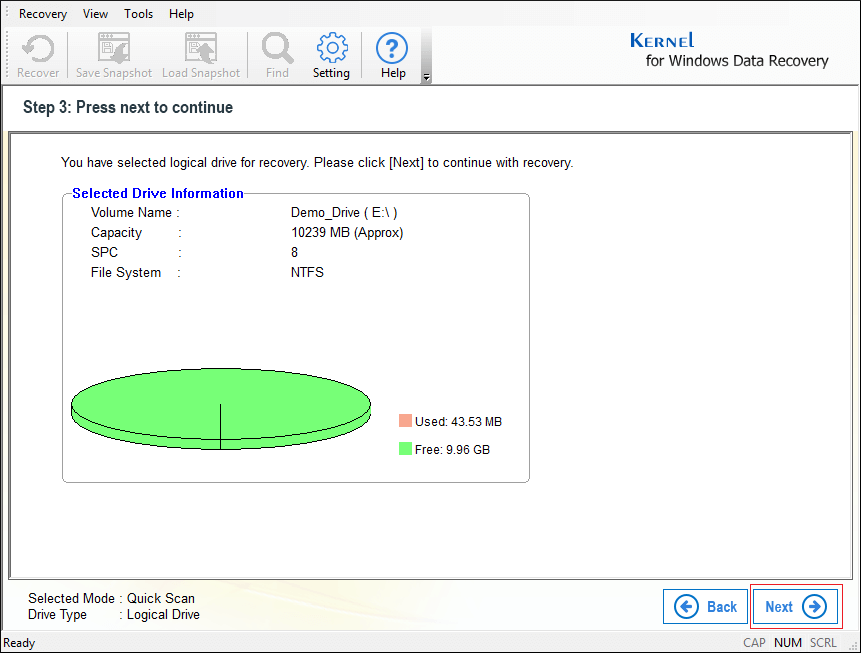
Confirm the chosen partition and click Next.


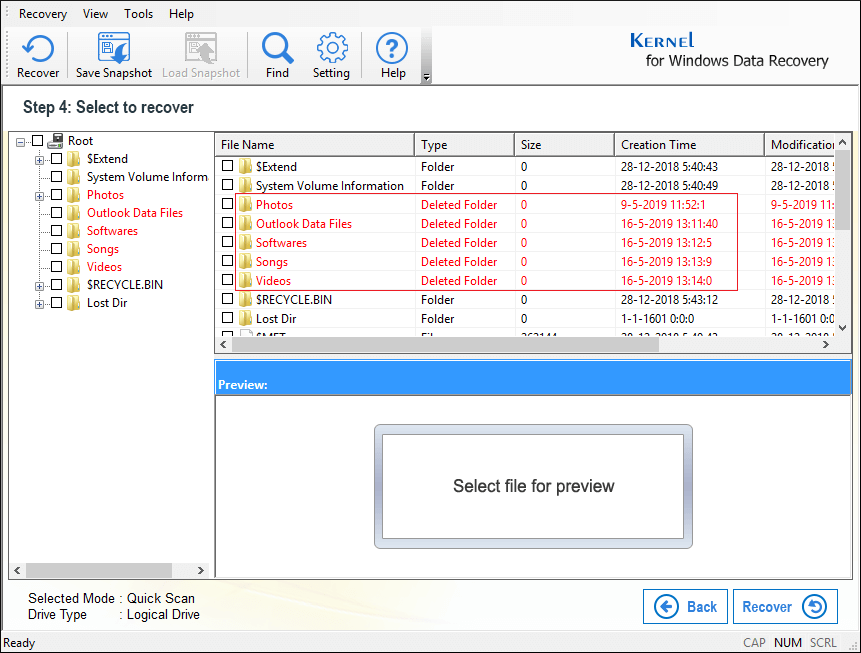
Note: File(s)/folder(s) lost or deleted permanently will be available in red color.
Note: To collapse or expand a folder, click on the + icon.
Note: While you decide on which folder or file to recover, with Windows Data Recovery you can make precise file/folder selection to reduce recovery time and recover only the file(s)/ folder(s) you need.

Note: You can even select a removable media storage device to save data after recovery.
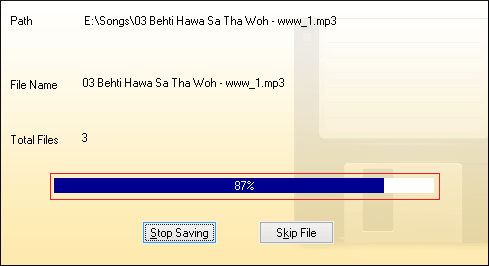
Note: To skip a specific file during recovery, click Skip File.


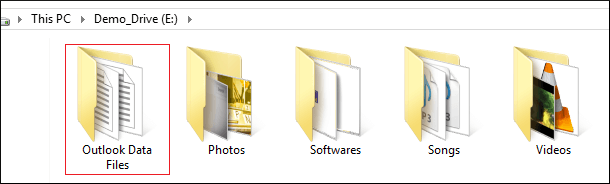
Browse to the location you selected in step-10 and check the recovered Outlook data and other files; all the data lost or corrupt/damaged will be available again as below.

Conclusion
Windows Data Recovery software helps you recover both lost or corrupt/damaged files & folders easily with minimal user efforts, making it quite simple to tackle issues like how to recover data from flash drive, recover deleted data on Windows 10, how to get permanently deleted music files back, and more.
![]()