

Create the first Exchange 2016 mailbox and assign the migration permissions
- Exchange 2010 to Exchange 2016 Migration – Part 1
Helps you prepare your Exchange 2010 environment for Exchange 2016 upgrade - Exchange 2010 to Exchange 2016 Migration – Part 2
Describes Exchange 2016 installation in Exchange 2010 environment - Exchange 2010 to Exchange 2016 Migration – Part 3
Guides you in creating your first Exchange 2016 mailbox and in permission assignment - Exchange 2010 to Exchange 2016 Migration – Part 4
Explains configuring Exchange 2016 internal/external URLs - Exchange 2010 to Exchange 2016 Migration – Part 5
Migration of system mailboxes from Exchange 2010 to Exchange 2016 - Exchange 2010 to Exchange 2016 Migration – Part 6
Tips for configuring SCP and DNS Records - Exchange 2010 to Exchange 2016 Migration – Part 7
Procedure for the migration of mailboxes from Exchange 2010 to Exchange 2016
After the Exchange 2016 installation (as given in Part 2 of this series), you can create the first Exchange 2016 mailbox and assign it the permissions for Exchange migration.
Instant Solution - Exchange Migrator
Exchange/Office 365 migrations are quite easy with professional tools like Exchange Migrator. This tool helps to manage mailbox and public folder migrations involving different Exchange versions and deployment types. Also, this tool helps with all tasks starting from the pre-migration analysis to the preparation of reports after the migration.
Create the first Exchange 2016 mailbox to start the Exchange migration
After the successful installation of Exchange 2016, you can proceed to create your first Exchange 2016 mailbox. This will help you test the new server and also simplify the migration process. This new mailbox will be made a member of the Organization Management role group and will be used to login to Exchange 2016.
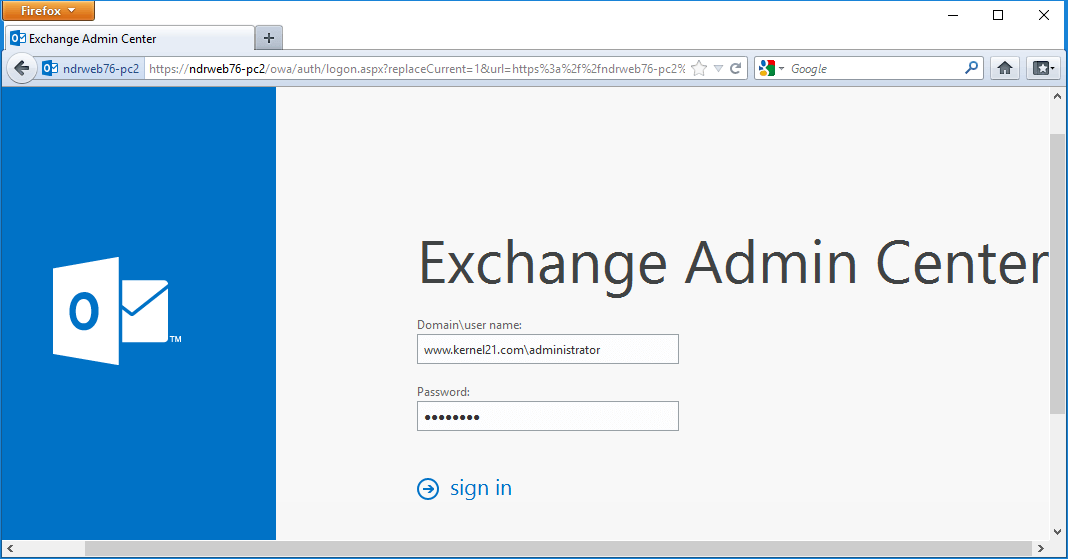
- Type https://<server name>/ecp?ExchClientVer=15 in the web browser to open the Exchange admin center (EAC) (E.g., https://NDRWEB76-PC2/ecp?ExchClientVer=15).
- Provide the credentials of the account used to install Exchange 2016 and sign in.
Note: Provide username in the Doman\username format.
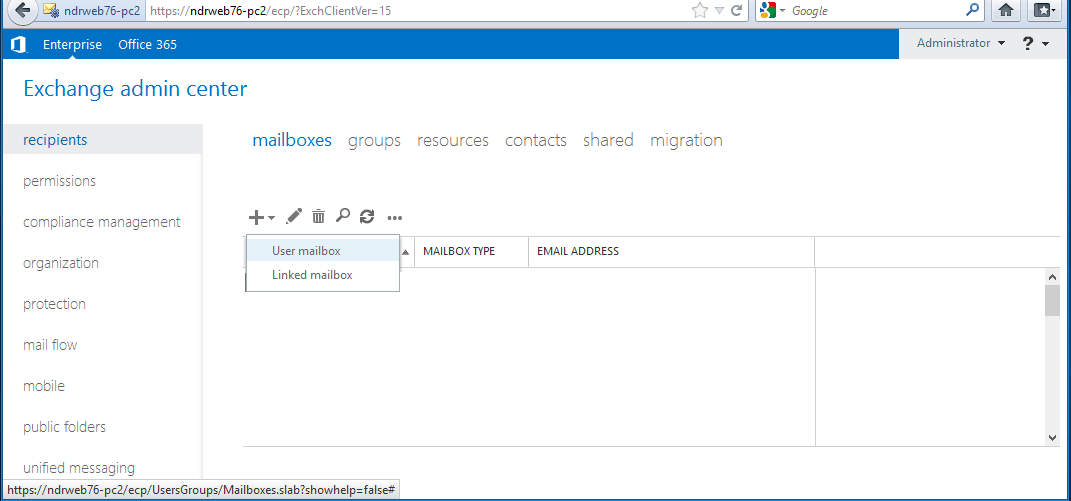
- In the Exchange admin center, go to Recipients > Mailboxes. Here, you can create the first user mailbox. For this, click Add (+), and click User mailbox.
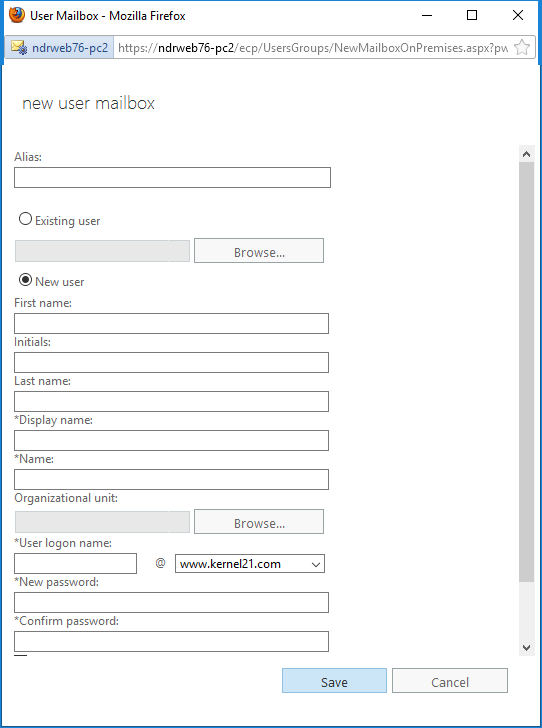
- In the new user mailbox page, provide the necessary details, and click Save.
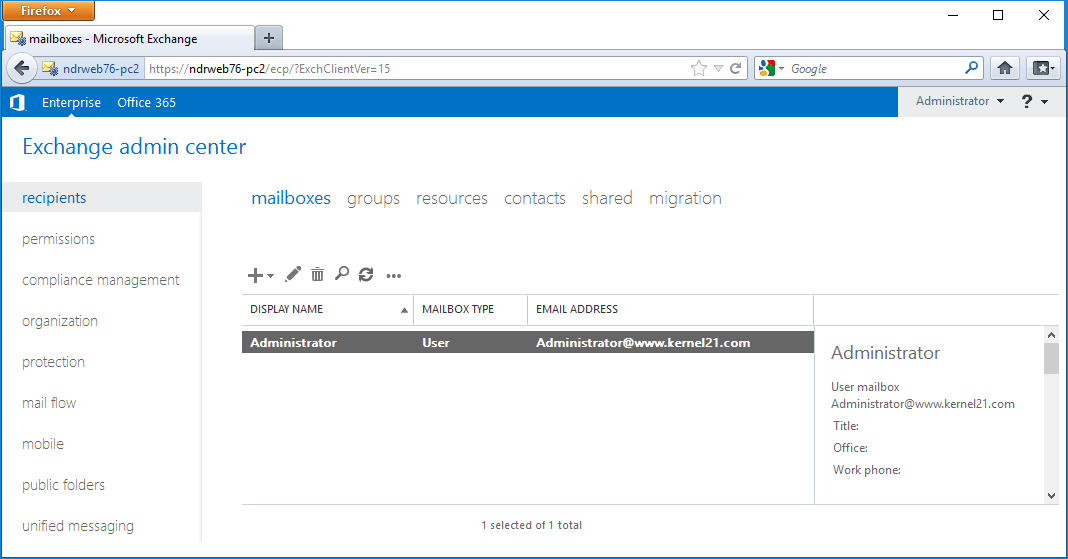
- The new user mailbox gets created.
Add the first user mailbox to Organization Management Role Group
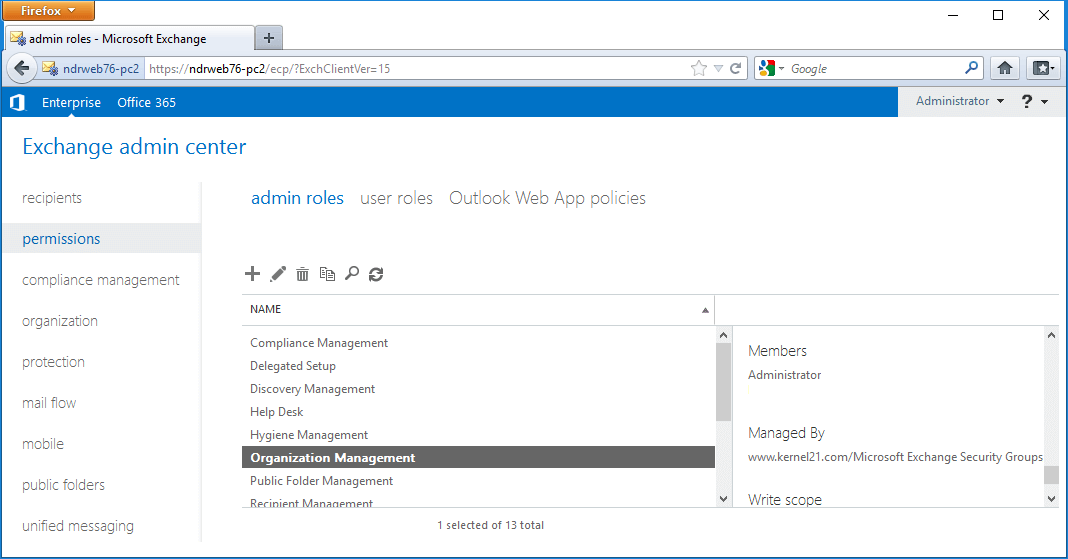
Before starting the migration, you need to assign the Organization Management permissions to the newly created user: - In the EAC, go to permissions > admin roles. Now, select Organization Management from the list and click Edit.
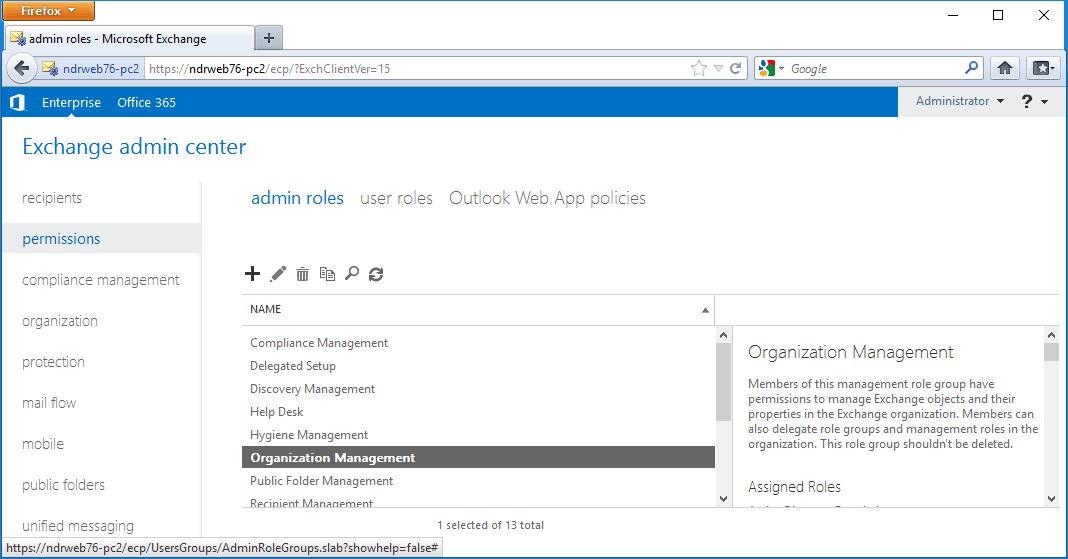
- In the Organization Management page, under Members, click Add (+). On the new page, select the first mailbox you have just created; click Add; click OK. Finally, click Save (on the Organization Management page).
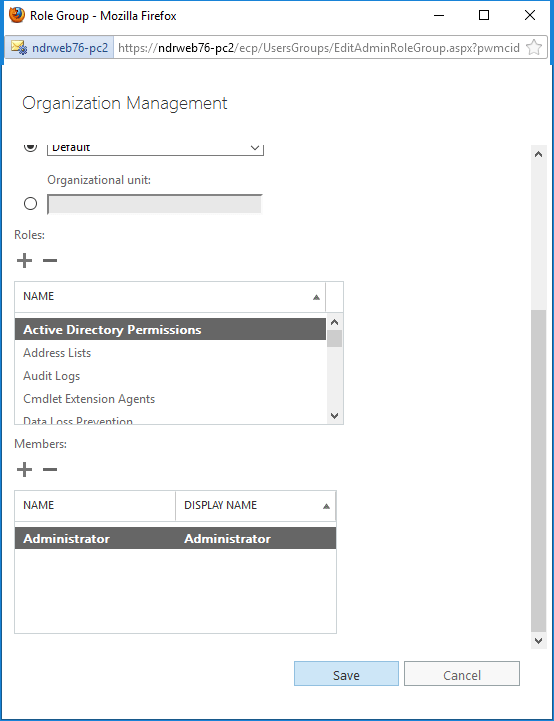
- This can be verified from EAC by going to permissions > admin roles. When you select Organization Management, the new mailbox will be listed under Members.


So, now you have the basic things required for Exchange Server 2010 to Exchange Server 2016 migration. Now you can configure internal/external URLs (as in Part 4 of this series).
Summary
After successfully installing Exchange 2016 on your Exchange 2010 premises, you need to create the first Exchange 2016 mailbox and give it the permissions required for Exchange 2010 to 2016 migration. This can be done using the Exchange 2016 Exchange admin center (EAC).


In cross-forest Exchange migration scenarios, synchronization of Global Address Lists between the source Exchange and the target Exchange is essential. Exchange Migrator helps you accomplish this in different ways during the Exchange 2010 to Exchange 2016 migration. It allows to establish one-way (source to target or target to source) or two-way synchronization between the source and target Exchange servers.