

Configure Internal/External URLs and manage Exchange 2010 certificates
- Exchange 2010 to Exchange 2016 Migration – Part 1
Helps you prepare your Exchange 2010 environment for Exchange 2016 upgrade - Exchange 2010 to Exchange 2016 Migration – Part 2
Describes Exchange 2016 installation in Exchange 2010 environment - Exchange 2010 to Exchange 2016 Migration – Part 3
Guides you in creating your first Exchange 2016 mailbox and in permission assignment - Exchange 2010 to Exchange 2016 Migration – Part 4
Explains configuring Exchange 2016 internal/external URLs - Exchange 2010 to Exchange 2016 Migration – Part 5
Migration of system mailboxes from Exchange 2010 to Exchange 2016 - Exchange 2010 to Exchange 2016 Migration – Part 6
Tips to configure SCP and DNS Records to Exchange 2016 - Exchange 2010 to Exchange 2016 Migration – Part 7
Procedure for the migration of mailboxes from Exchange 2010 to Exchange 2016
Instant Solution - Exchange Migrator
Exchange/Office 365 migrations are quite easy with professional tools like Exchange Migrator. This tool helps to manage mailbox and public folder migrations involving different Exchange versions and deployment types. Also, this tool helps with all tasks starting from the pre-migration analysis to the preparation of reports after the migration.
After creating the first Exchange 2016 mailbox with adequate permissions (as discussed in Part 3 of this series), it is time to configure Exchange 2016 services. These settings can be managed from Exchange Management Shell, the Exchange admin center (EAC), and the Internet Information Services Manager. Configuring Exchange Services involves:
- Configuring External/Internal URLs
- Reusing Exchange 2010 Certificates
- Moving arbitration mailboxes
- Configuring SCP (Service Connection Point)
- Configuring DNS Records
In this part of the article, we will cover the configuration of External/Internal URLs. Also, we talk about reusing Exchange 2010 certificates for Exchange 2016 Server.
Configure External/Internal URLs
To configure External URLs, follow the steps:
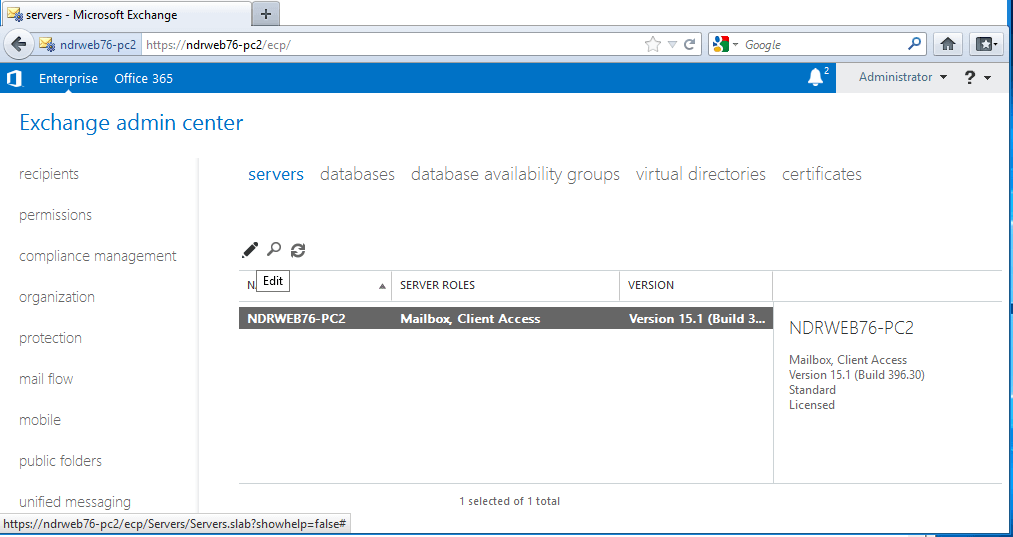
- Open EAC (type https://<server name>/ECP in the web browser – E.g., https://NDRWEB76-PC2/ECP) and login to it using the credentials of the first Exchange 2016 mailbox.
- Under servers > servers, select the internet-facing server and click Edit.
- Go to the Outlook Anywhere tab and specify the external hostname (in the first field). E.g., mail.example.com. Click Save.
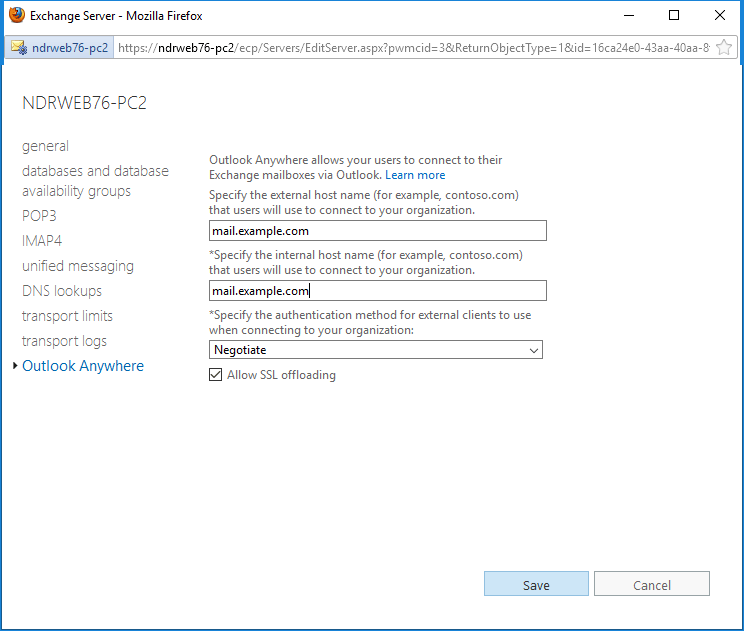
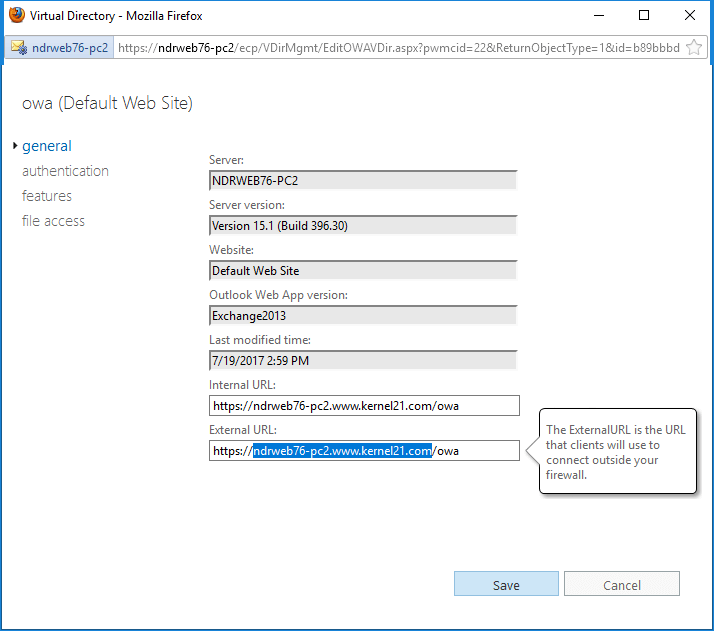
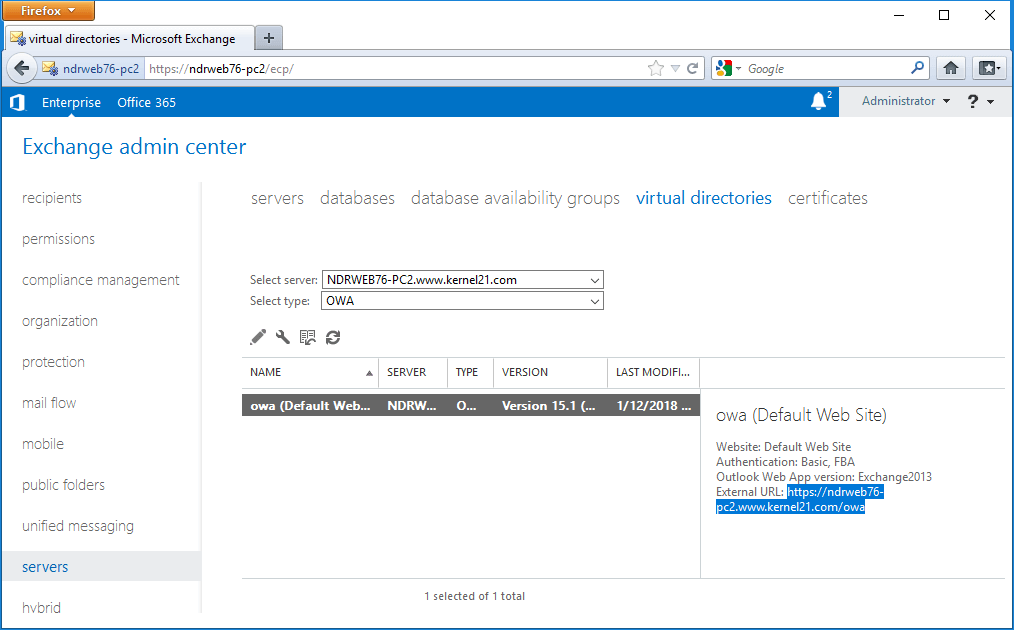
Note: You can also specify the internal hostname (in the second field). - In EAC, now go to servers > virtual directories. In the first dropdown list (Select server), select the internet-facing server. You have all the virtual directories in the Select type dropdown list. Select the required virtual directory and click Edit.
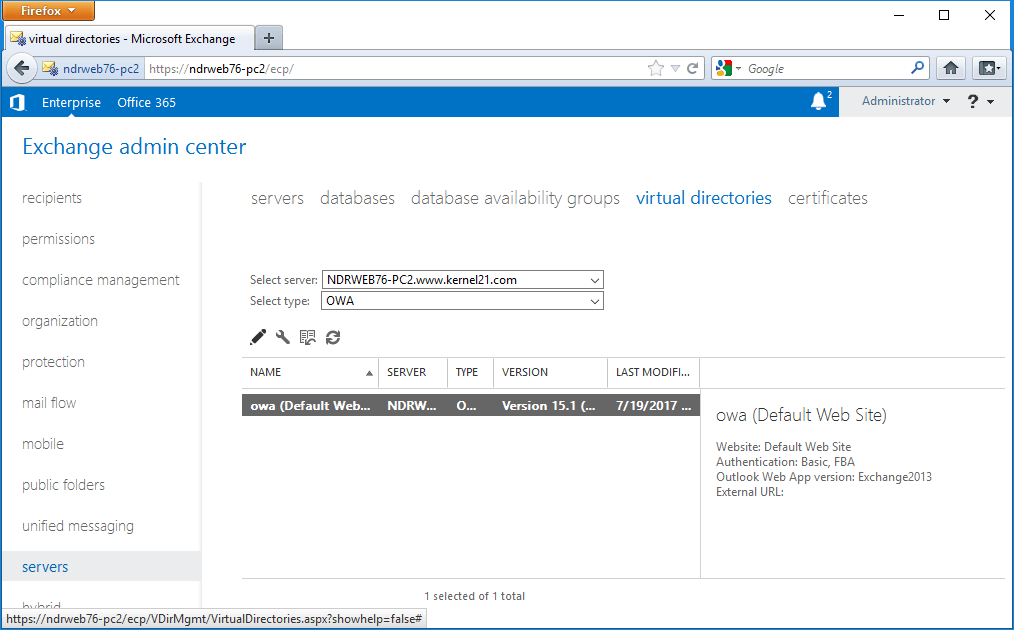
- Here you can edit the external URL (just replace the required text in between https.// and / (the first forward slash) with the one you want to use. Click Save.
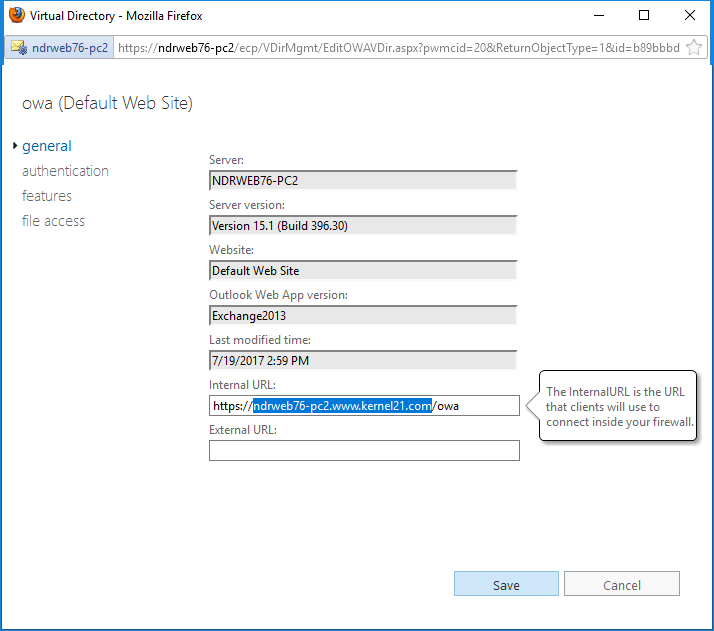
Note: To change the internal URLs, you can replace the content in the Internal URL in the same way if you are opting for a different URL for the same.
- Repeat the procedure for all the required virtual directories – like EWS, Mapi,
Microsoft-Server-ActiveSync, OAB, etc.
Note: External URL will not be displayed for the Autodiscover virtual directory.
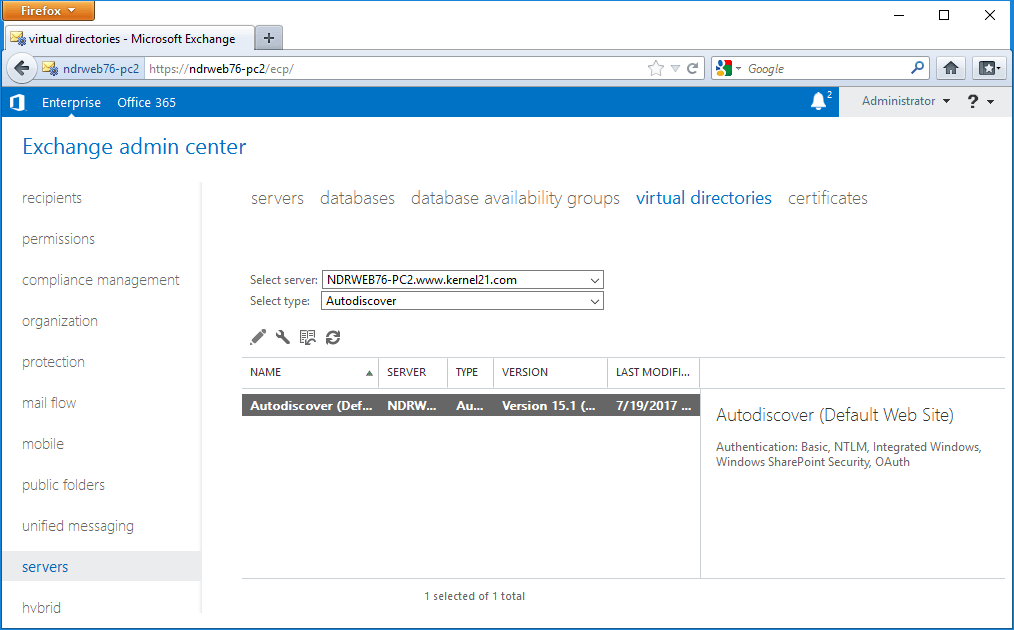
- This can be verified in the Details pane after selecting the internet facing mailbox server and the required virtual directory under servers>virtual directories in EAC.


Reuse Exchange 2010 Certificates
You can reuse the Exchange 2010 third-party SSL certificates in Exchange 2016 if the hostnames match in virtual directories. And for this, you need to export certificates from the Exchange 2010 server and then import it to Exchange 2016 Server. This is possible only if you have the private key. Alternately, you can purchase a new certificate. You can verify the certificate details under servers>certificates in EAC.


Thus, you have successfully configured Internal/External URLs in Exchange 2016 and decided to reuse Exchange 2010 certificates. Now you can configure SCP and change the DNS records as required (see the Part 5 of this series).
Summary
Configuring internal/external URLs is an important part of configuring Exchange 2016 services. This can be done from EAC.


Updating Outlook profiles manually after Exchange 2010 to 2016 migration may be a tiresome task for Exchange administrations. That is why Exchange Migration software comes with a Profile Manager that helps to update the Outlook profiles. The Profile Manager feature simplifies the post-migration tasks of Exchange administrators.