

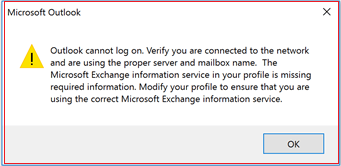
Are you facing an error notifying “Outlook cannot log on. Verify you are connected to the network and are using the proper server and mailbox name. The Microsoft Exchange information service in your profile is missing required information. Modify your profile to ensure that you are using the correct Microsoft Exchange information service.”?
If yes, then this blog is going to guide you through various methods, with the help of which you can overcome with this issue. So, the first question is that why does this error occur? This issue has been reported by many users recently, and it after users install a new Windows update.

Fix this Error by Following These Methods
Method 1: Remove the Current Profile and Create a New One
When the reason for any issue is corruption, it is the best solution to go for creating a new profile after deleting the old one. Deleting the corrupted profile completely can provide you the desired result without wasting any time. Let’s start:
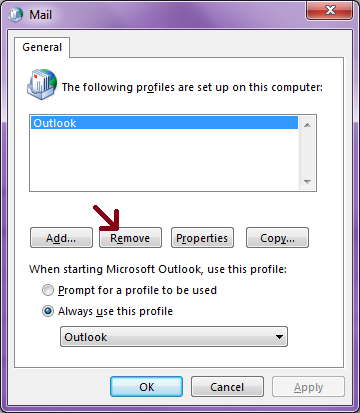
- Open Control Panel and click on Mail.
- Select Show Profiles and select the profile you are facing issue with.
- Find the Remove button under the profiles section and click on it.
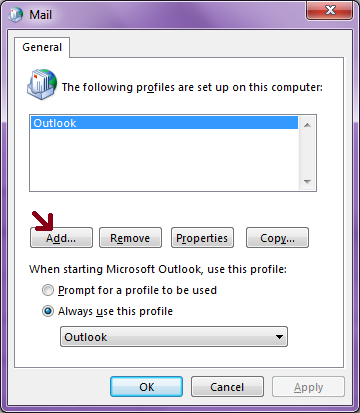
- Now, click on the Add button to add a new profile and provide a name to it.
- Now follow the instruction to configure a new account.

This method can help you to solve the above-mentioned error. If you do not want to remove profile as the first option and want to try other methods, then read the blog further.
Method 2: Try Repairing Outlook Profile
If corruption is the reason behind the error, then try removing it with the help of the inbuilt repair utility.
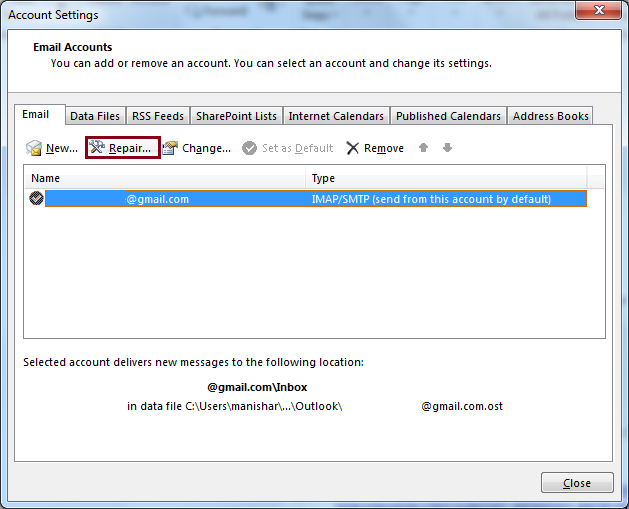
- Open the Control Panel and click on Mail.
- Select Email Accounts from there.
- In the Email tab, select the Outlook profile causing the problem and click on Repair mentioned above the Email accounts box.
- The repairing process will take place; as soon as the repair process is over, restart the system.

If you get the solution after this, well and good, but if it does not solve your issue then move to the next method.
Method 3: Try to Boot your System in Safe Mode
While running in the safe mode, your system runs a very few programs, and that is the time when you can diagnose the actual problem behind the error. Here we are going to mention the steps to follow for Windows 10.
- While pressing Shift key click on the Restart button.
- In the dialogue box that appears, select Troubleshoot and click on Advanced Options.
- Now in the Advanced Options dialogue box select Startup Settings.
- A new window for Startup Settings will open press F4, F5, and F6 keys to enter the safe mode.
By entering in the Safe Mode, you can easily identify the reason for the error.
Method 4: Try Repairing Corrupted PST
Be it an error in Outlook, corrupted PST can always be a reason. Try repairing PST to see if it solves the issue. Try repairing corrupt PST with PST Recovery tool. It is an automated way to repair a corrupt, damaged or broken PST.
- To fix the corruption, run the tool and selecting a file. For this, click on the Browse button and select the corrupt PST file. Once selected, click on the Next button.
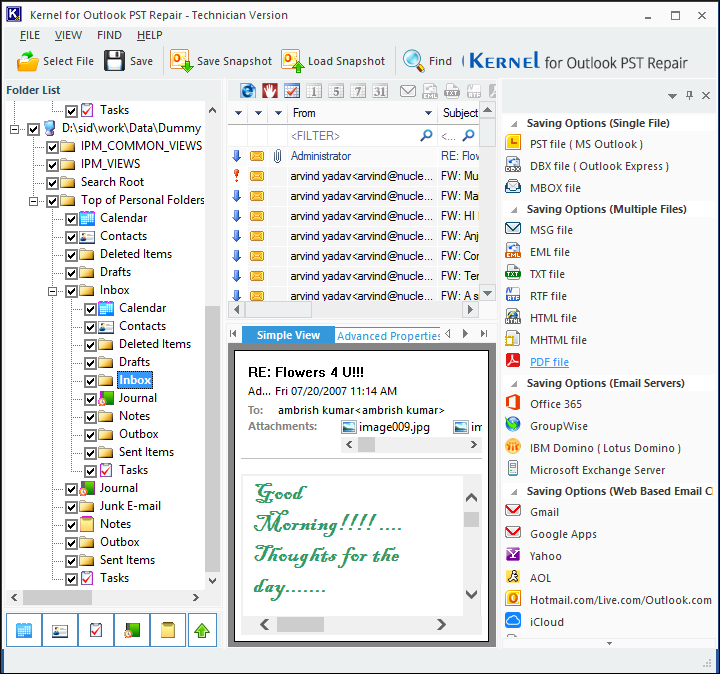
- Once the file scanning is done, all the content of the file will be displayed. Here you can have a detailed preview of the content of the files.
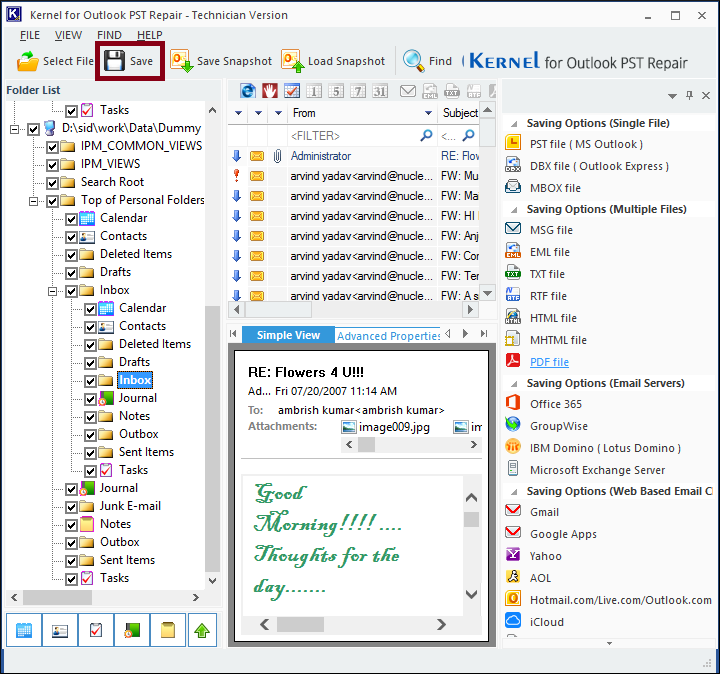
- Once satisfied, you can proceed to save the file by clicking on the Save button on the top of the tool’s screen.
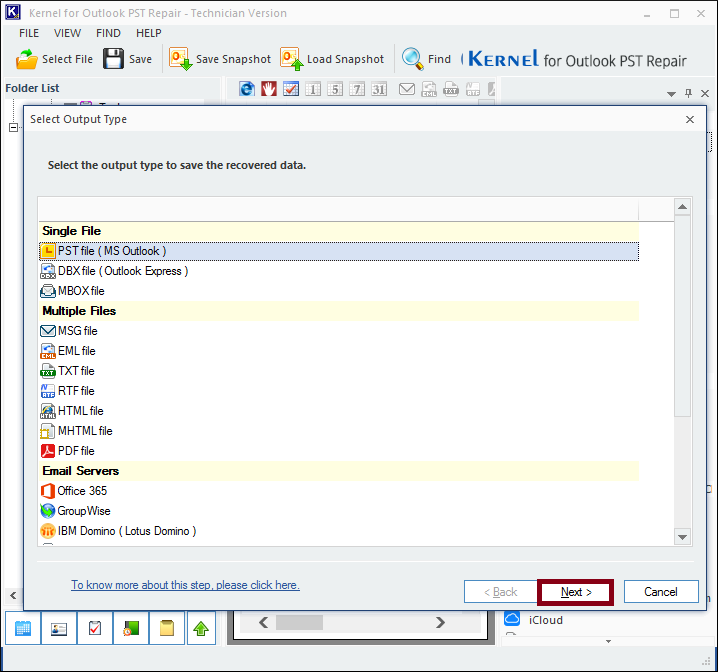
- Moving forward, select the format for the output file, which is the PST file (MS Outlook), and click on Next to proceed.
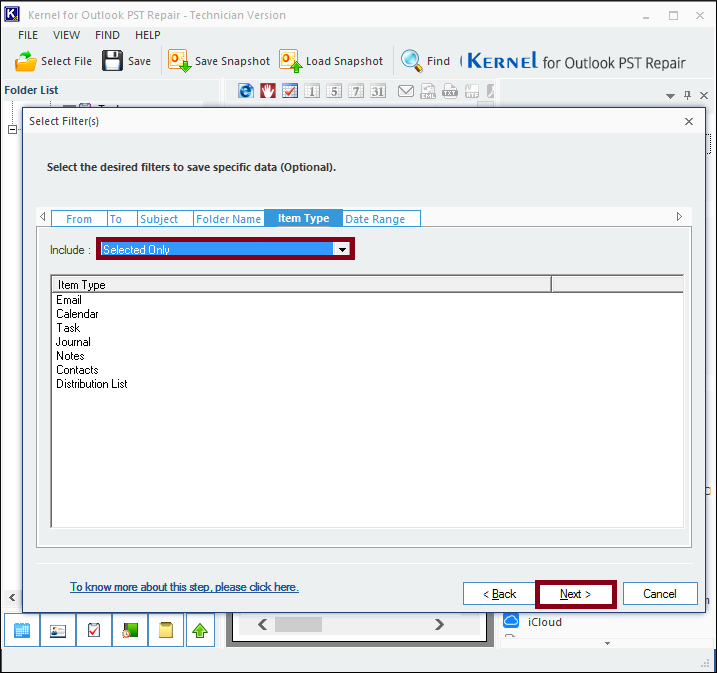
- Now, apply the filters to select the content. Here you need to apply filters as required. Click on Next once done.
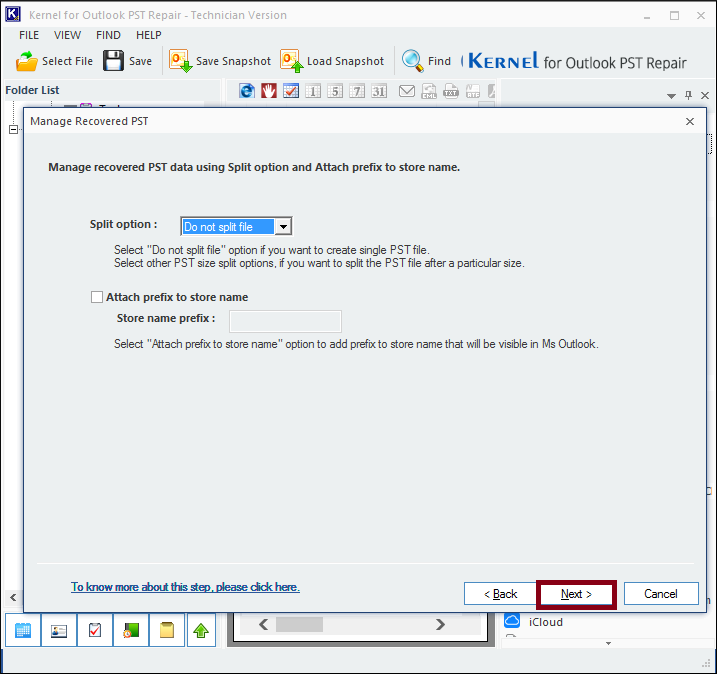
- Here, manage the recovered PST file by selecting the split option and by adding a prefix. However, both of these managing options are optional. Click on the Next button to proceed.
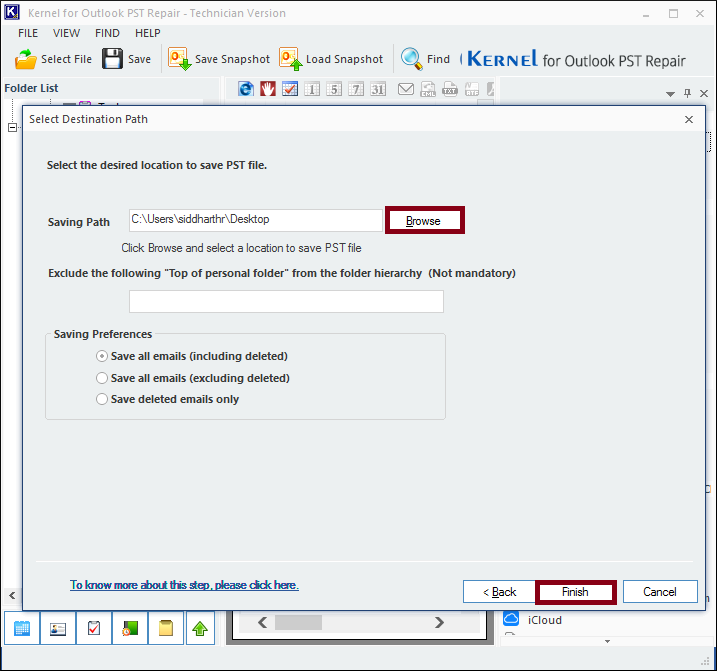
- At this final stage, select a destination for the file by clicking on the Browse button. Click on the Finish button to proceed with saving.
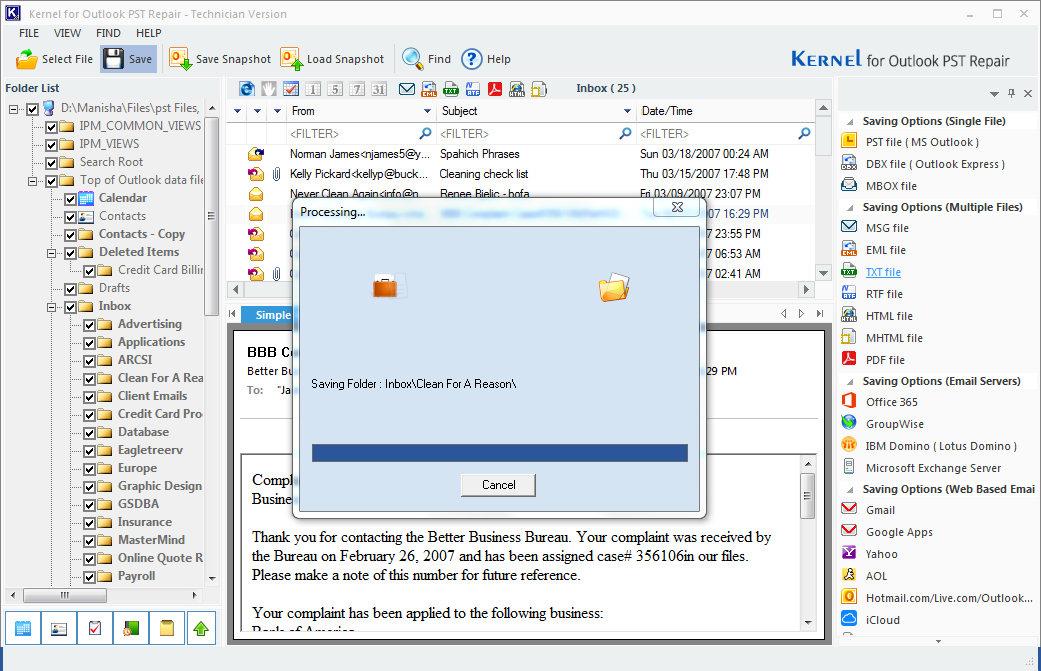
- Wait for the saving process to finish; once it is done, click on the OK button.
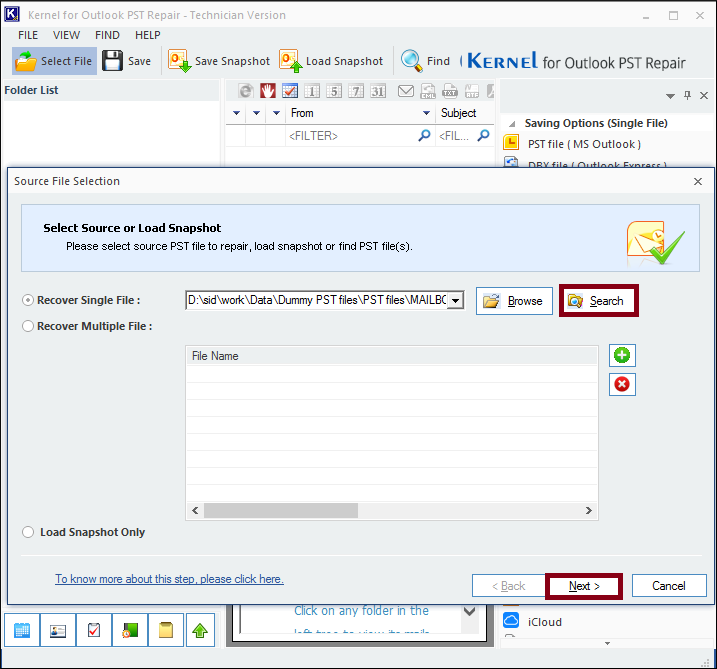
Note: If you can’t locate the PST file, then click on the Search button to search the corrupt PST file.


![]()

Conclusion:
After performing all the above methods and writing this blog, I can simply say that any of these methods would work; it is just a matter of what issue you are actually facing. All of these methods are tried and tested and are highly recommended. So, to repair your PST safely, a third-party tool like Outlook PST Repair is recommended. This tool not only repair a PST but also recover all its items, including Contacts.