Exchange Suite is a complete Exchange recovery & migration solution that can be used to deal with all Exchange related issues and migration needs.
It works with all the components of Exchange environment—offline EDB files, OST files, PST files, live Exchange, public folders, Office 365 (Exchange online), and Outlook profiles.
Here is how you can use Exchange Suite for Recovery, Export, Backup, and Migration operations:
- Step 1: Add Source - EDB file, live Exchange, Outlook profile, Office 365, public folder, OST file, PST file
- Step 2: Add Destination - New PST, existing PST, live Exchange, Outlook profile, Office 365, public folder
- Step 3: Recover, Export, or Migrate
(EDB file, live Exchange, Outlook profile, Office 365, public folder, OST file, PST file)
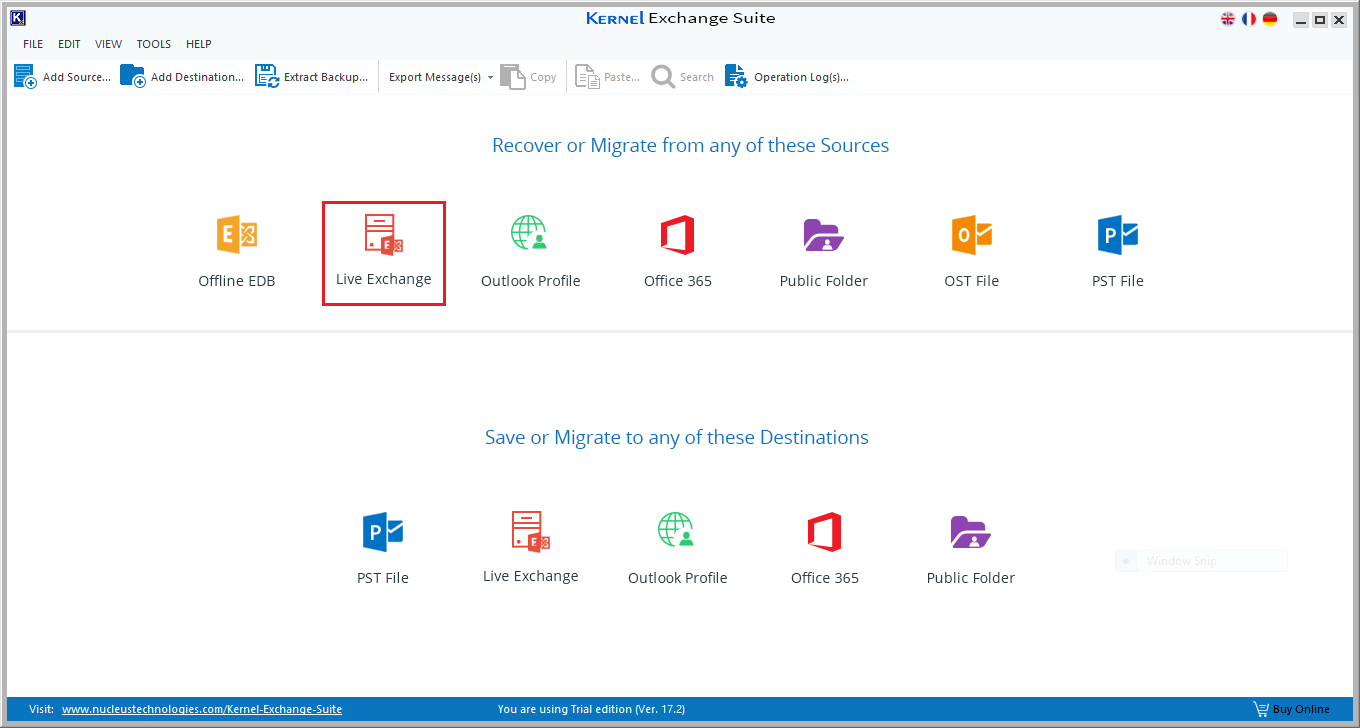
Exchange Suite helps you recover and export mailbox data from various sources. For this, you have to add it as a source.
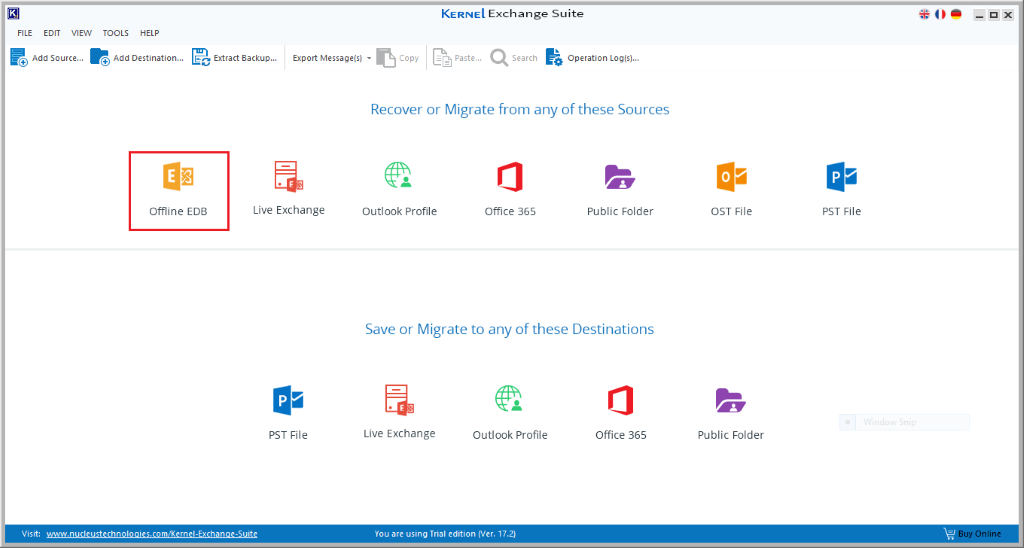
- Start Exchange Suite and click the Offline EDB icon.
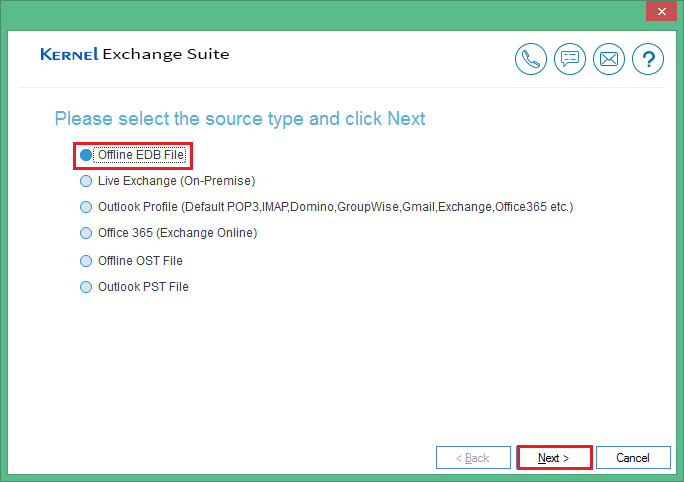
- Select the first option of Offline EDB File and click Next.
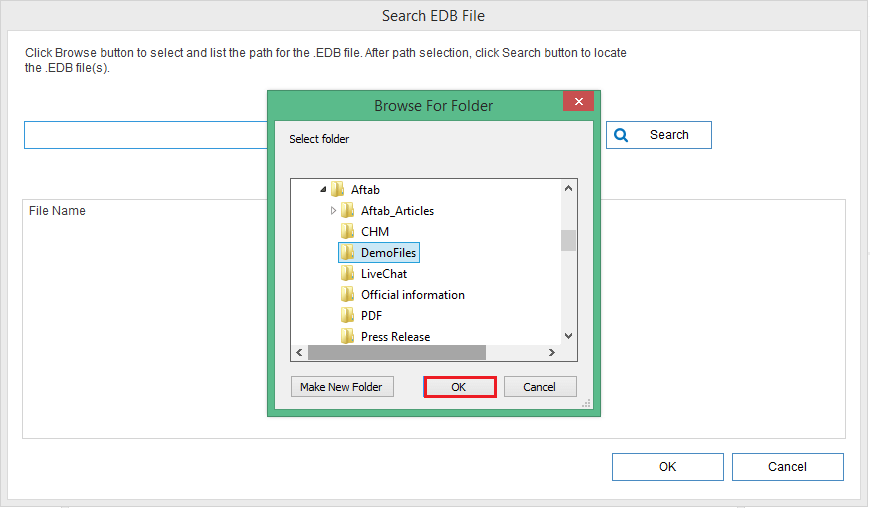
- If you know the location of EDB file, then browse and select the EDB file using the button with three dots on it. When the EDB file gets selected as the source, click Next to move ahead.
Now the tool will add EDB file as the source. Click Finish.
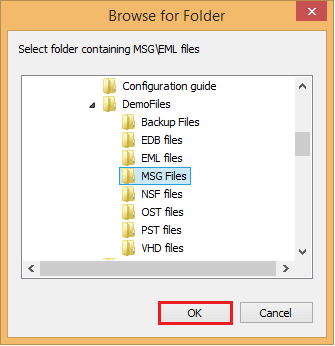
Note: If you don’t know the location, click the Search button in the above window. In the Search EDB File window, you can search in any drive or folder. After selecting the drive or folder, click the Search button. As soon as the tool lists all the EDB files, choose the required EDB file and click OK.
- Now the tool will add EDB file as the source. Click Finish.

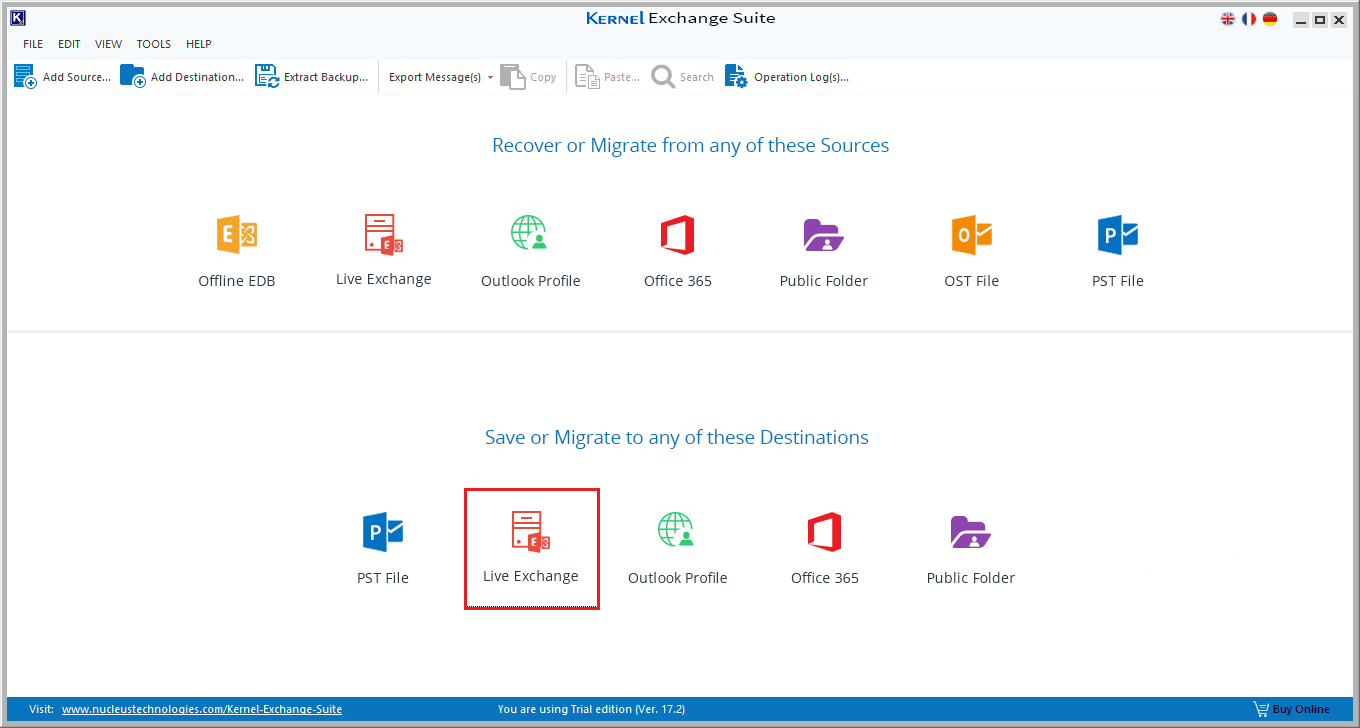
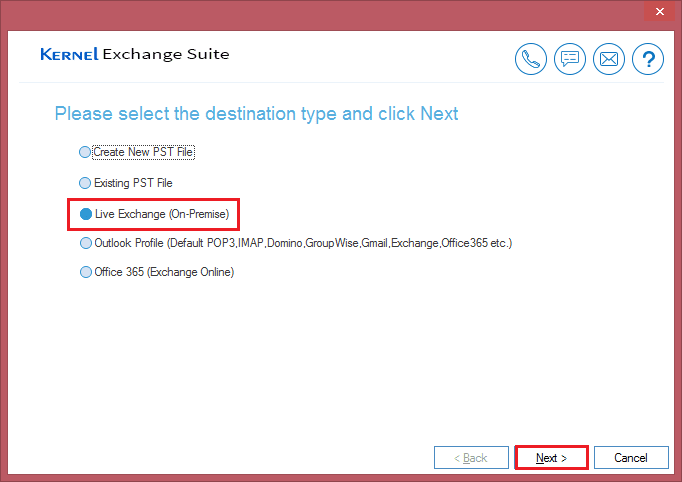
- Start the application and click the Live Exchange icon
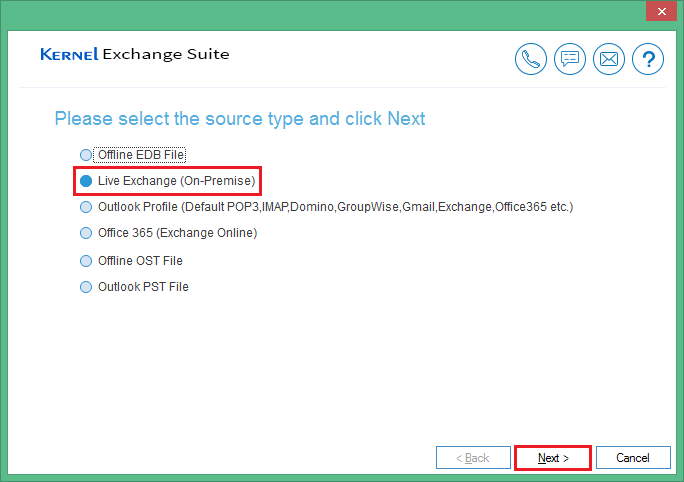
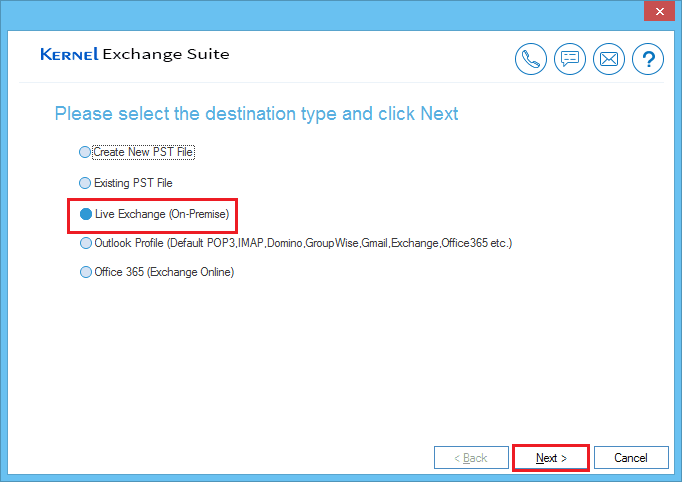
- Select Live Exchange (On-Premise) and click Next.
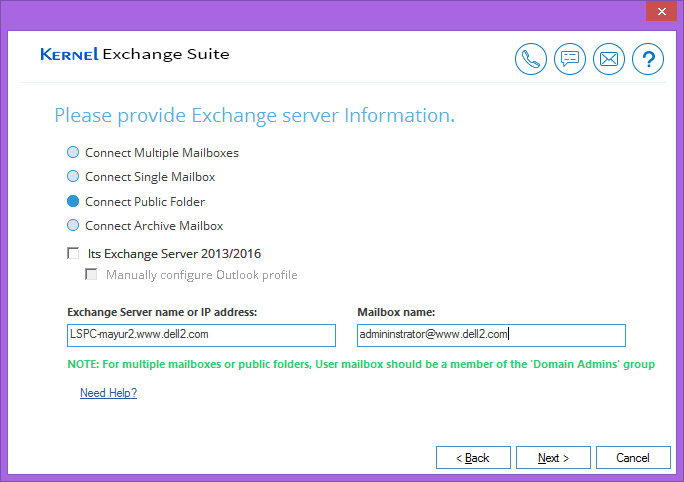
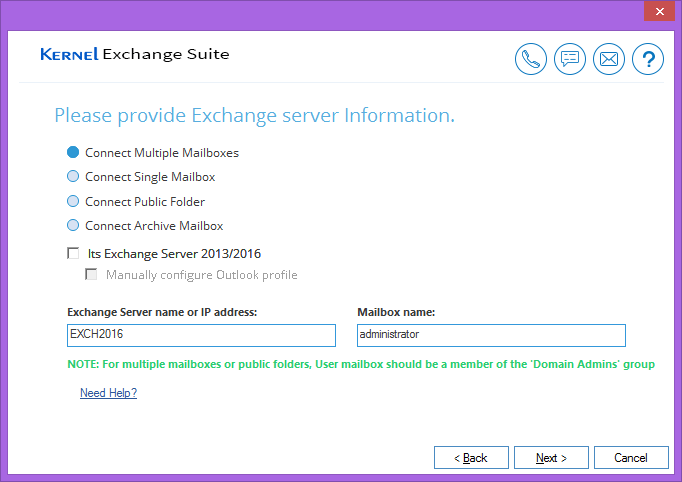
- Input server name or IP address and the name of the mailbox.
You can select any of the following options- Connect Single Mailbox: Select it to add single mailbox as a source. Type the name of the mailbox.
- Connect Public Folder: Select it to add a public folder as a source. Type the name of a user that has full rights over the public folder.
- Connect Archive Mailbox: Select it to add the Archive Mailbox as a source. Type the name of a user that has an archive mailbox.
- Connect Multiple Mailboxes: Select it to add the multiple mailboxes as sources. Type the name of the user that has full right over all mailboxes of the Exchange server.
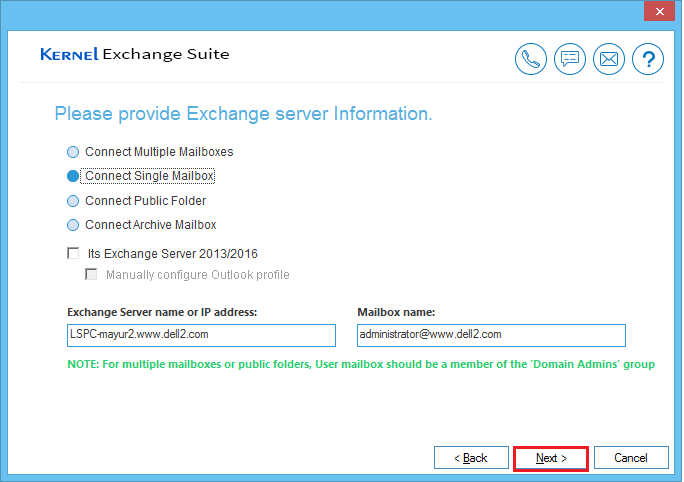
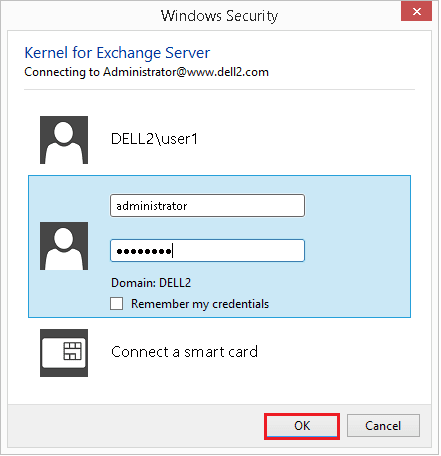
Note: If you are using Exchange 2013 or 2016, then check the box Its Exchange Server 2013/2016 - Enter the account details and click Next
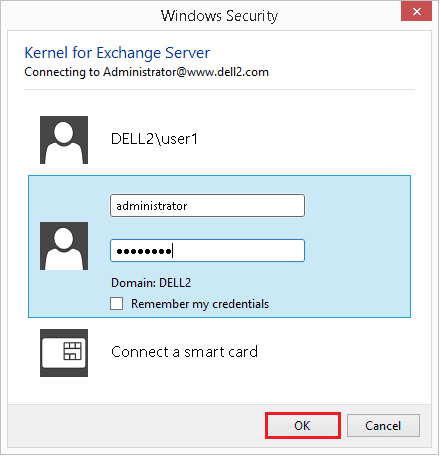
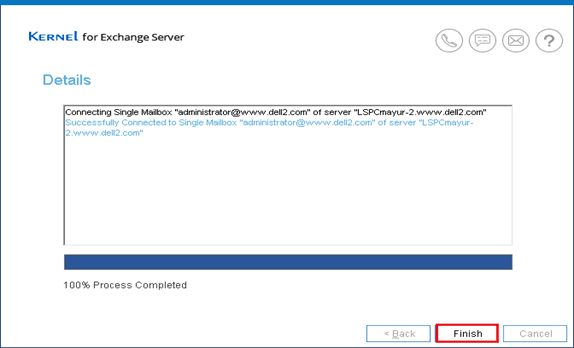
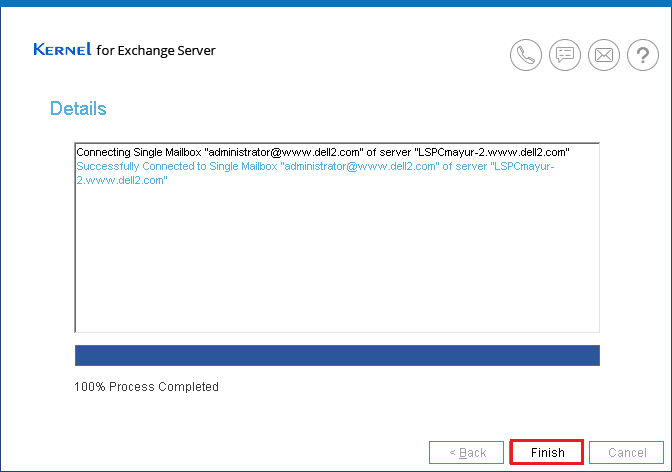
- After checking the account credentials, the tool will successfully add live Exchange Server as the source.

- Start the application and click Outlook Profile
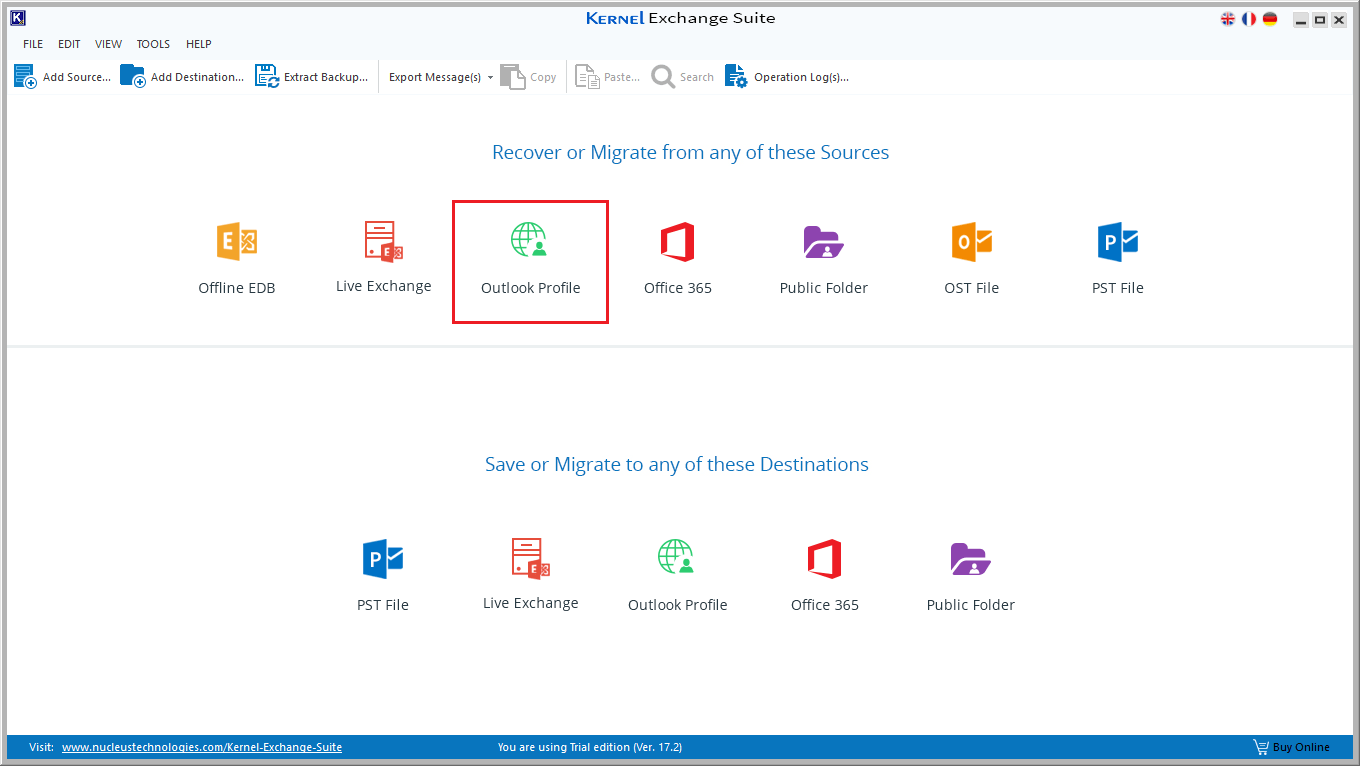
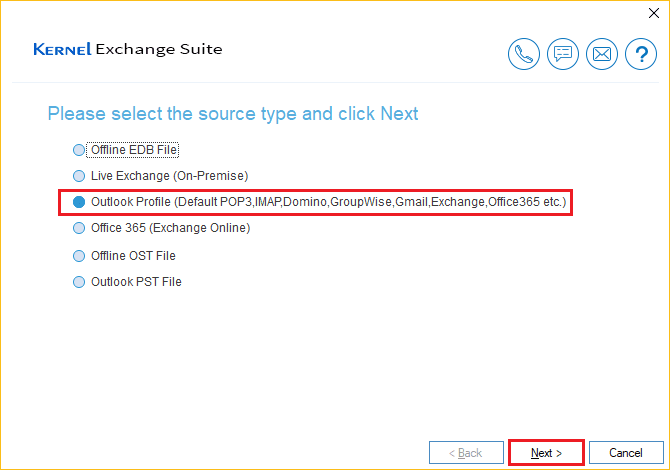
- Select Outlook Profile and click Next.
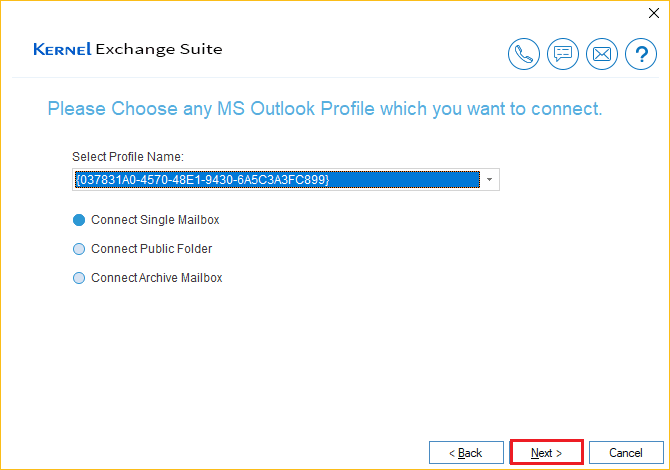
- Select the desired profile name from the drop-down menu. Choose the desired option and click Next.
- After verifying the mailbox, the tool will successfully add the Outlook profile as the source.

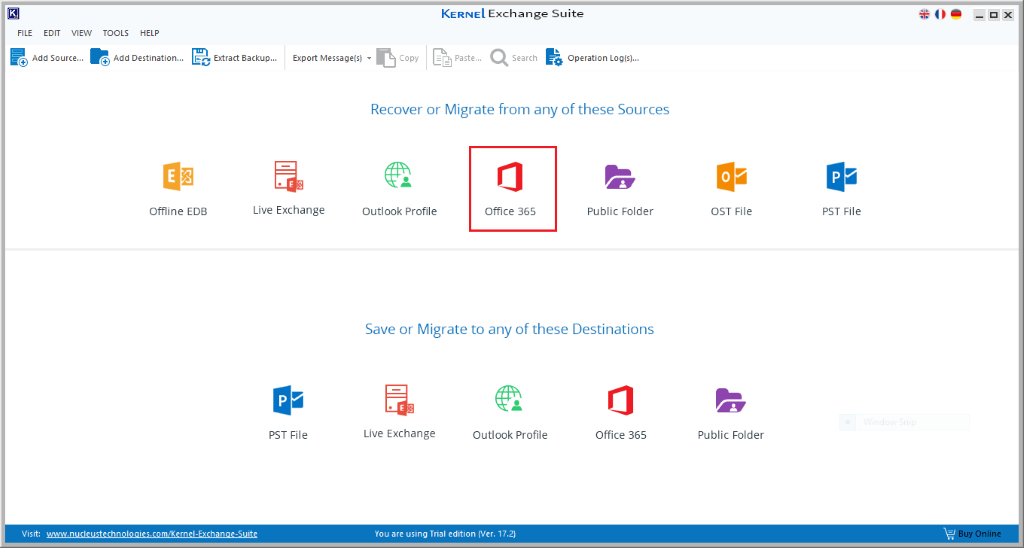
- Start the application and click the Office 365 icon
- Select Office 365 (Exchange Online) and click Next.

- Input the Office 365 user credentials and select the desired options.
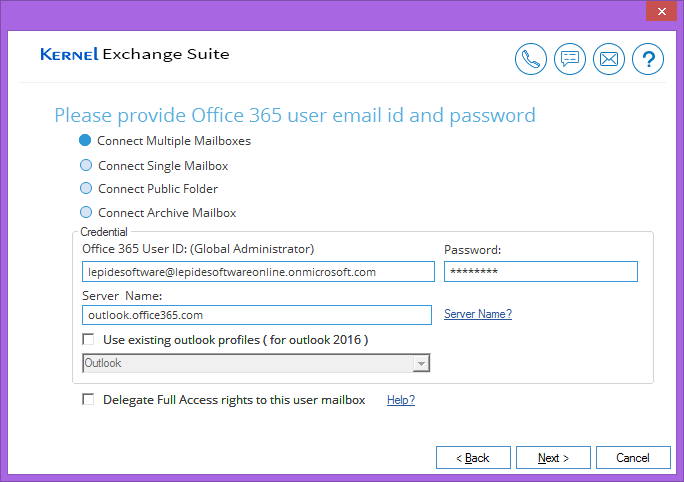
Note – To migrate multiple mailboxes, you need to enter a global administrator user account credentials. - Click Finish when the account is connected successfully.

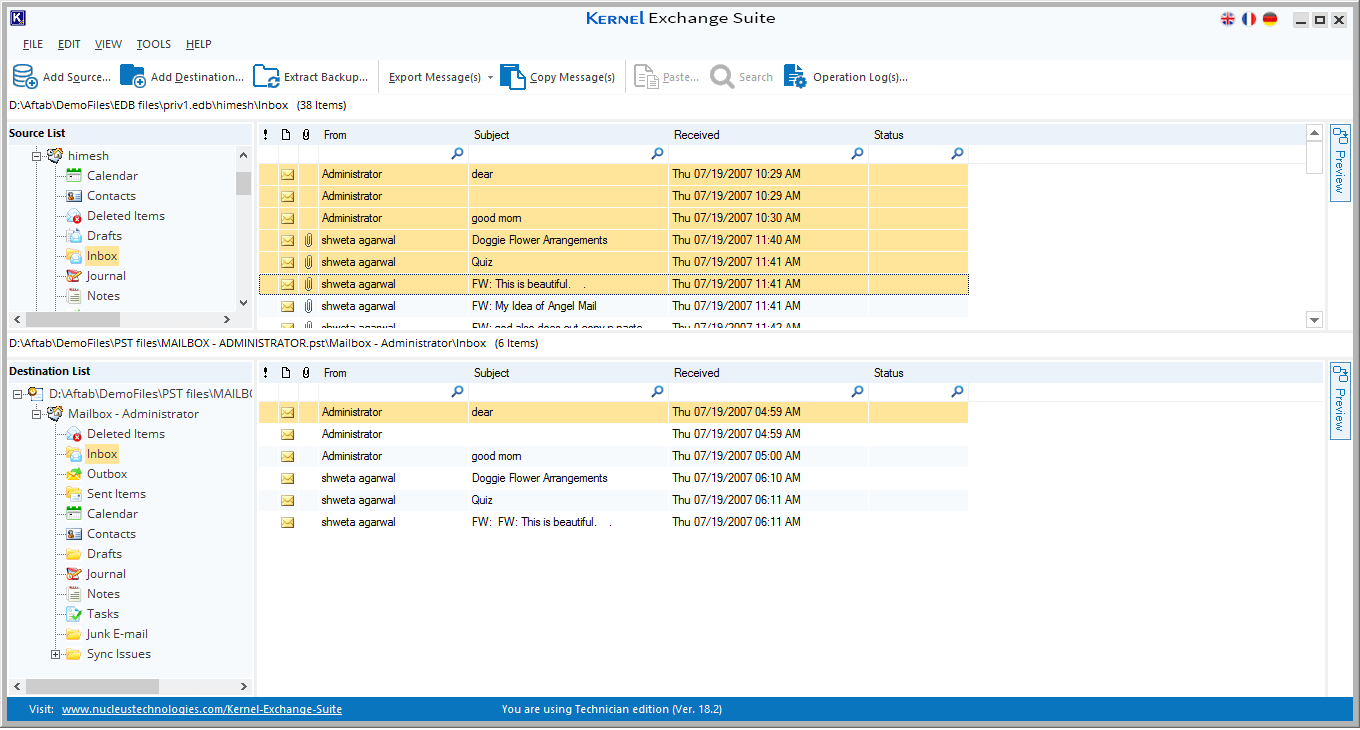
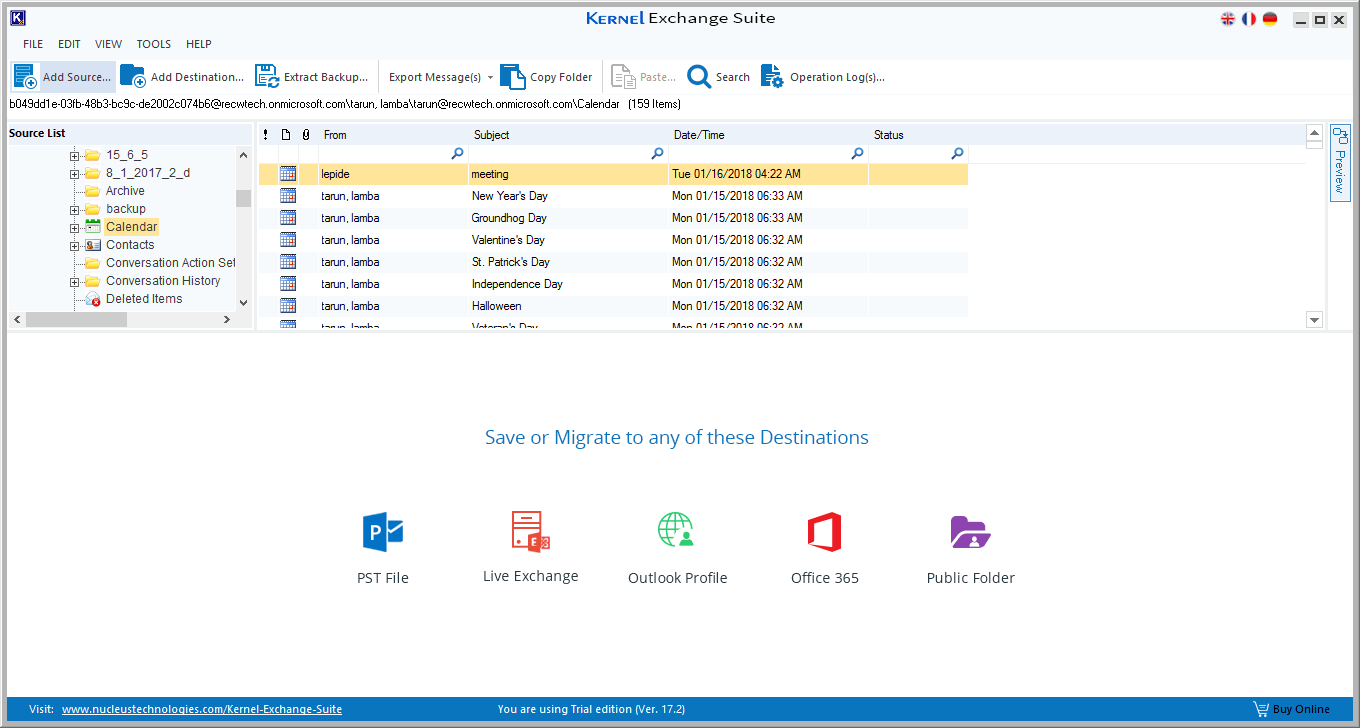
- The Office 365 account gets added as the source. You can preview its content on the Preview pane on the right.
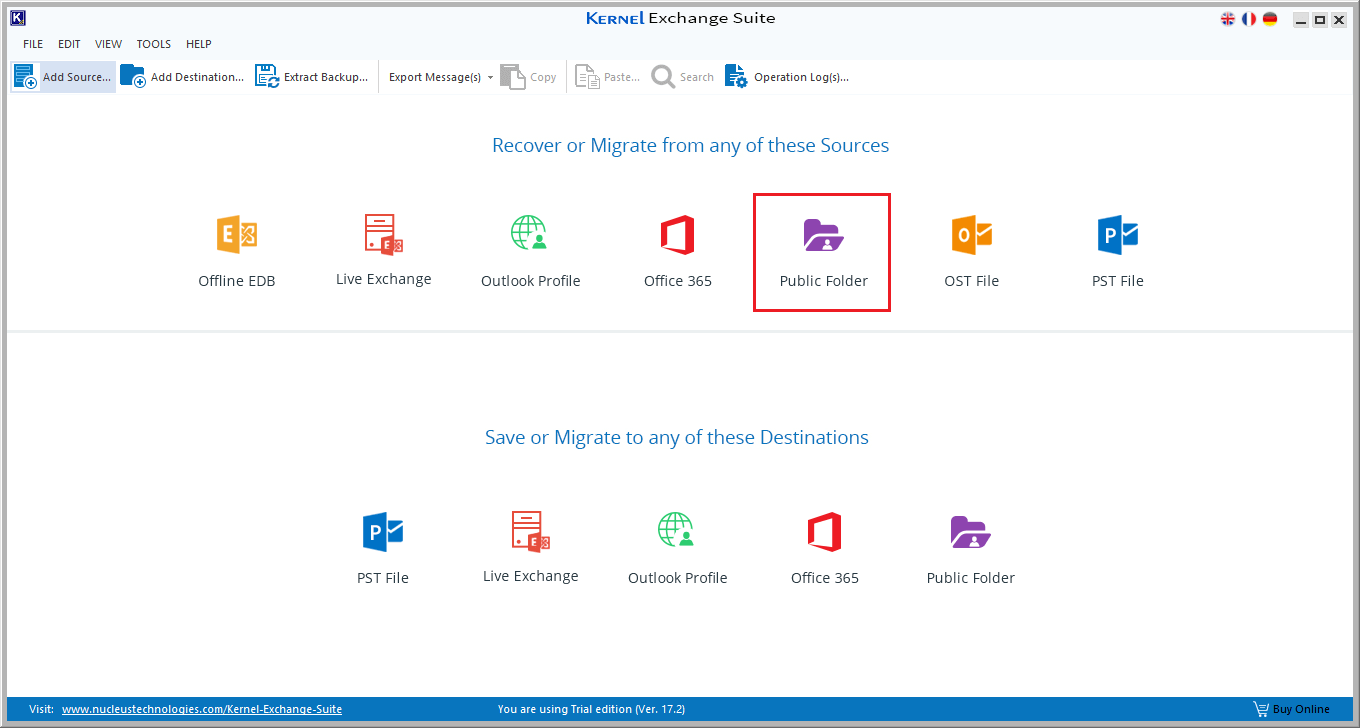
- Start the application and click the Public Folder icon.
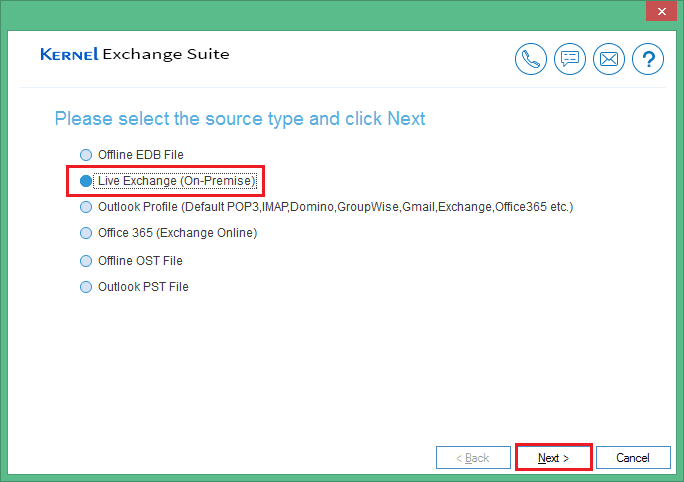
- Select Live Exchange (On-Premise) and click Next.
- Enter either server name or IP address and mailbox name and click Next.
- Enter the account credentials, then click Next.
- After checking the account credentials, the tool will add the public folder as the source.
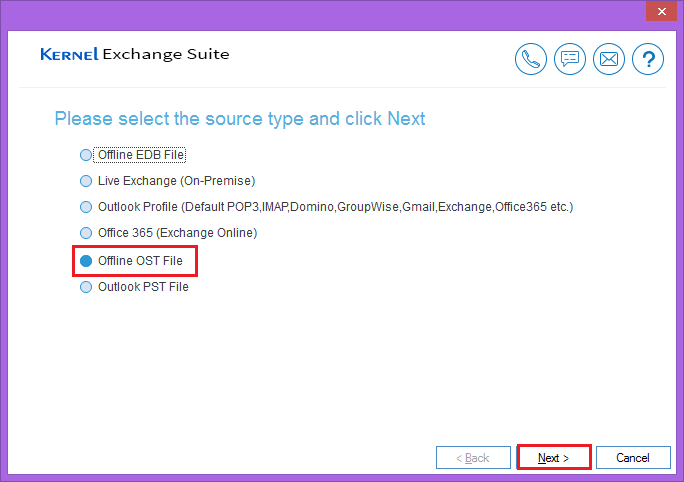
- Start the application and click the OST File option.

- Select Offline OST File and click Next.
- Browse the OST file and click Next.
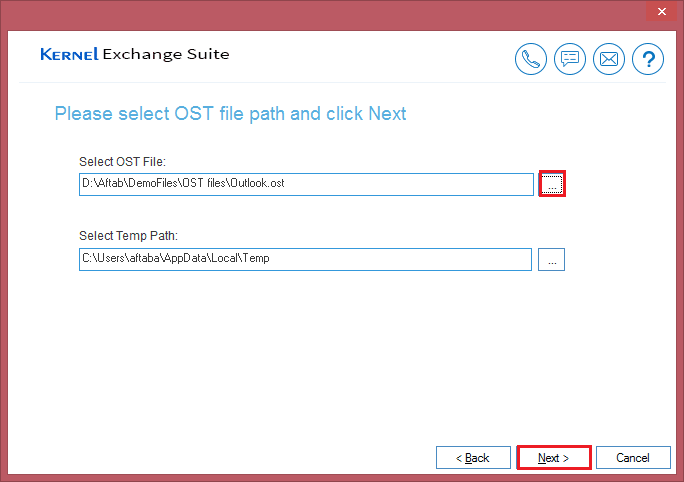
- The OST file is successfully selected as the source. Click Finish.
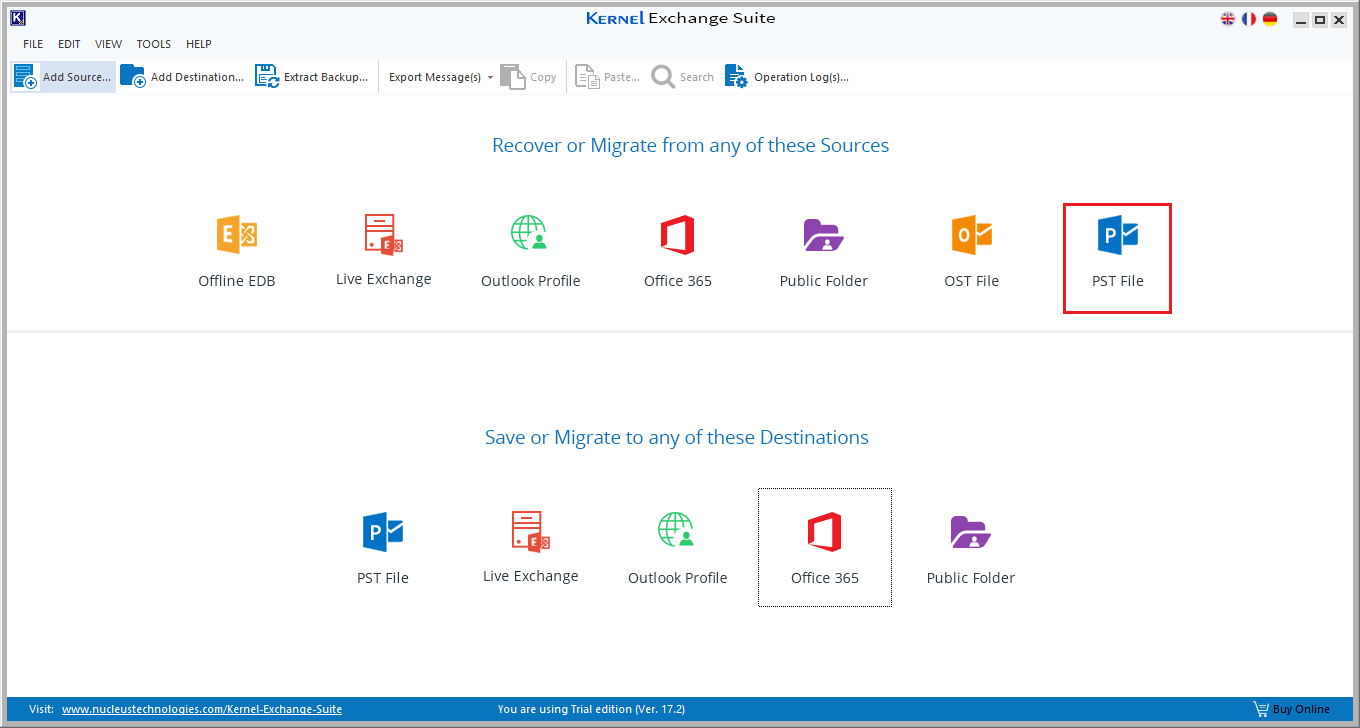
- Start the application and click PST File.
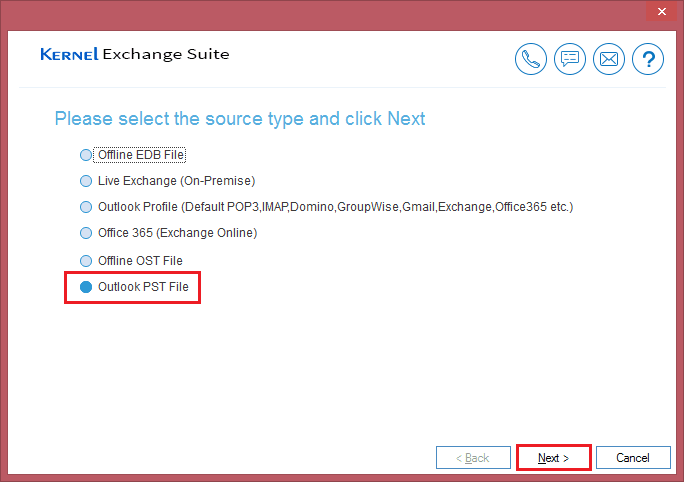
- Select Outlook PST File and click Next.
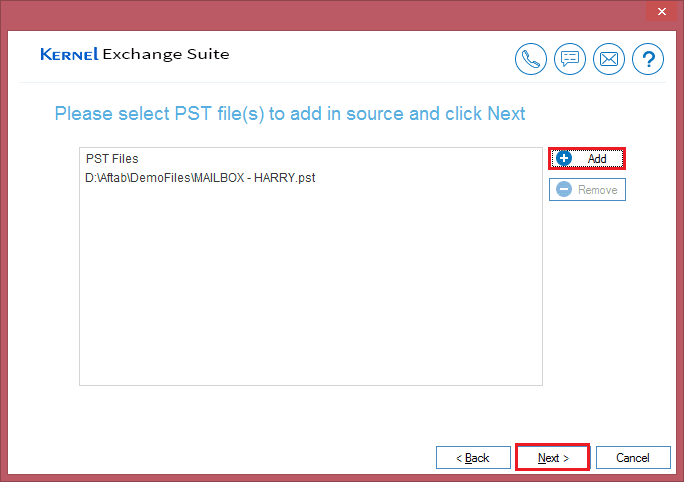
- Add the PST file (using the + Add button) and click Next.
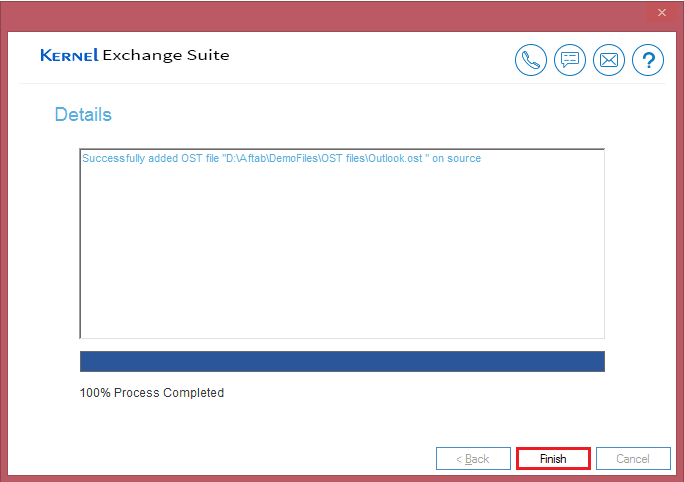
- The PST file gets successfully added as the source.

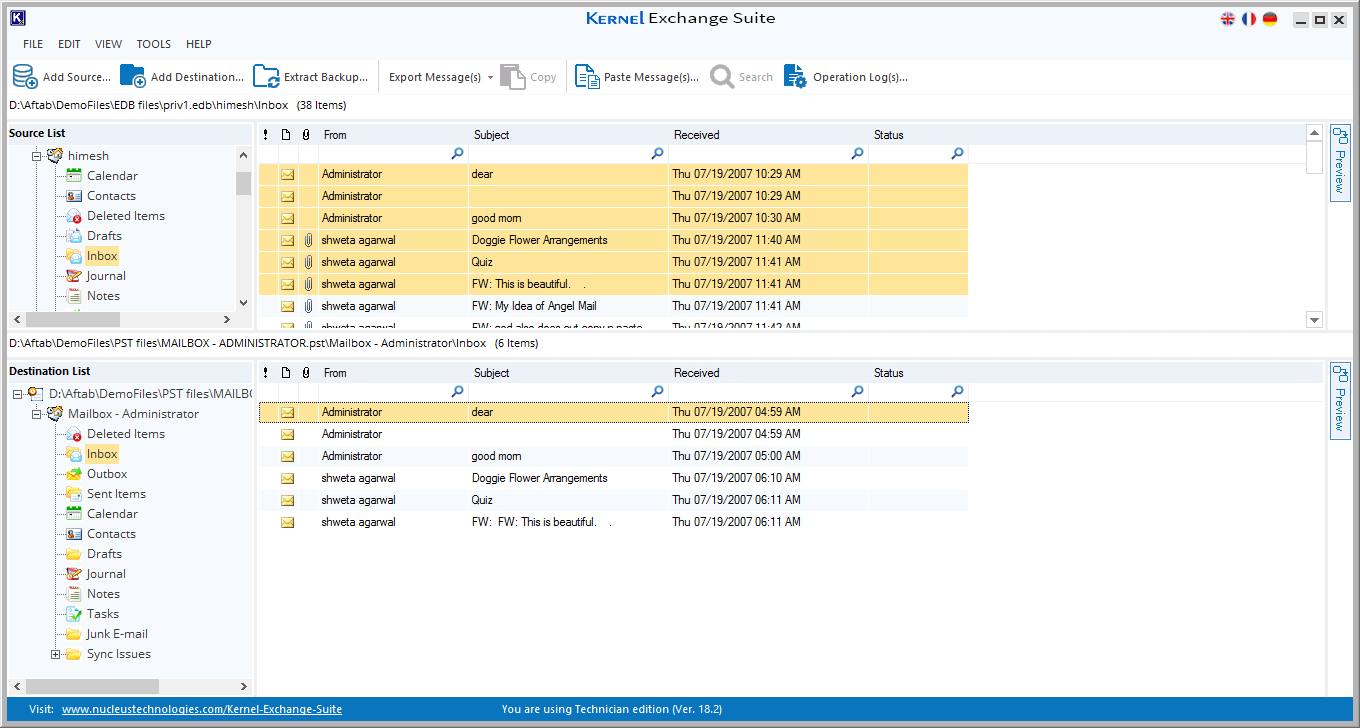
After adding the source, you can perform following actions as well. To perform these actions, you need not add the destination as given in the next tab.
Using the Export Mailboxes to PST option, you can directly export the source mailboxes to PST files.
This option is most useful after adding EDB file, live Exchange, or Office 365 as the source. For each source mailbox, a separate PST file will be created in the destination.
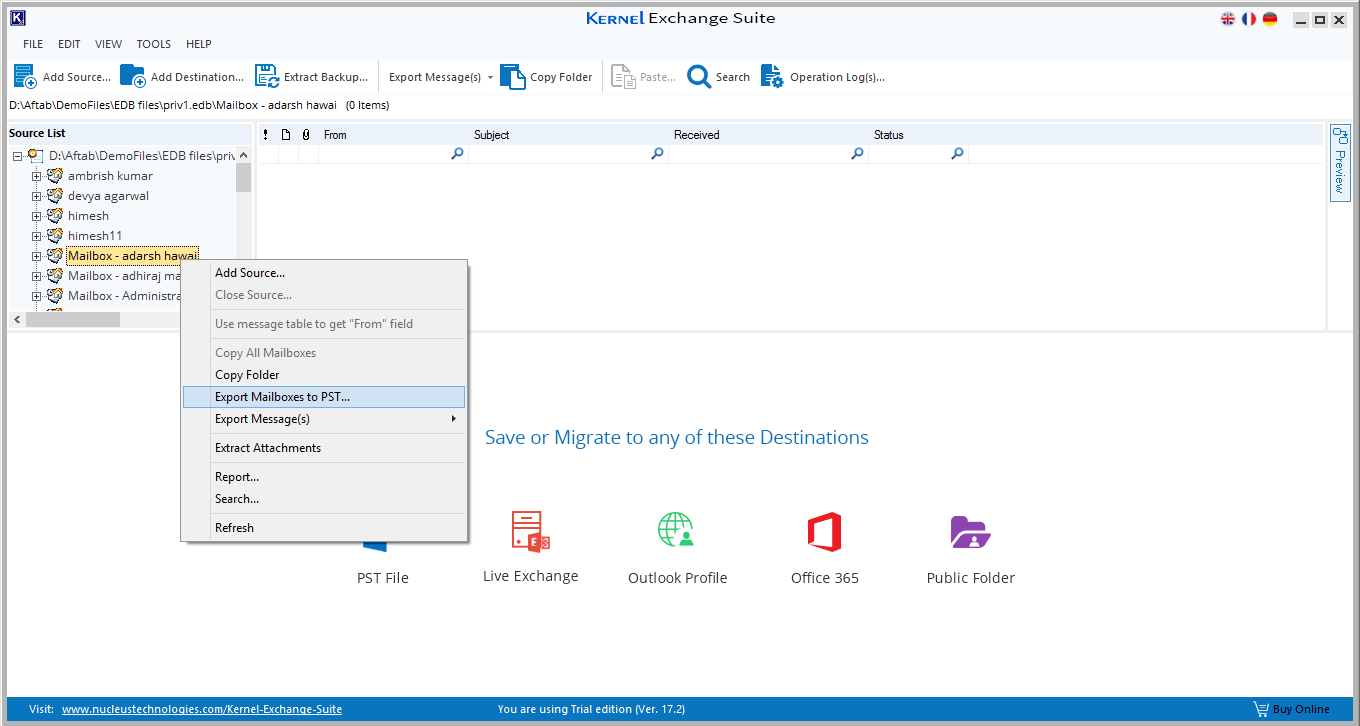
- Right-click on the root node and click Export Mailboxes to PST.
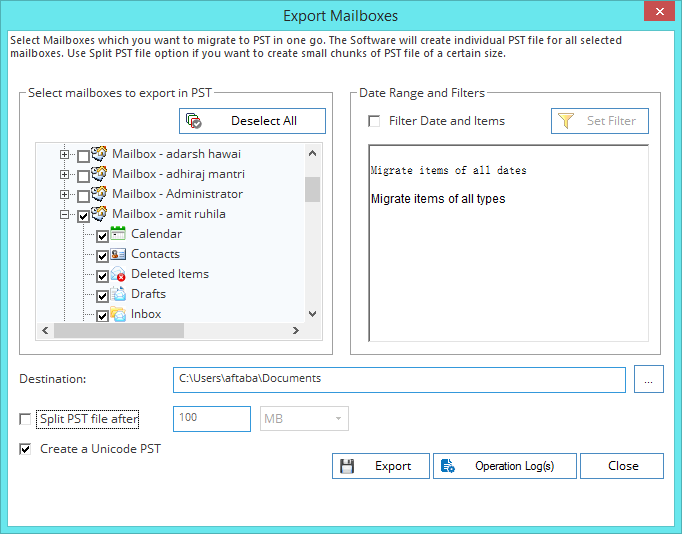
- In the wizard you can select/deselect the mailboxes and folders, filter mailbox data by criteria like Date Range and Items, provide a destination, split PST file after a fixed size, and create a Unicode PST. After providing the desired options, click Export.
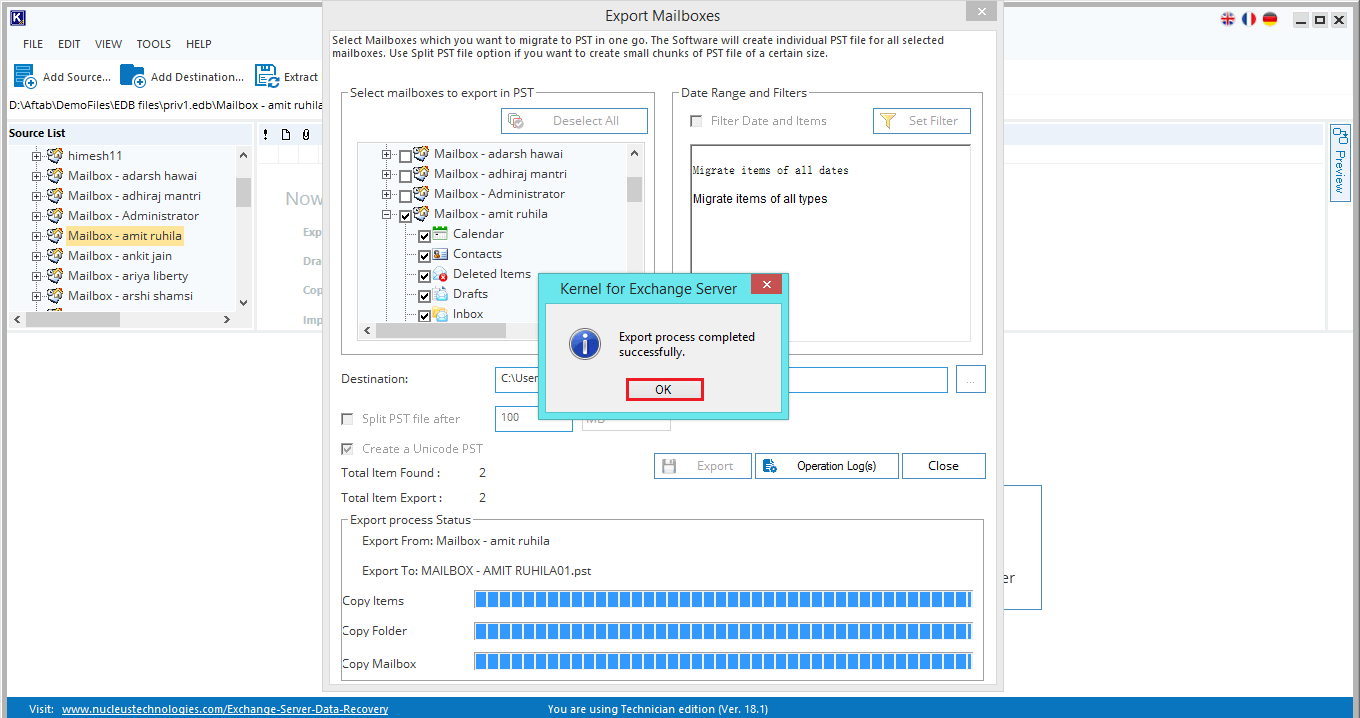
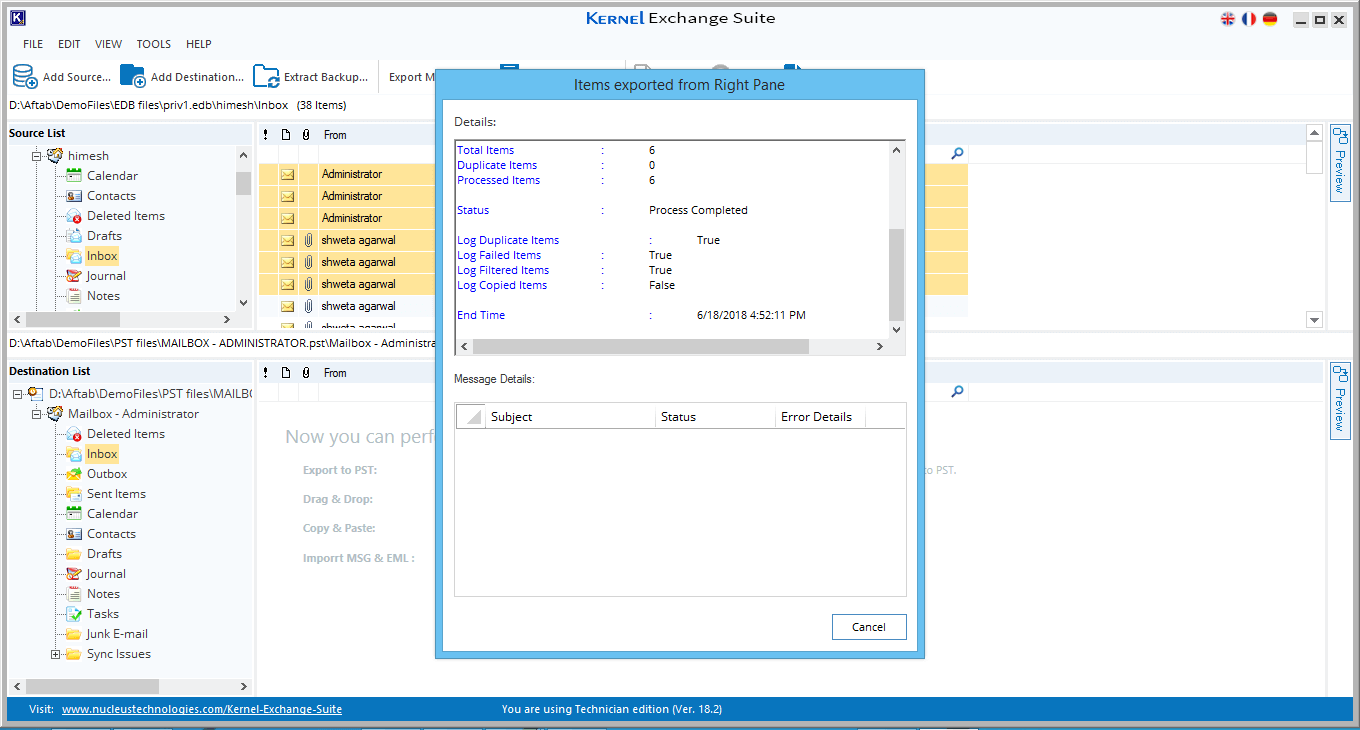
- After the successful conversion, the tool will display a success message. Click OK.
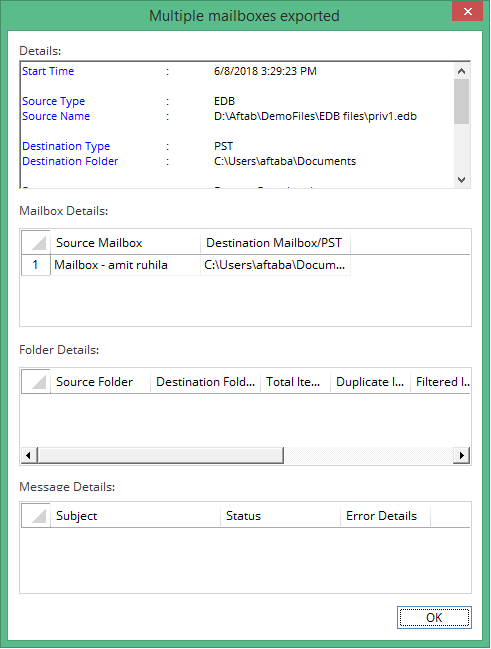
- Now, the software generates a report with the migration status.
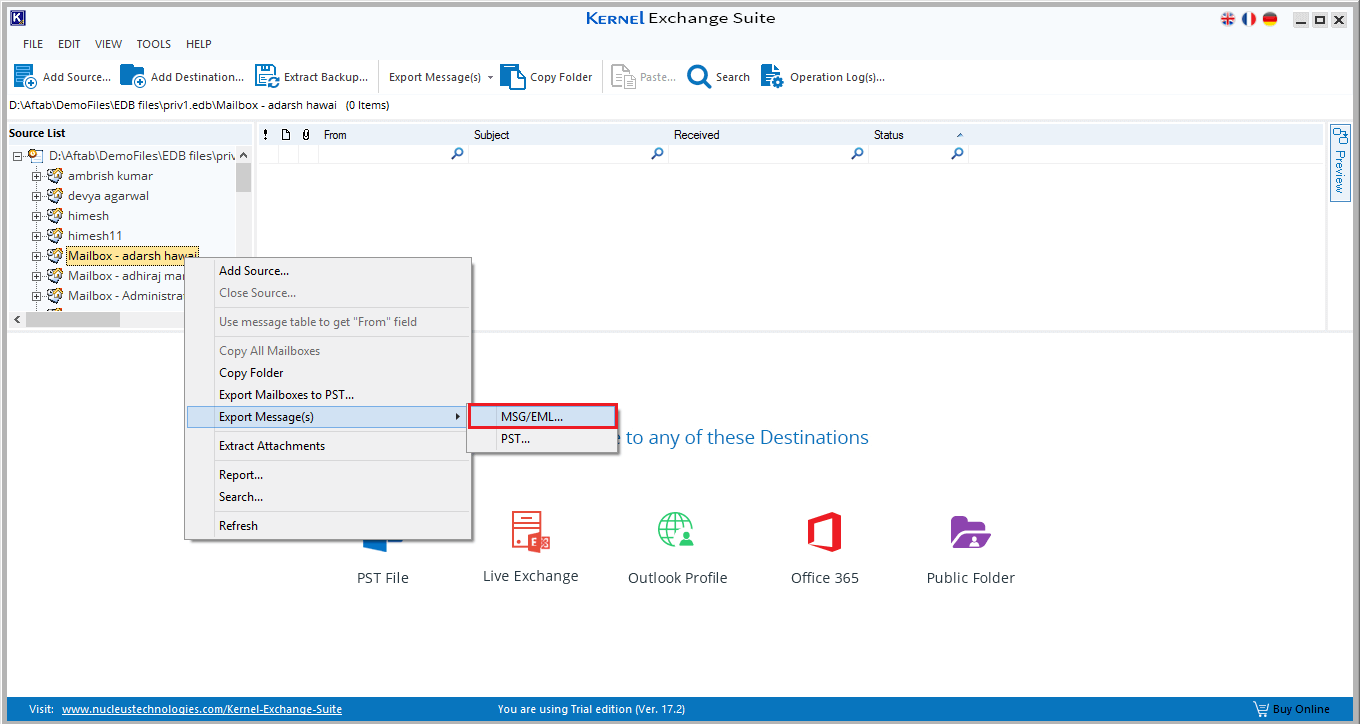
From the source, you can export message(s) as MSG/EML files.
- Select any mailbox, right-click on it, and click Export Messages>>MSG/EML.
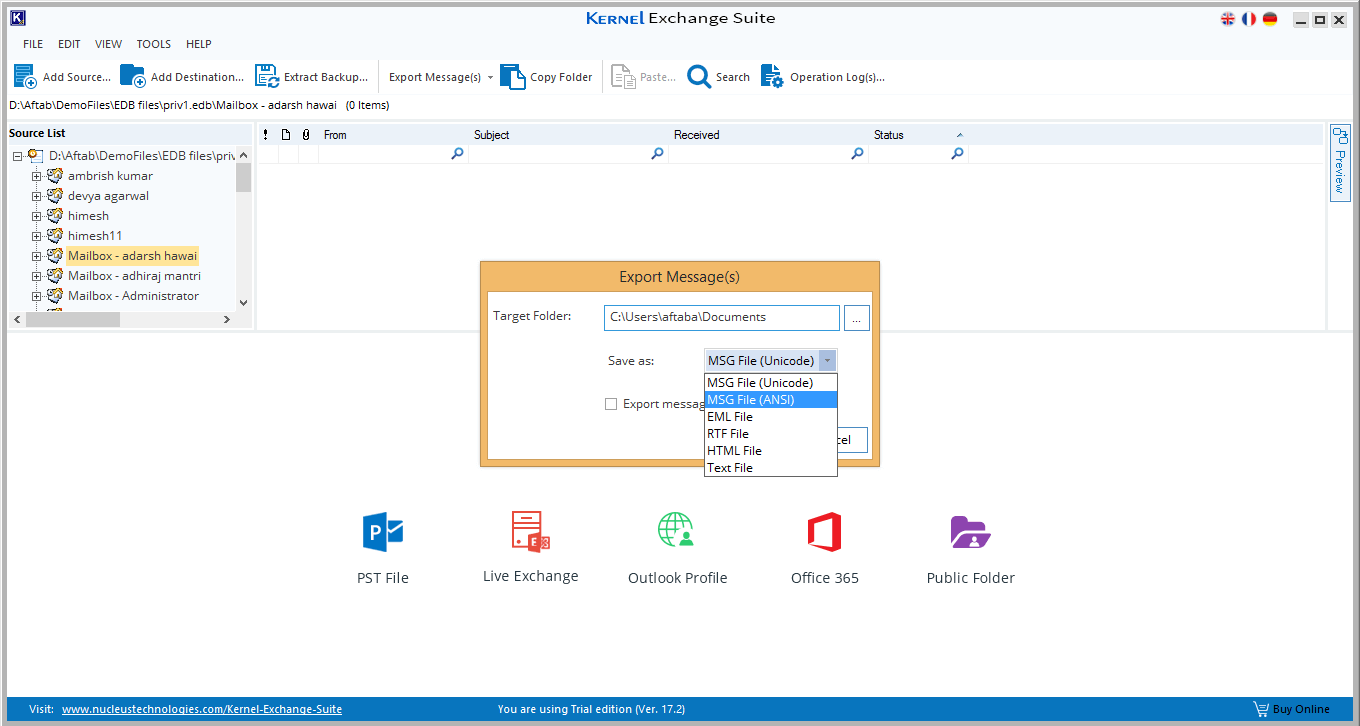
- Select the destination folder, select the desired output format, and click OK.
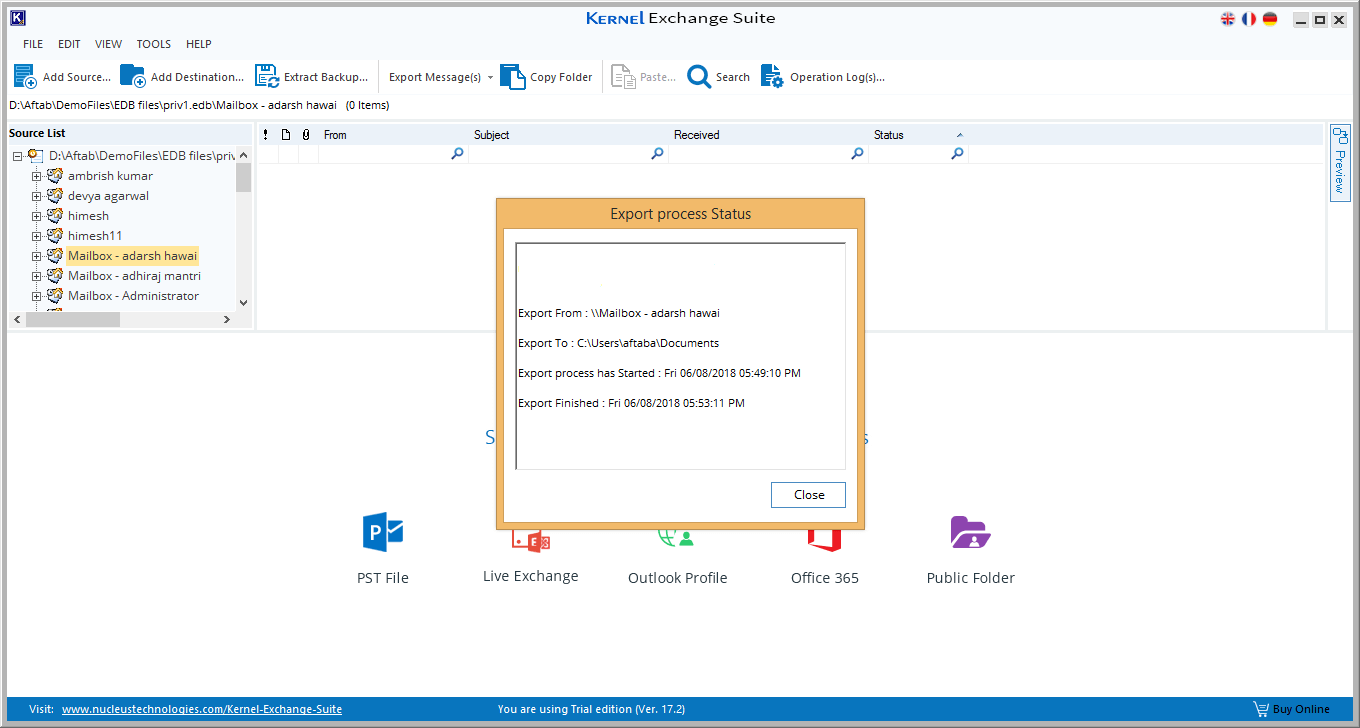
- After successful export, a migration report is displayed with the status of messages.
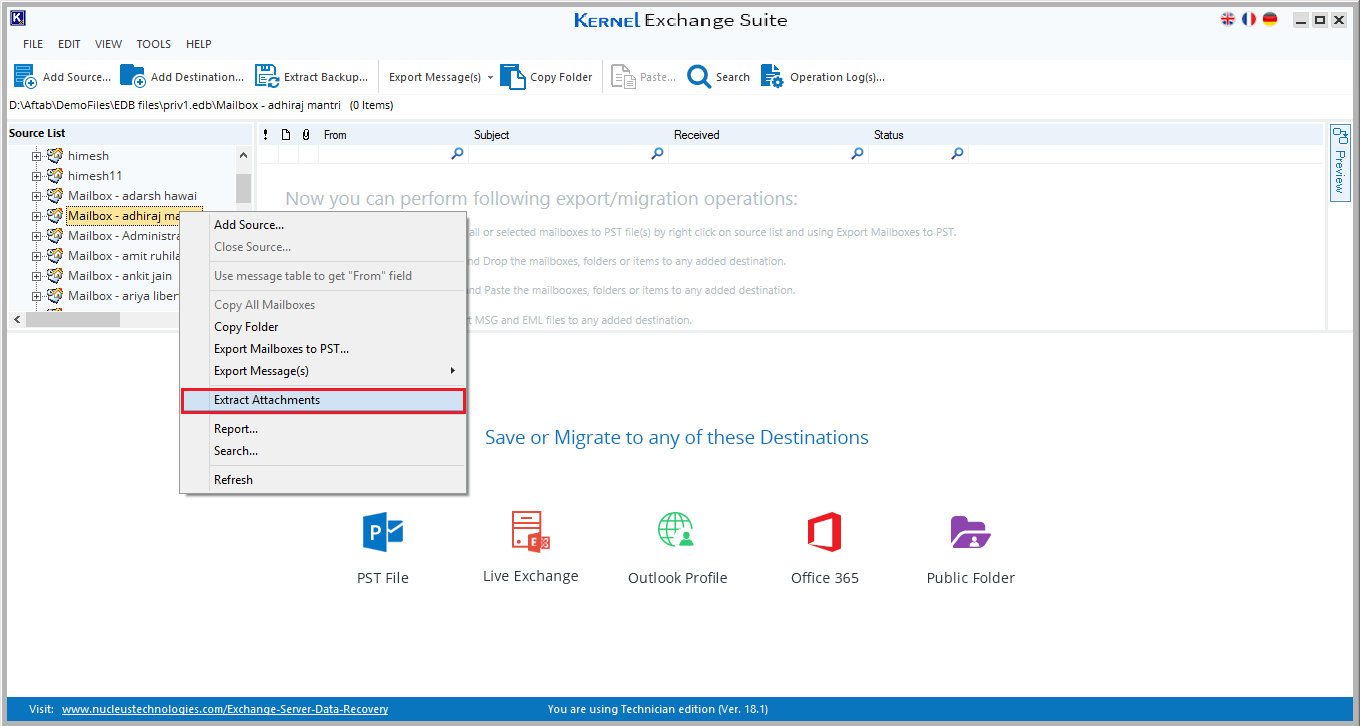
If you want to extract attachments from your emails (without saving the emails), then it is also possible with the Exchange Suite.
- Right-click any mailbox and select Extract Attachments.
- The next step allows you to select or deselect the folders, apply the appropriate filter, and browse a destination for the extracted attachment files.
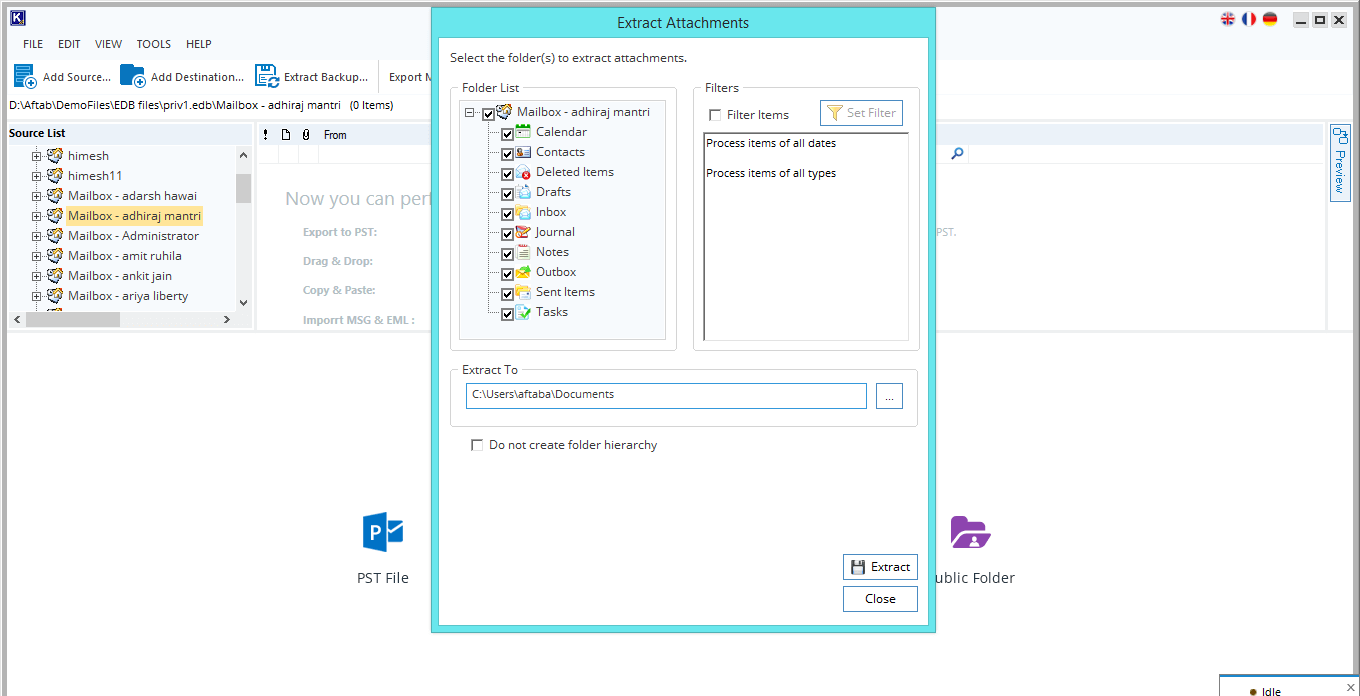
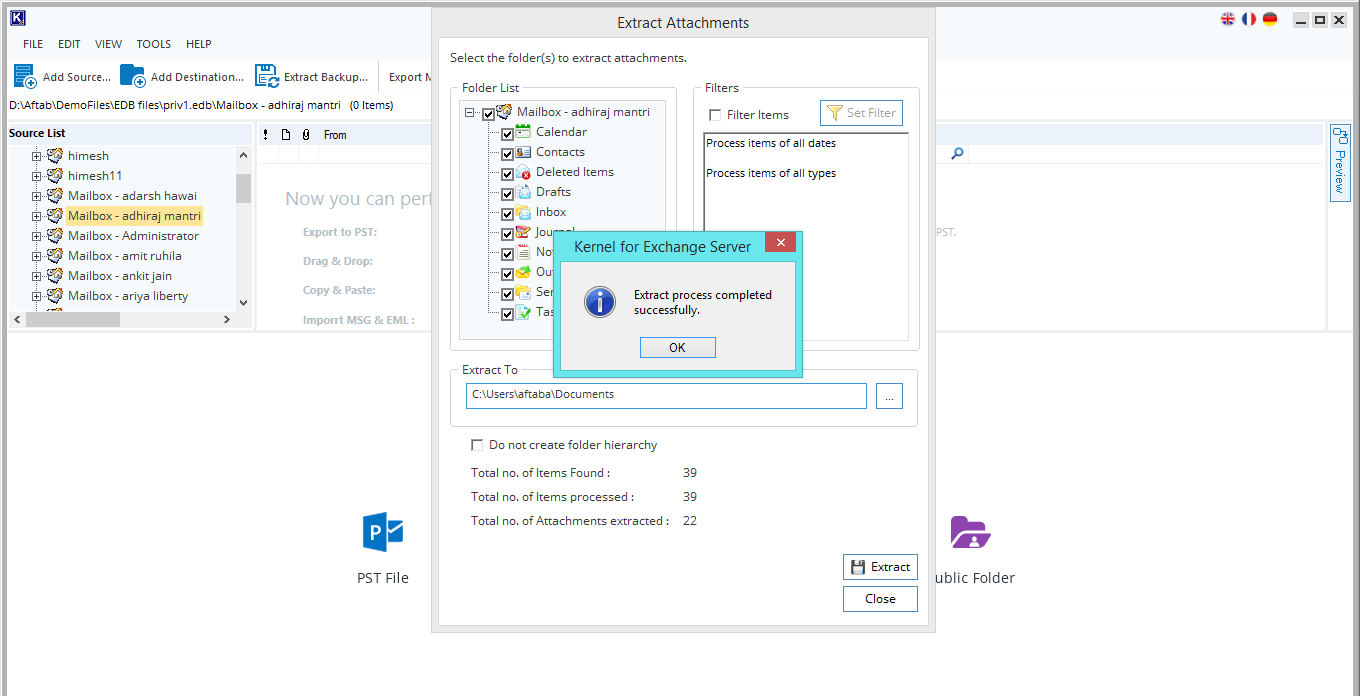
Note: You can also choose to skip creating folder hierarchy. - After attachment extraction, the tool will provide a completion message.
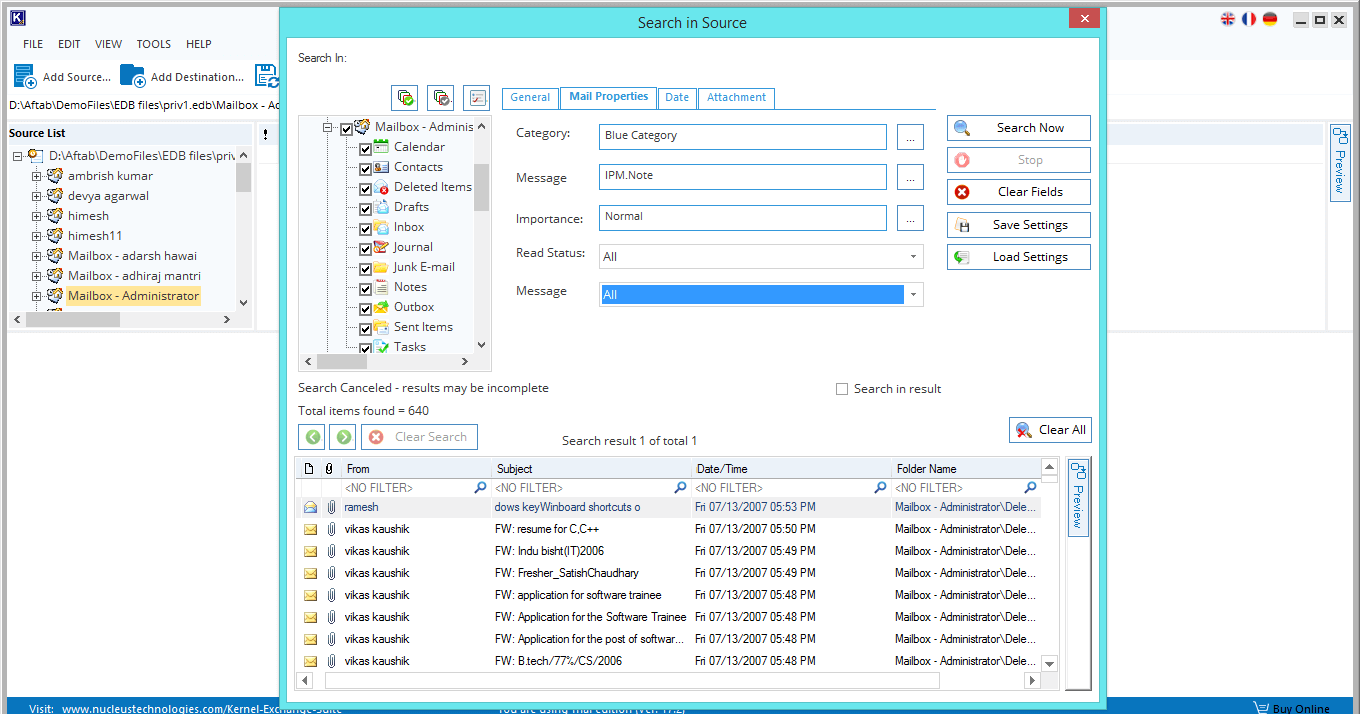
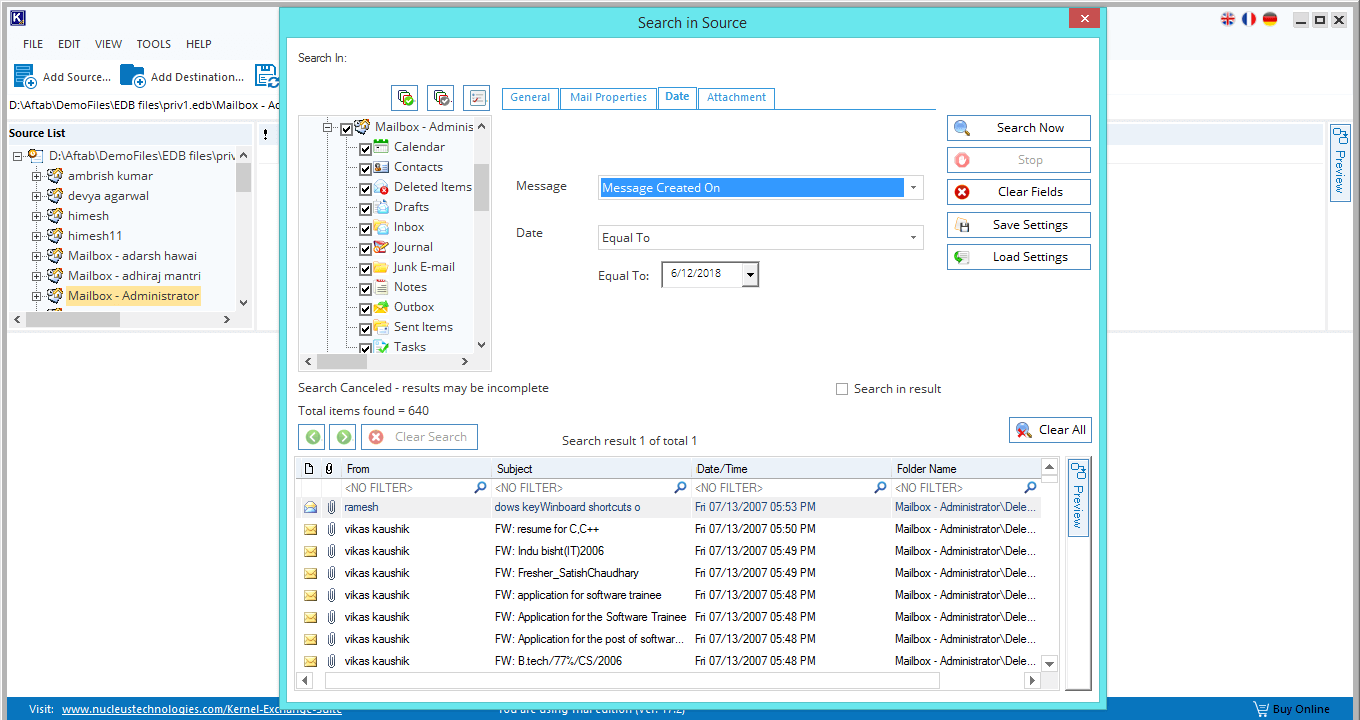
The Search feature helps you to search for specific items based on multiple criteria under the tabs General, Mail Properties, Date, and Attachment. You can set the search parameters to Match All Conditions (AND) or Match Any Condition (OR).
- General
Under the General tab, there are multiple parameters like Message Subject, Message Body, From, To, Cc, Bcc. Input the required information.
- Mail Properties
Under Mail properties, you can search messages based on Category, Message Type, Importance, Read Status, and Message.
Note: You can also choose to skip creating folder hierarchy. - Date
Under Date, you can search for messages based on Message Created On, Message Submitted On, Message Delivered On, and Message Modified On. The available Date filter setting are Equal To, Not Equal To, Less Than, Greater Than, and Between.
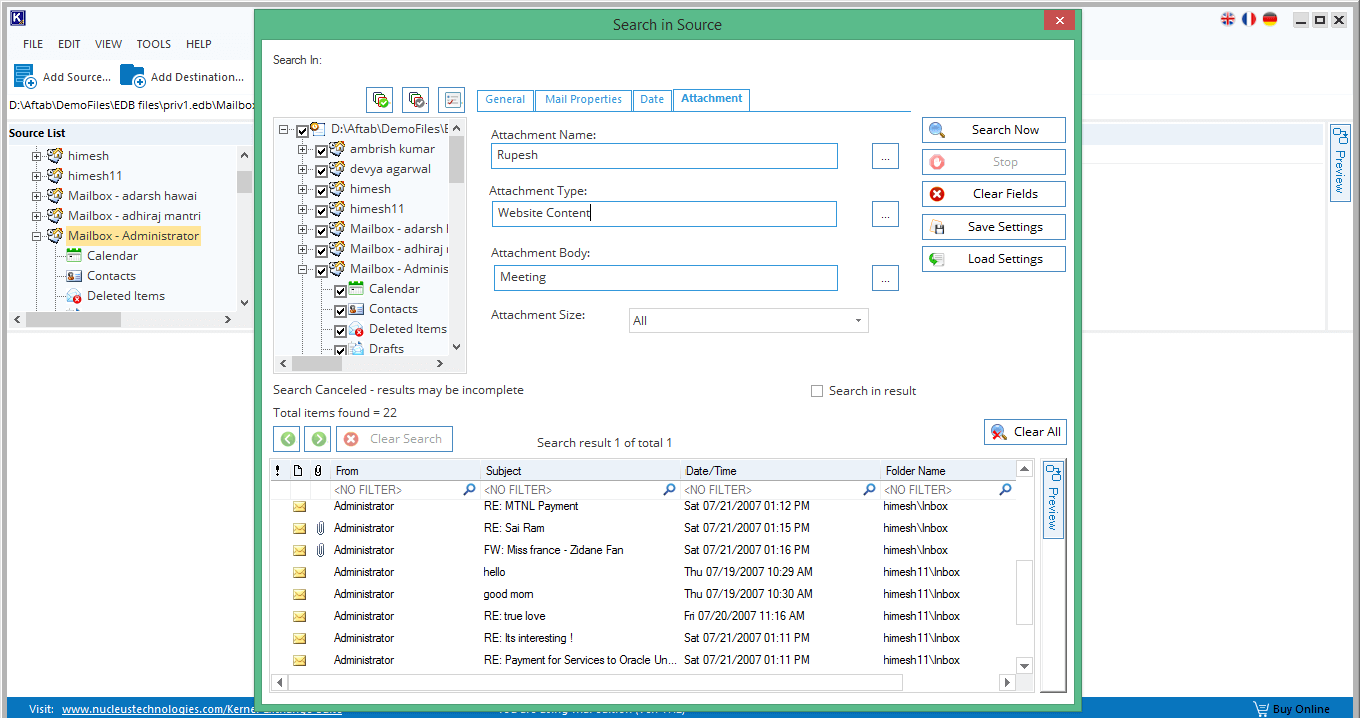
- Attachment
If you want to search a message based on an attachment, then you can do it based on different parameters like Attachment Name, Attachment Type, Attachment Body, and Attachment Size.
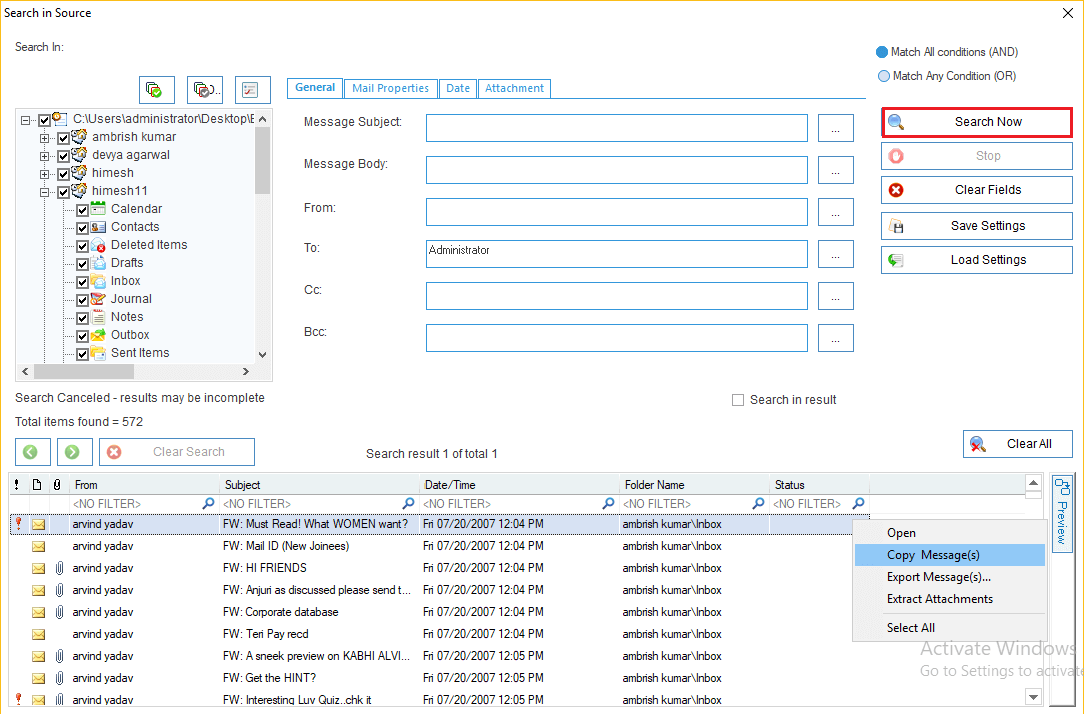
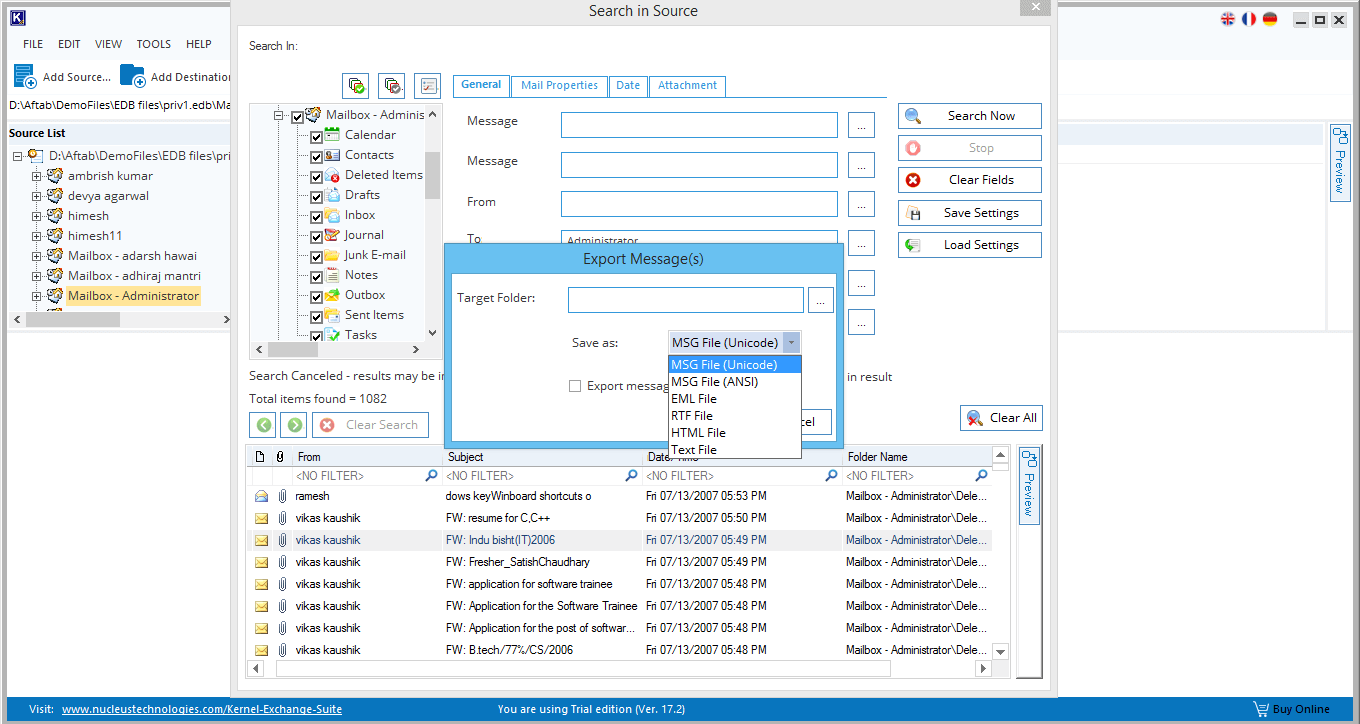
After setting all the parameters as required, click Search Now. After the search, the messages meeting the specified criteria will be listed in the bottom pane. You can perform the following actions: - Export Message(s)
With this option, you can choose to directly export messages to multiple file formats like MSG (Unicode), MSG (ANSI), EML, RTF, HTML, and Text.
- Copy Message(s)
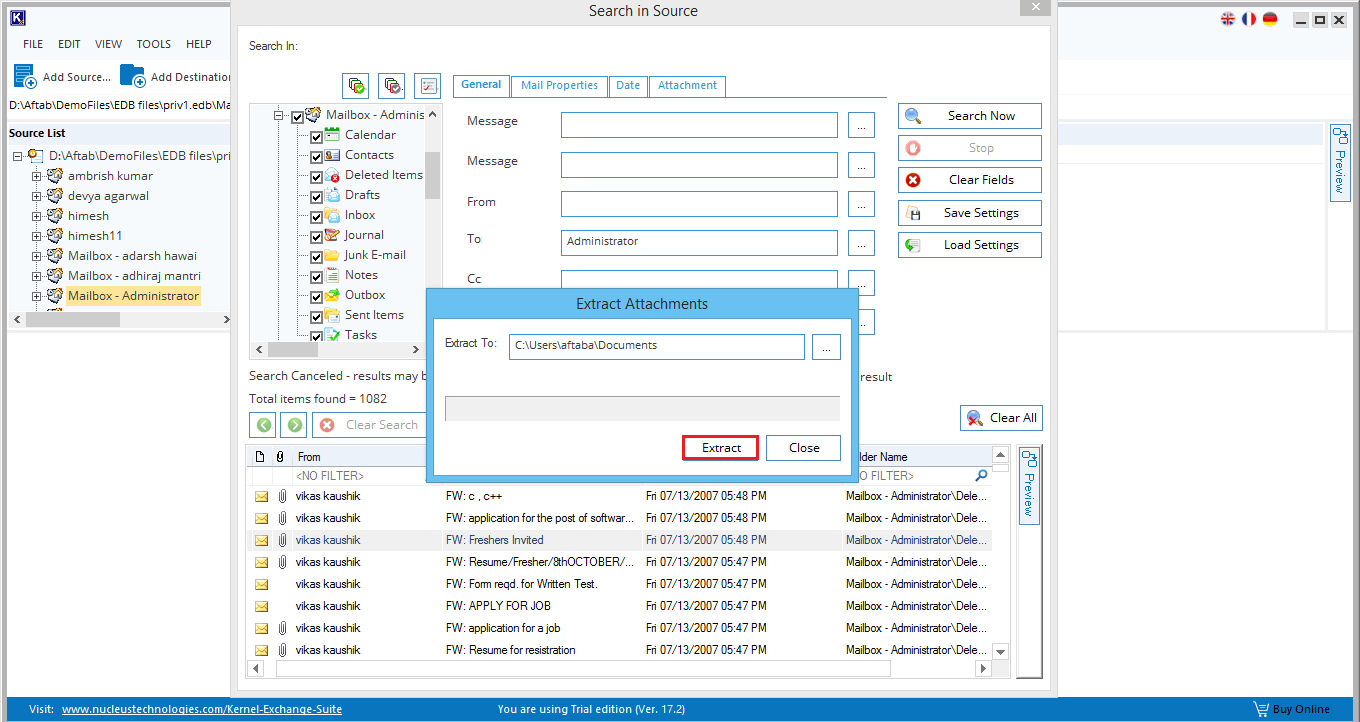
You can copy the messages and paste them to the desired location. - Extract Attachments
Using the Extract Attachments option, you can directly save attachments (excluding the email messages).
(New PST, existing PST, live Exchange, Outlook profile, Office 365, public folder)
Exchange Suite helps you recover and export mailbox data (from a source) to various destinations. For this, you should add the required destination (after adding the source).
- Run the application and click PST file in the destination panel.
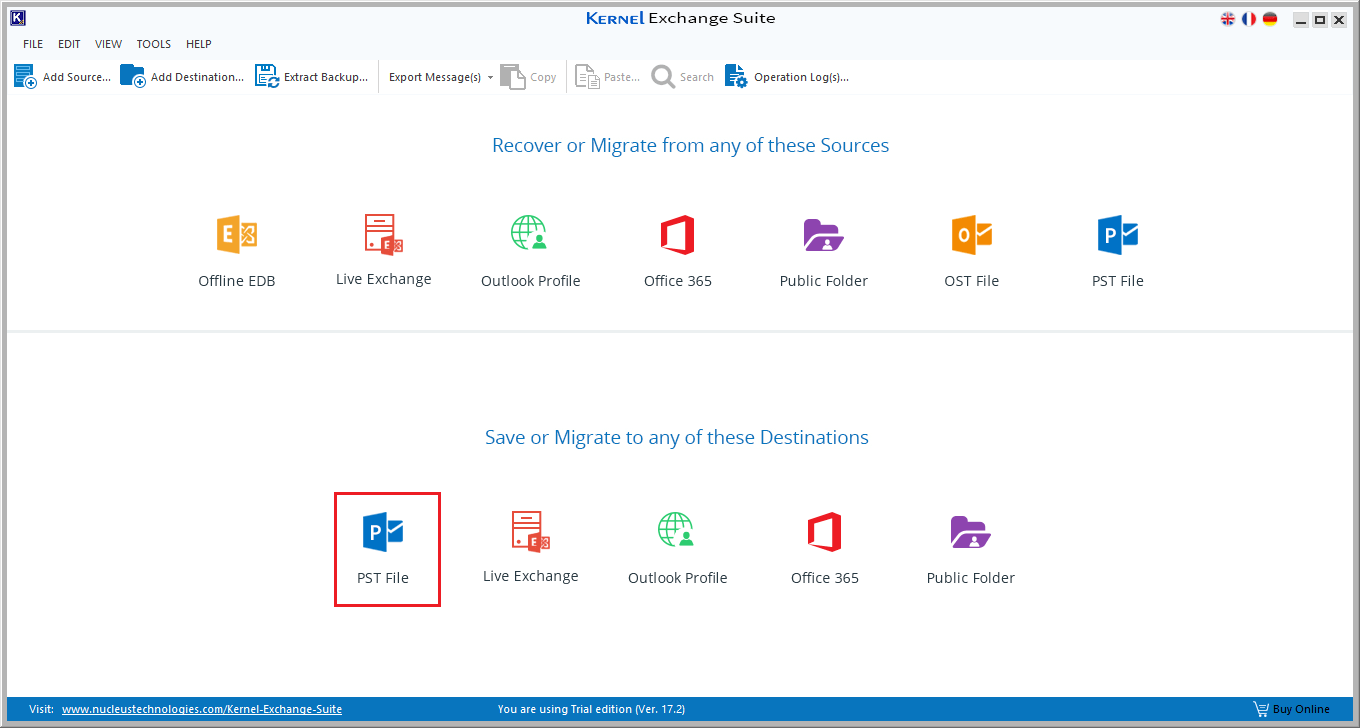
- Choose among the first two options to select whether you want to create a new PST file or migrate to an existing one.
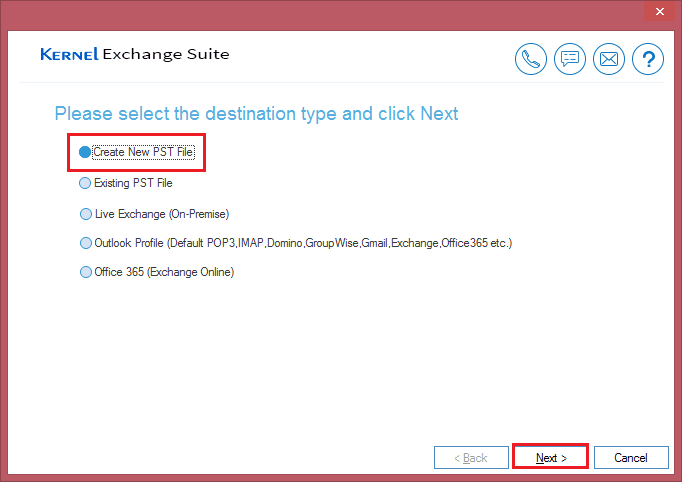
- Fill the required information and click Next.
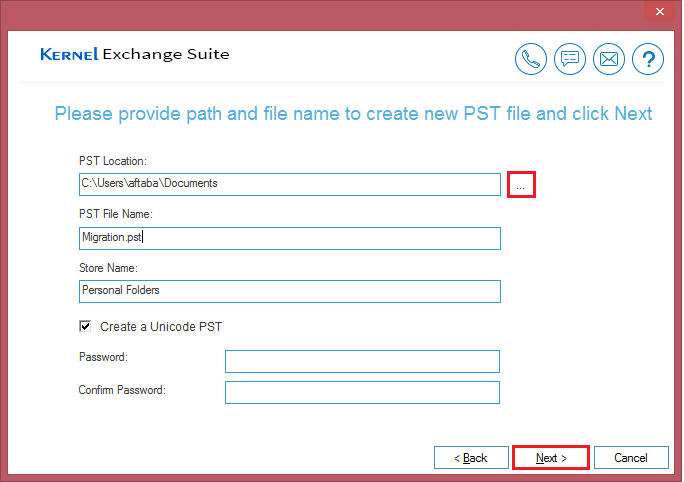
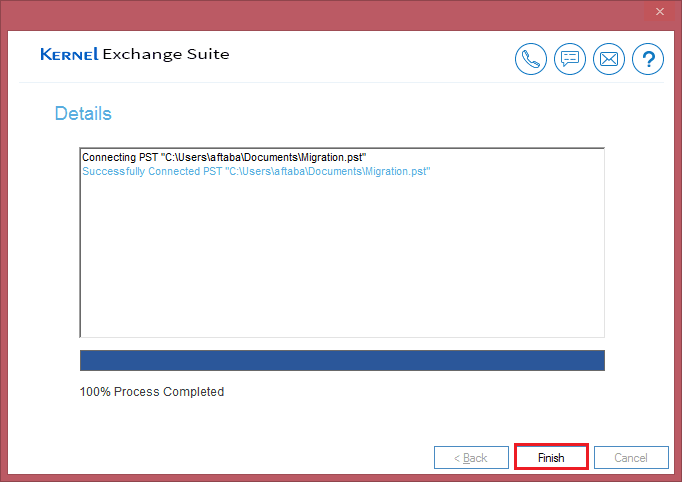
Note: You can protect the newly created PST file with a password, if required. - The PST file is successfully added as a destination.
- Run the application and click Live Exchange in the destination pane.
- Click Live Exchange (On-Premise) and click Next.
- Choose the required option and provide the login credentials.
- After checking the credentials, the tool will establish the connection and set the exchange account as the destination.
- Run the application and click Outlook Profile in the destination panel.
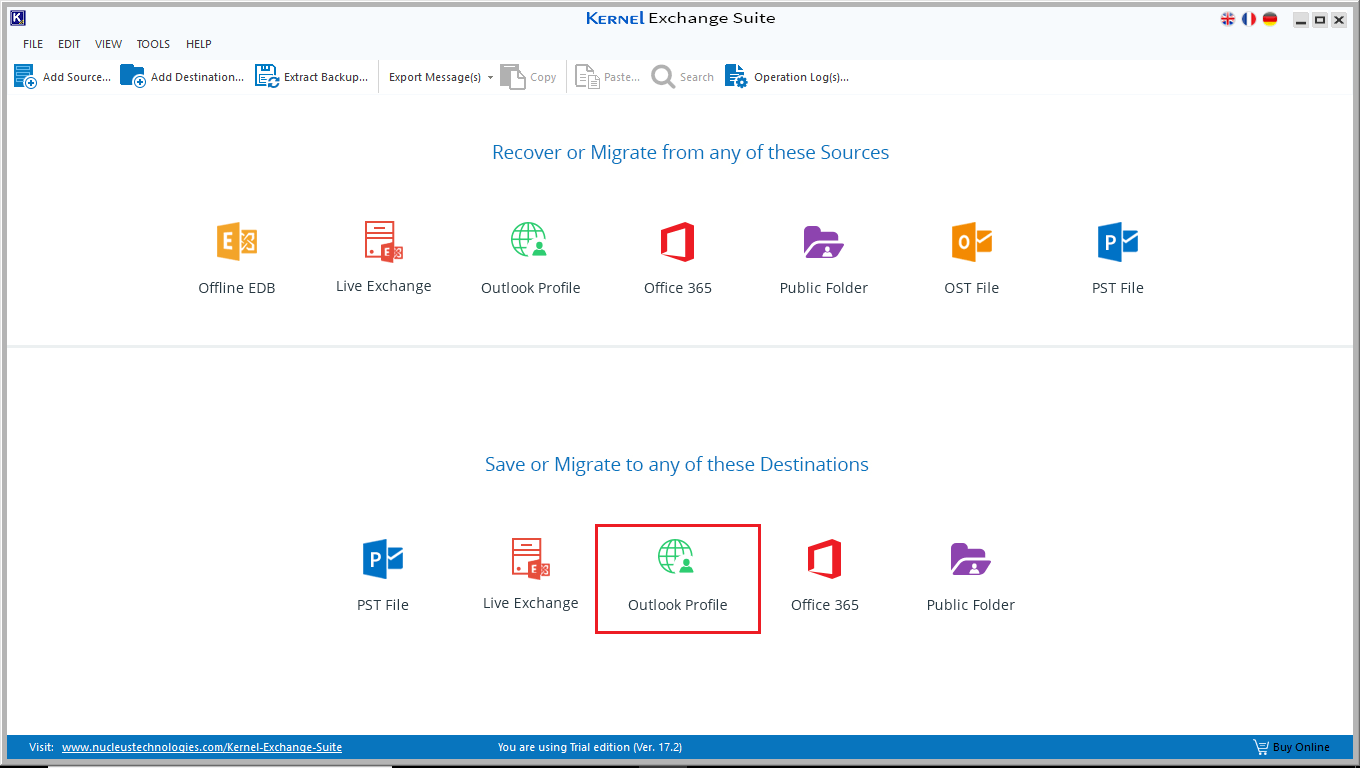
- Select Outlook profile and click Next.
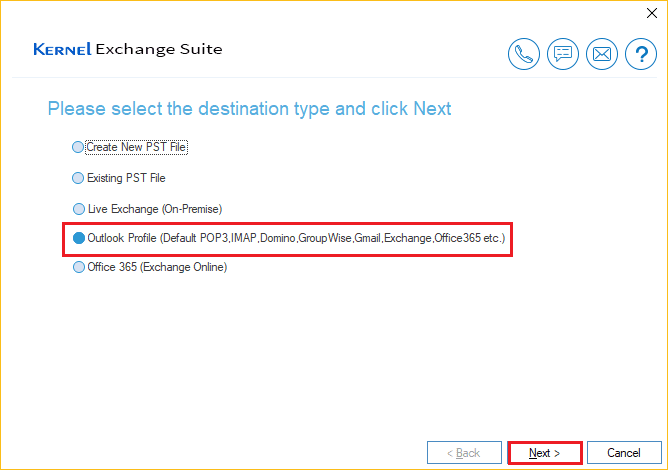
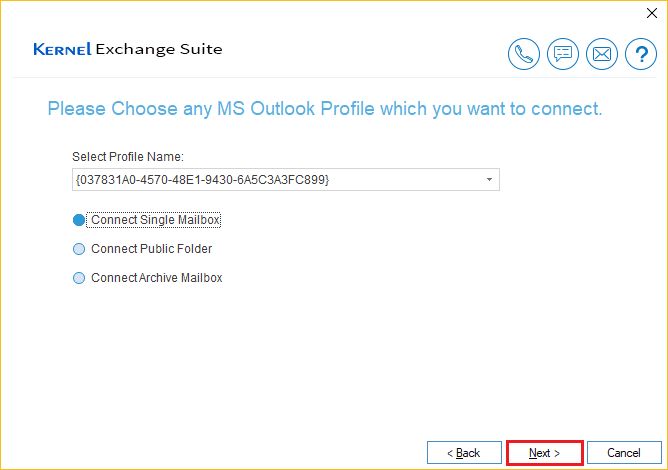
- Select the profile where you want to save the migrated data and choose among the desired option. Finally, click Next.
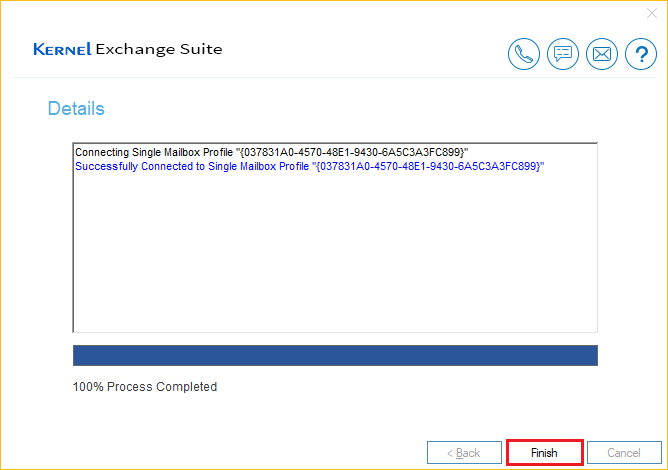
- The tool will verify the profile and add it as the destination.
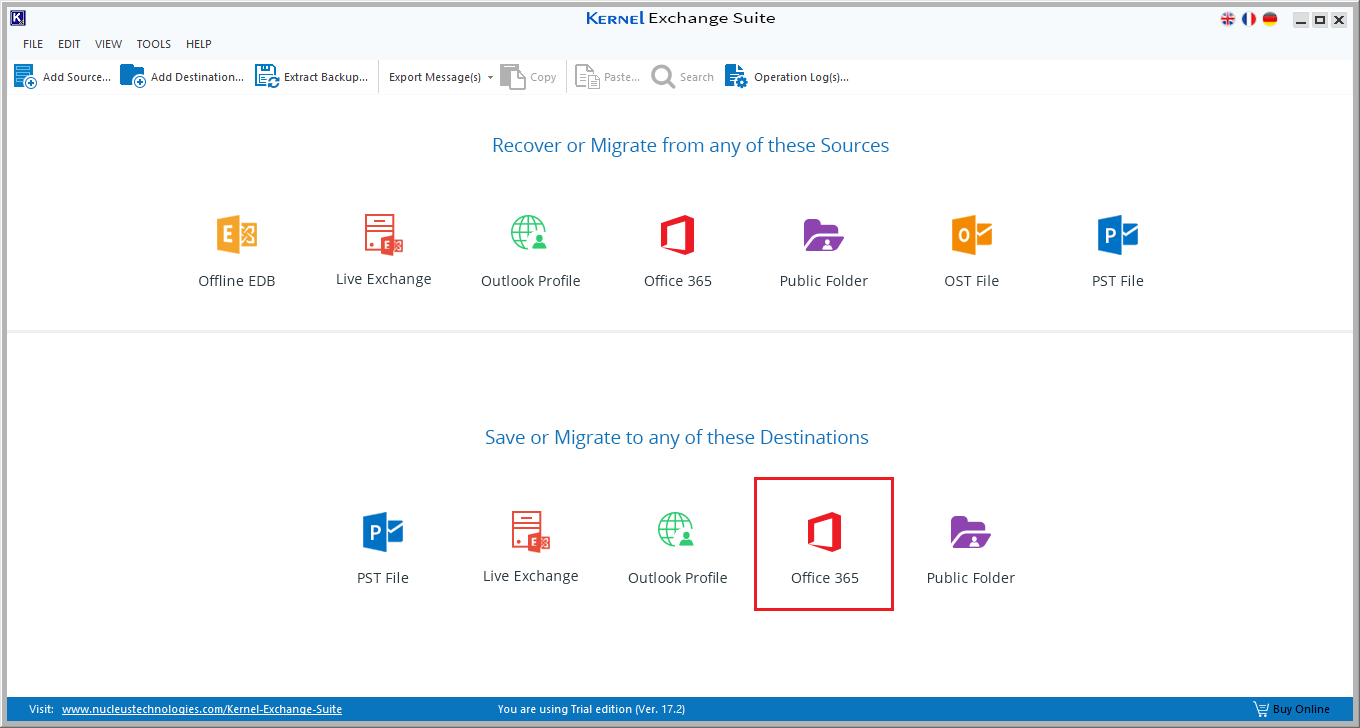
- Run the application and click Office 365 in the destination pane.
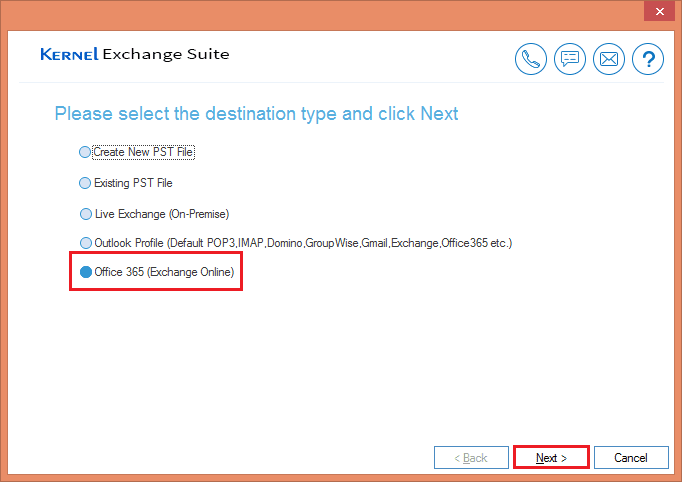
- Select Office 365 (Exchange Online) and click Next.
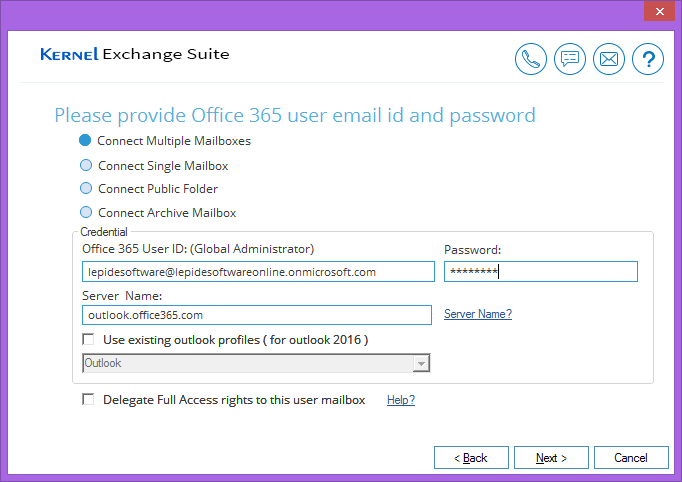
- Choose the desired option and input the credentials and click Next.
- The Office 365 account gets added as the destination of the migration.

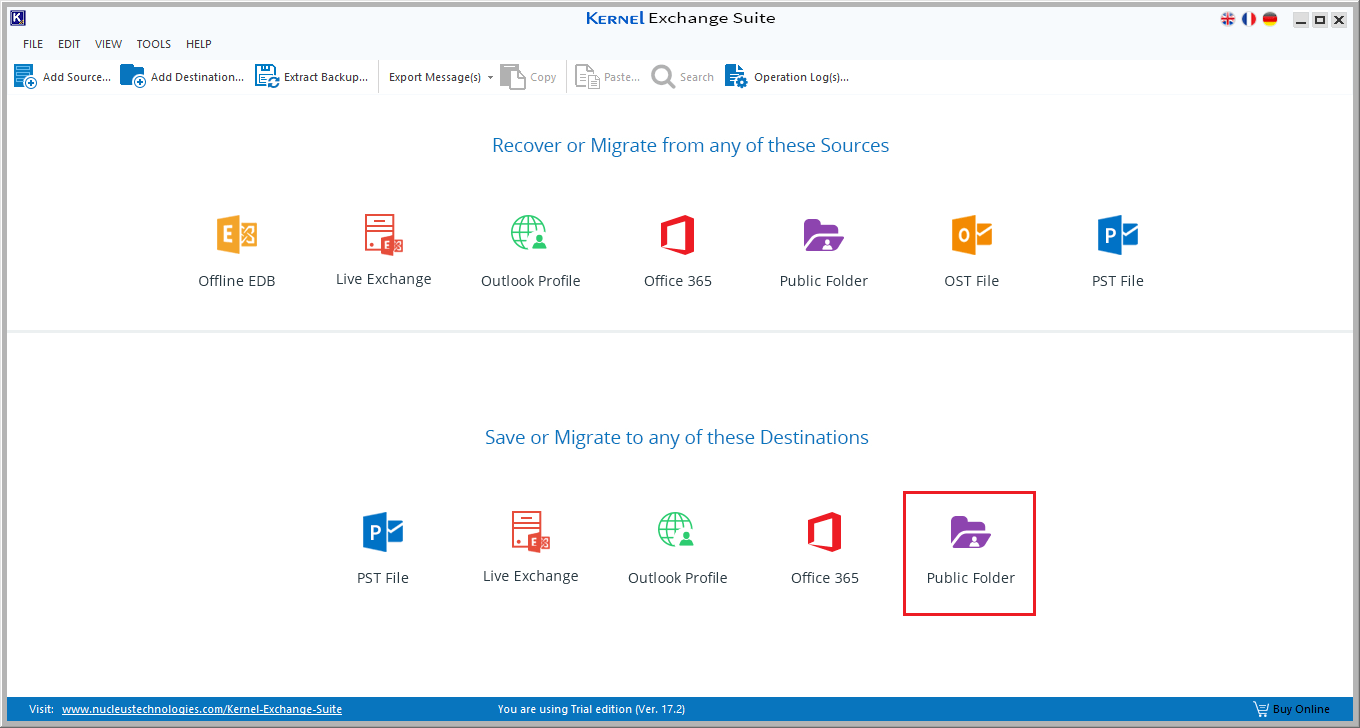
- Run application and click Public Folder in the Destination pane.
- Select Live Exchange (On-Premise) and click Next.
- Select the third option - Connect Public Folder. Then Input Exchange Server name or IP, and mailbox name. Select desired options and click Next.

- Software will ask to input the exchange account credentials.
- As soon as the connection is established, the tool will provide a confirmation that the account has been connected.

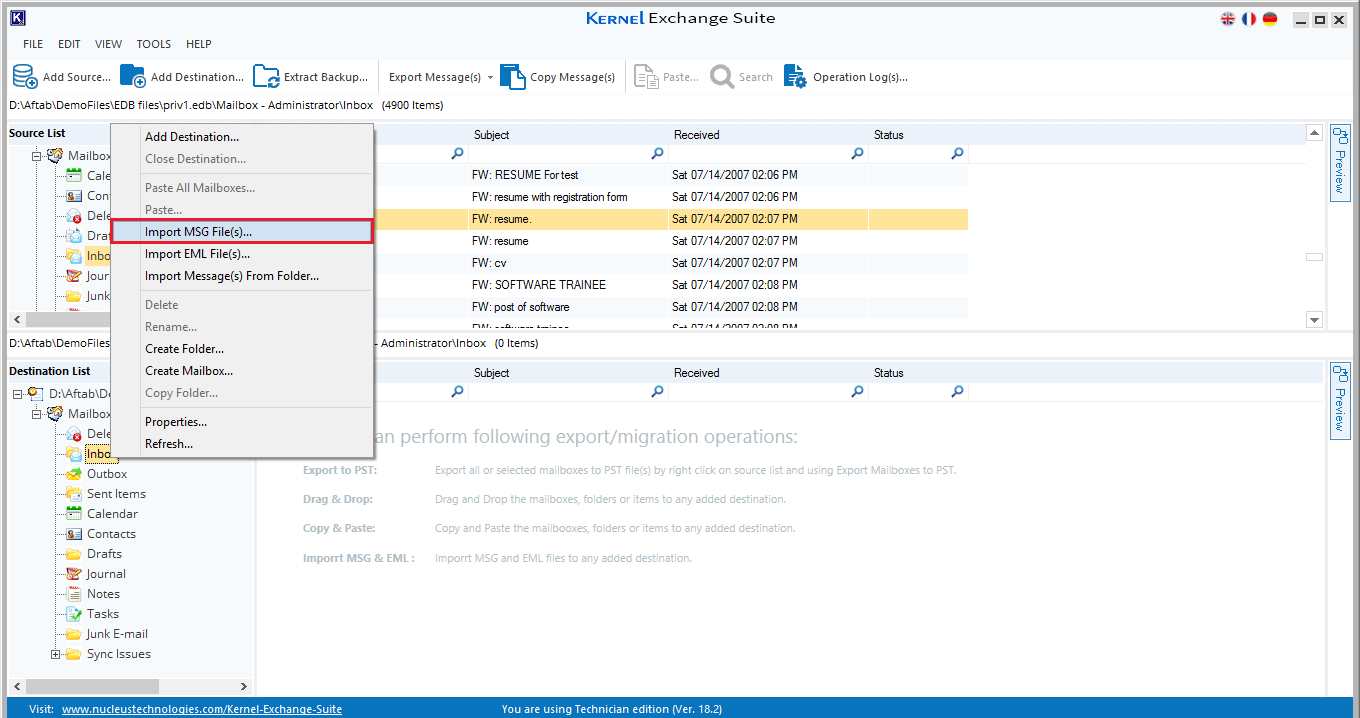
After adding the destination, you can perform following actions as well. These actions will help you import emails from the system to a New PST file, existing PST file, live Exchange, Outlook profile, Office 365, or public folder (after adding it as destination in the tool).
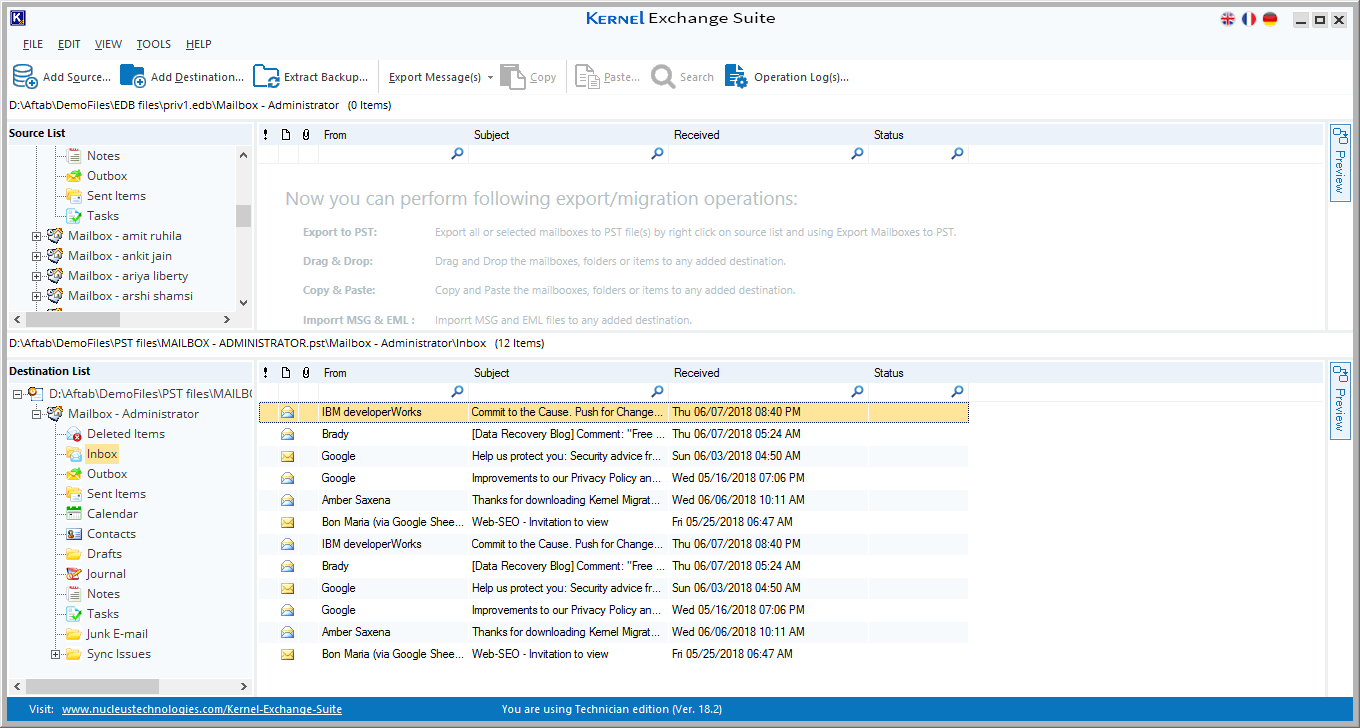
- In the destination, right-click on any folder and select Import MSG File(s).
- Browse to the location, select MSG files, and click Open.

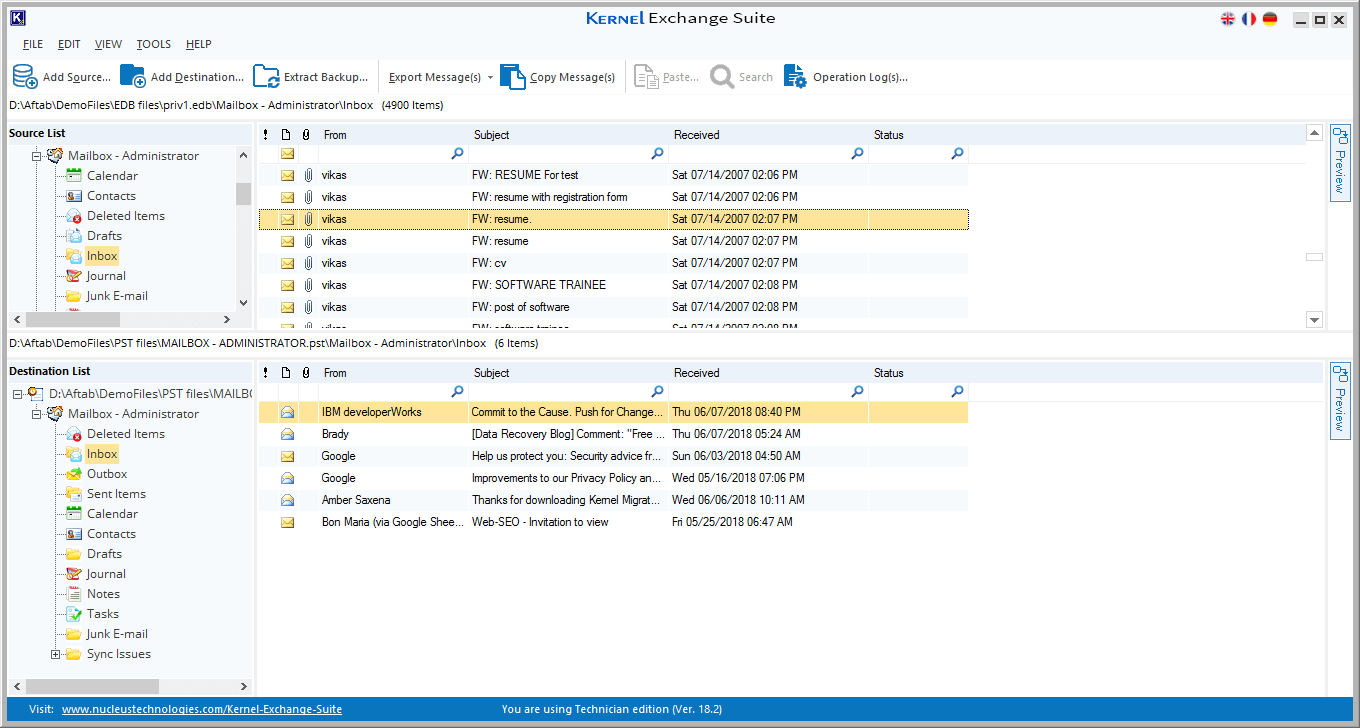
- After importing all the files, the tool will ask to refresh the list. Click Yes.

- The MSG files are successfully imported to the destination folder.
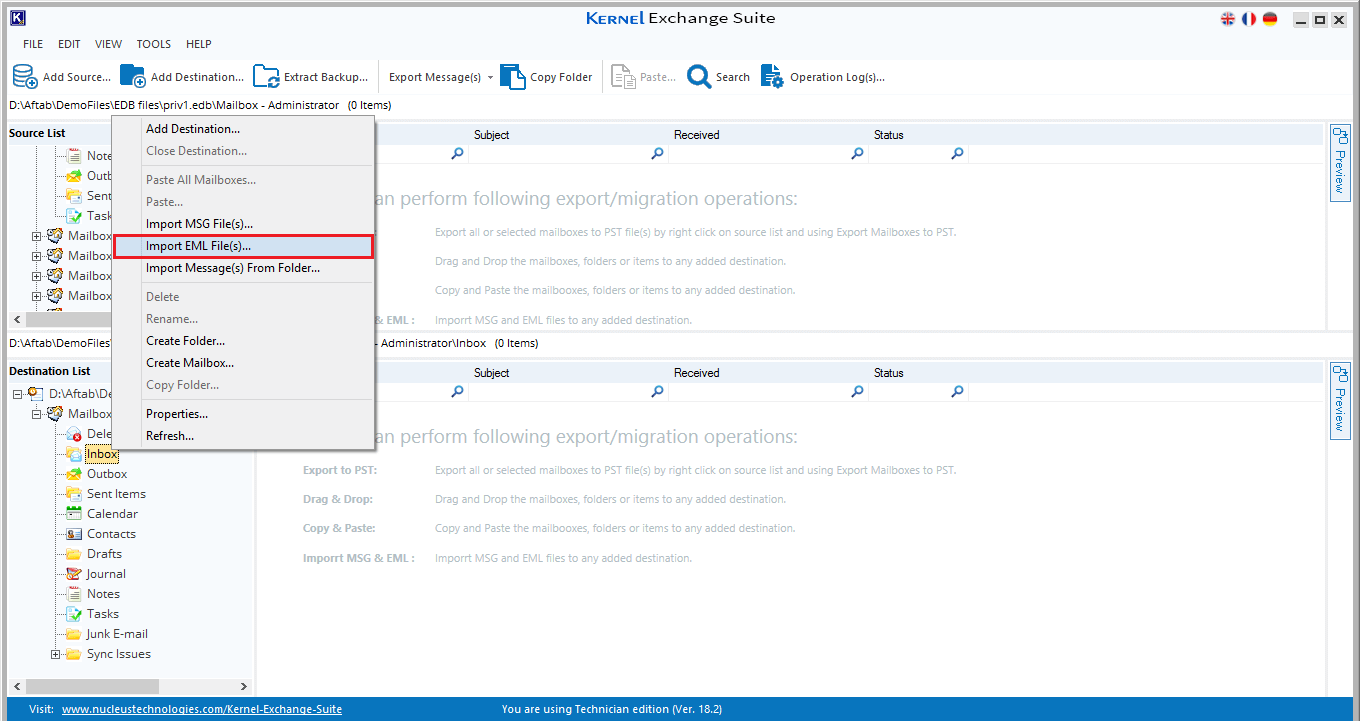
- Select any destination folder, right-click on it, and select Import EML File(s).
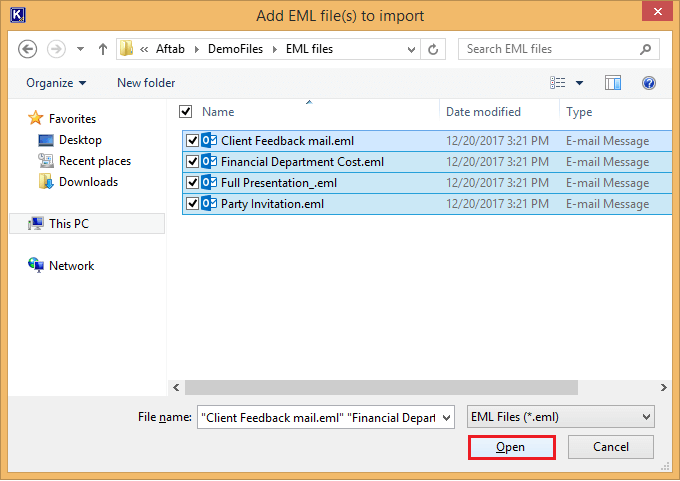
- Browse to the location, select the EML files, and click Open.
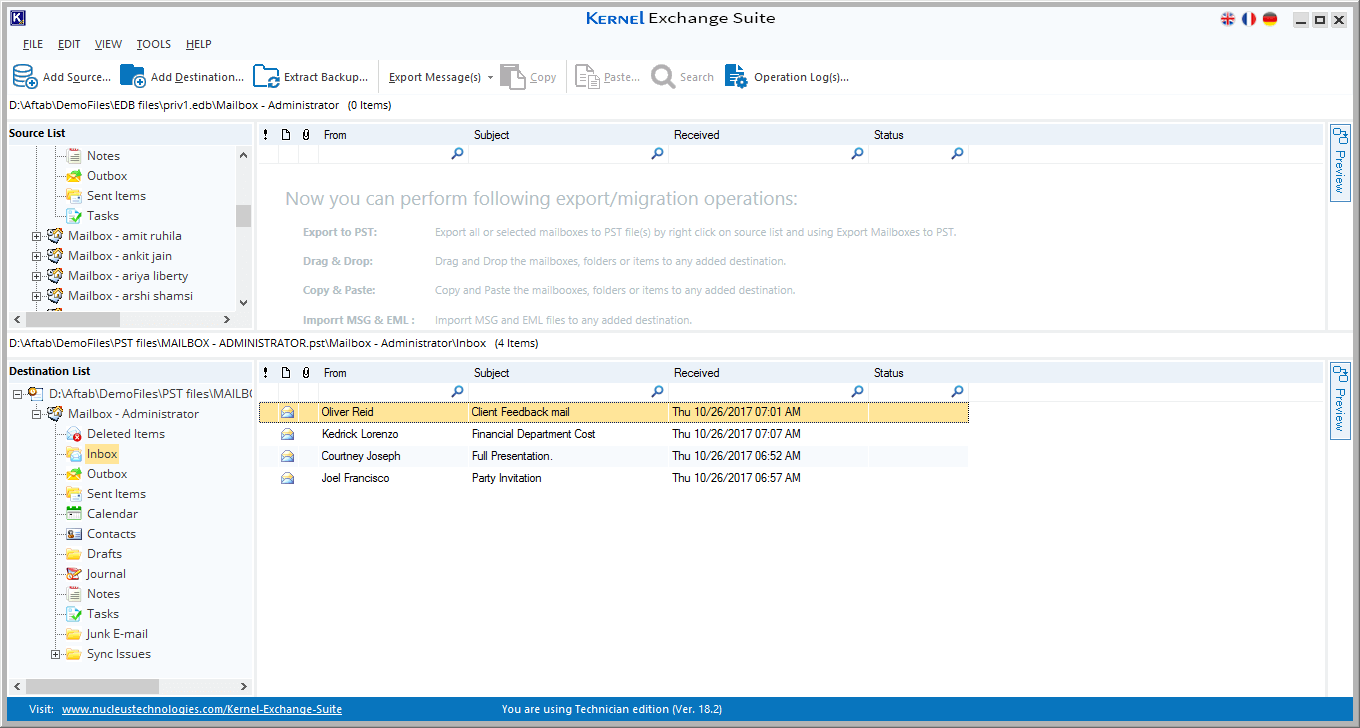
- After importing messages, the software will ask to refresh the list. Click Yes.

- The EML files are added to the destination.
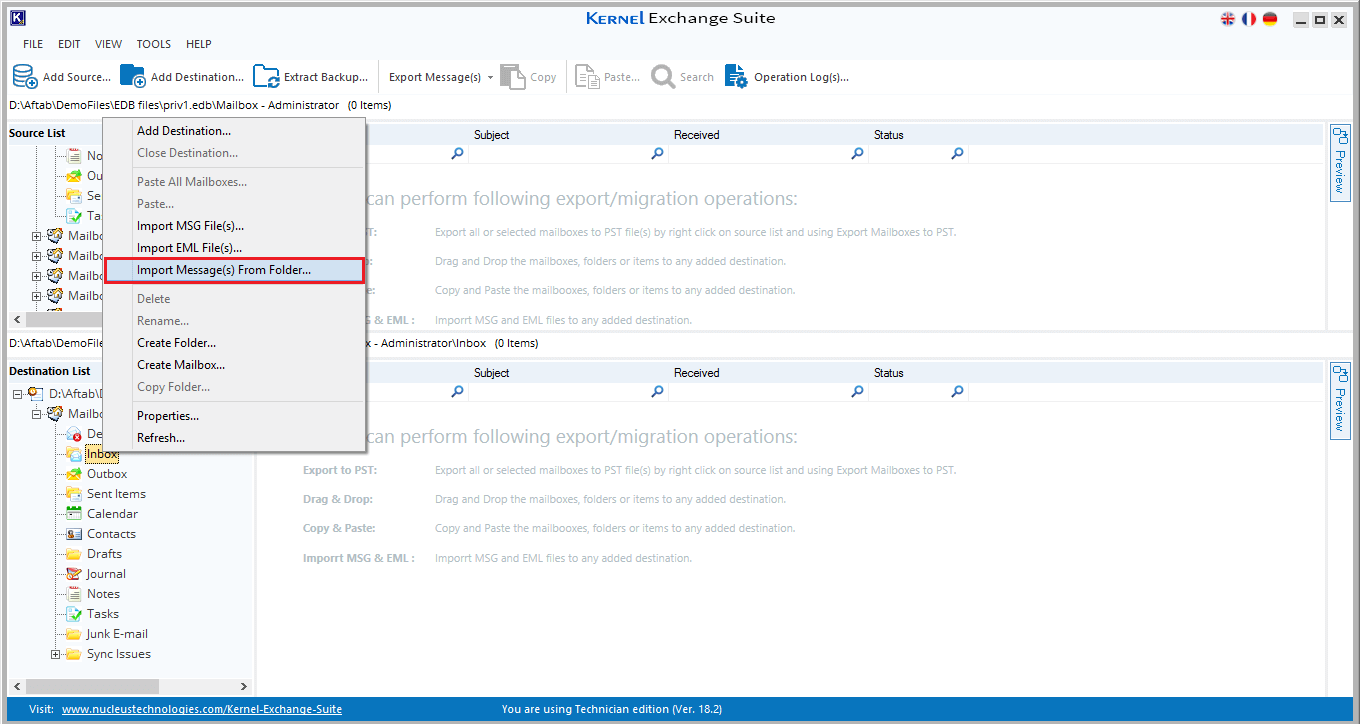
- Right-click in the destination folder and select Import Message from Folder(s).
- Browse and select the folder where desired messages are residing. Then click OK.
- Click Yes to refresh the list after the tool has imported the files.

- Now, the messages from the folder are added to the destination folder.
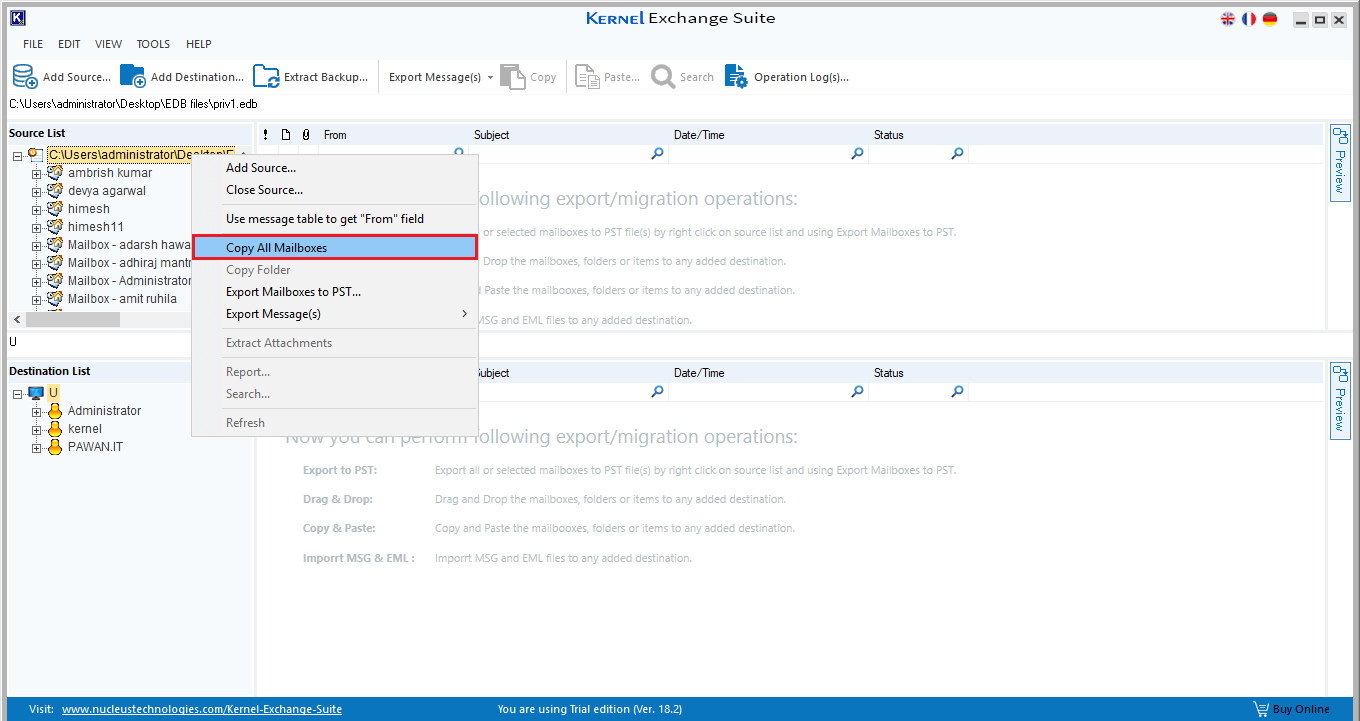
This method is suitable for the migration of multiple mailboxes from EDB file, live Exchange, or Office 365 to live Exchange or Office 365.
- Right-click at the root node of the source and select the option Copy All Mailboxes.
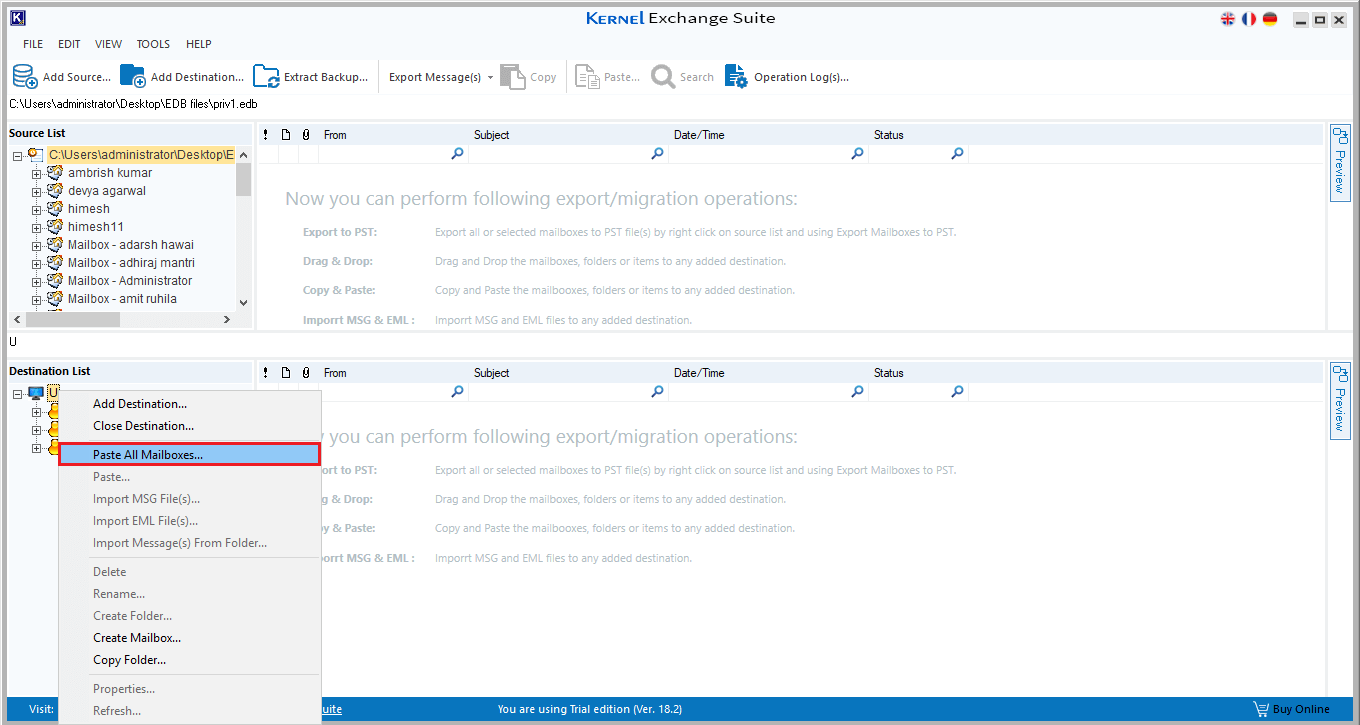
- Go to destination panel, right-click and select Paste All mailboxes from the list.
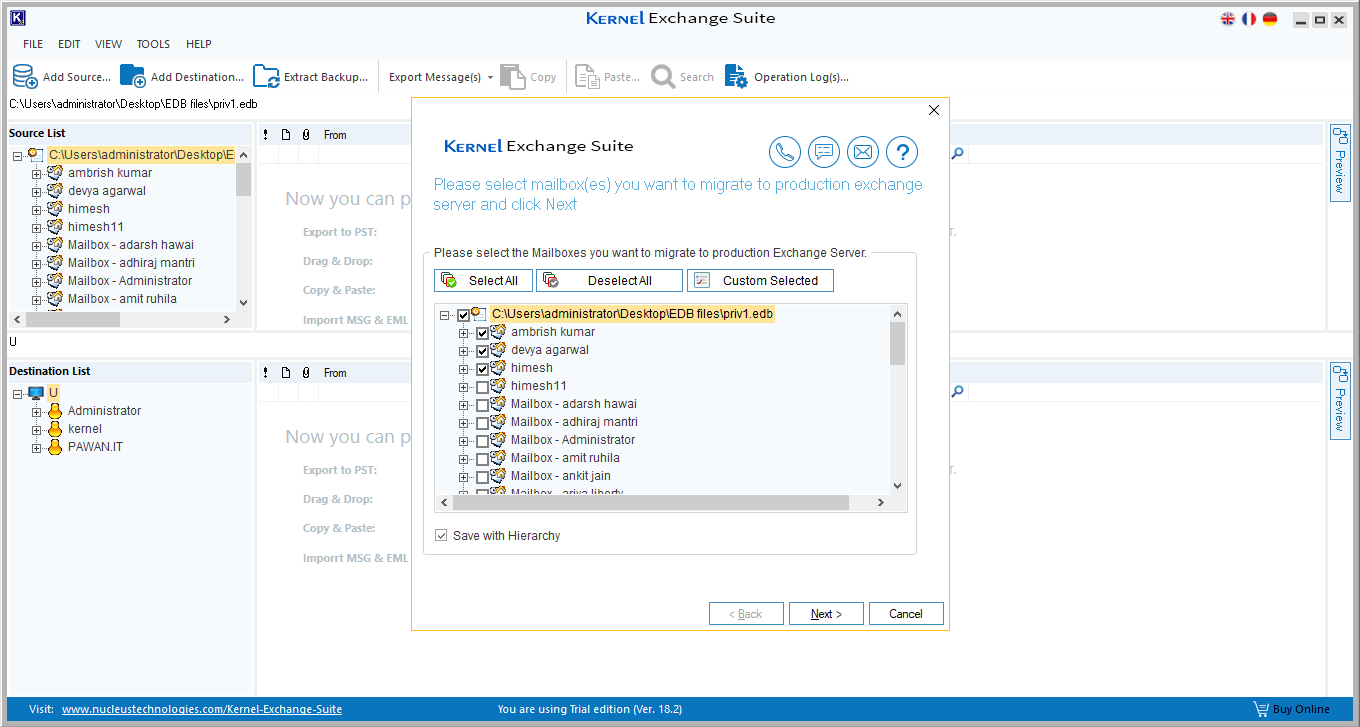
- Select or de-select mailboxes as per requirement. You can also choose to customize your selection and check the box to Save with Hierarchy.
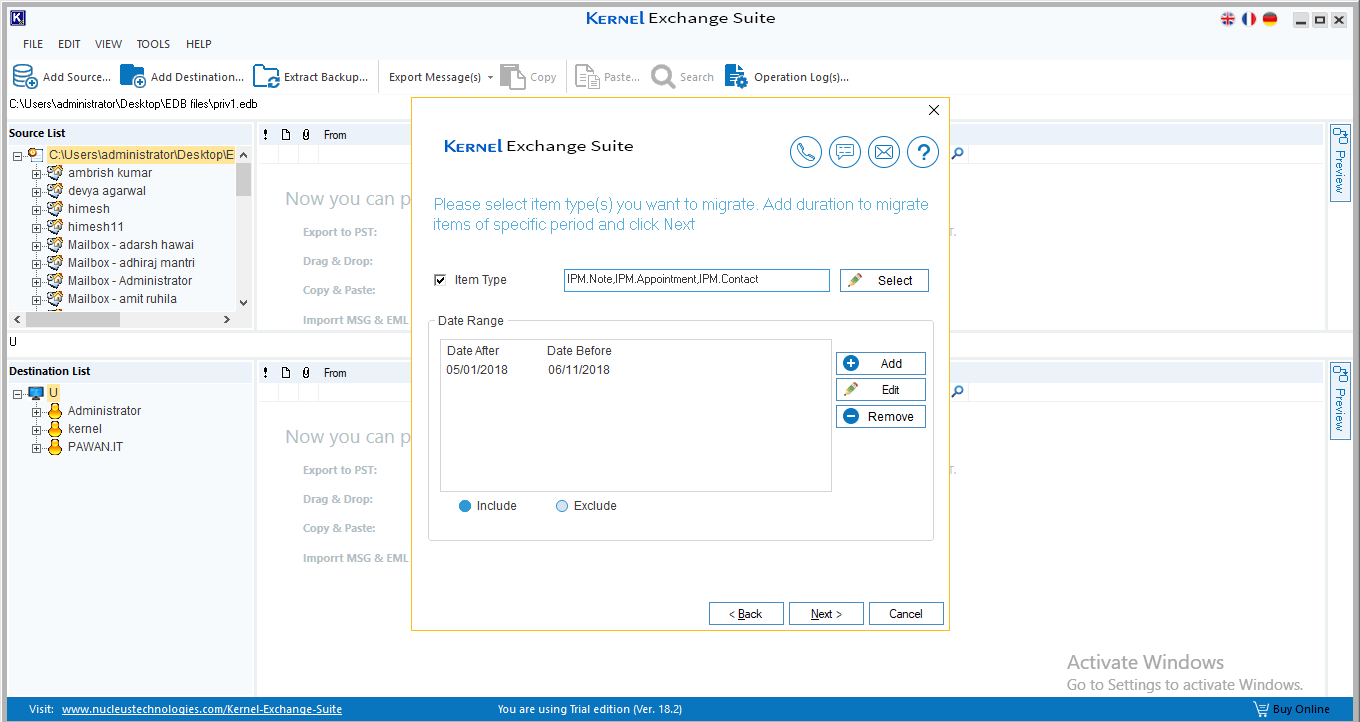
- Apply the appropriate filters to Include or Exclude items based on Item type and Date Range.
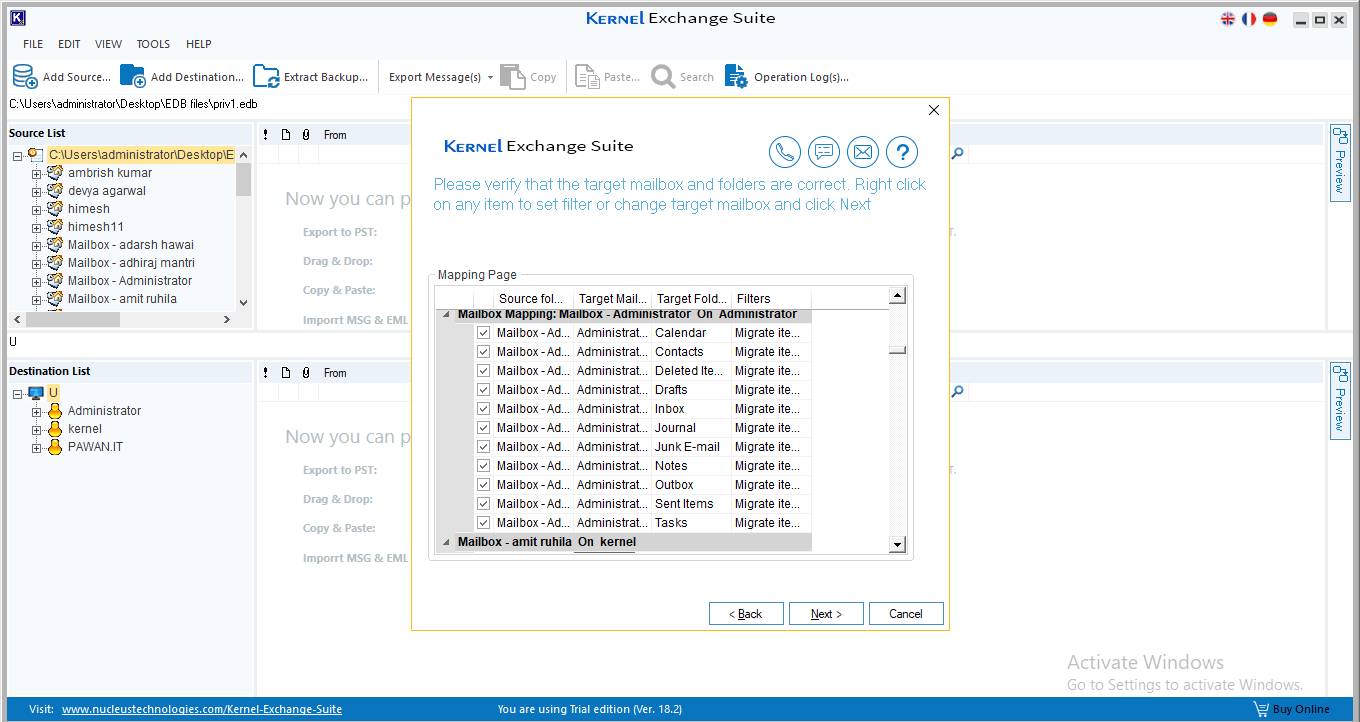
- Here, you can manually map each source mailbox account to a destination mailbox.
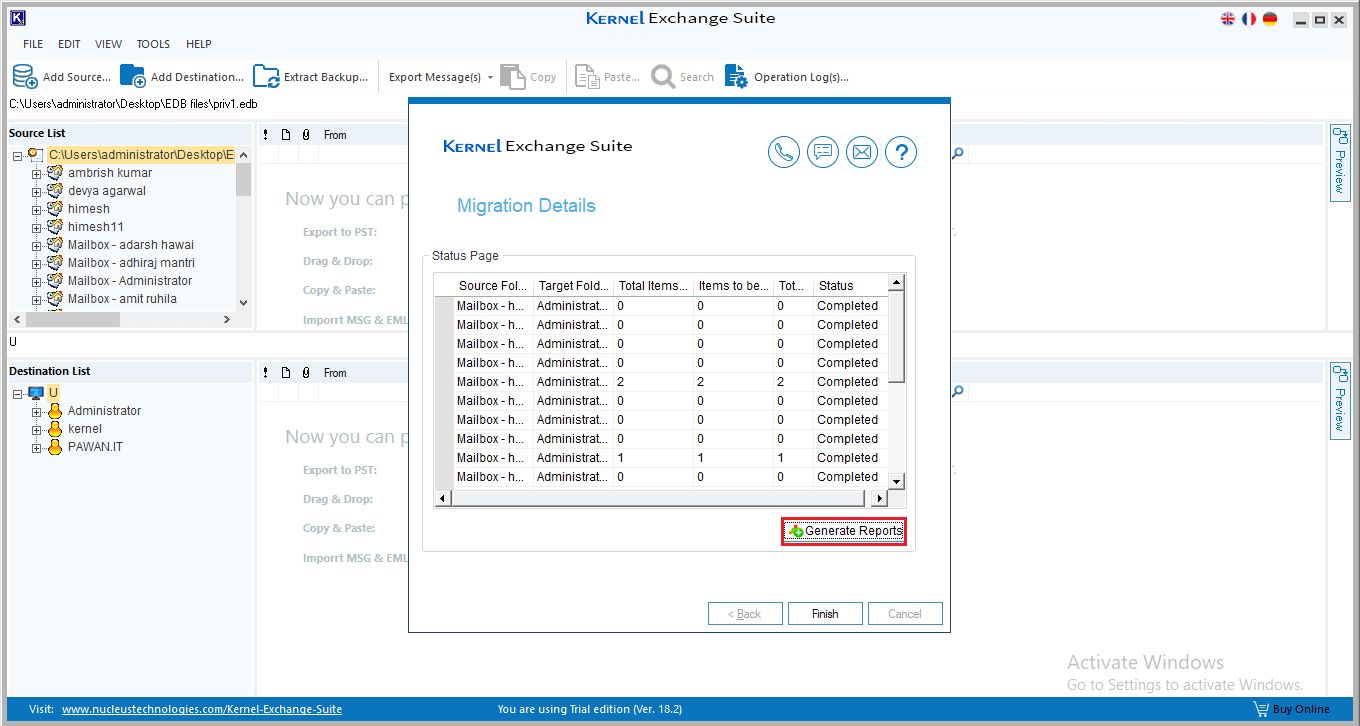
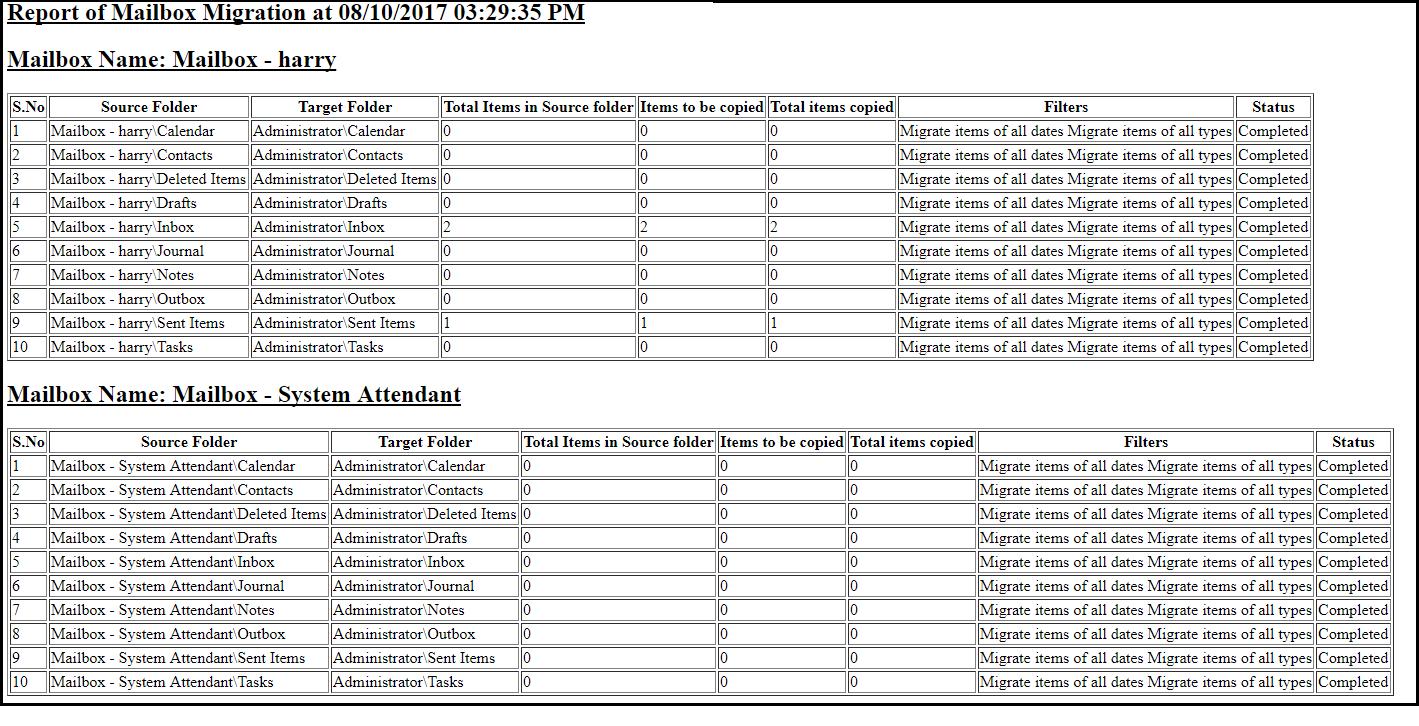
- After the migration, the tool provides a complete status report. You can also save the report in HTML format by clicking the Generate Reports button.
- After saving the report at the desired location, you can view the report.
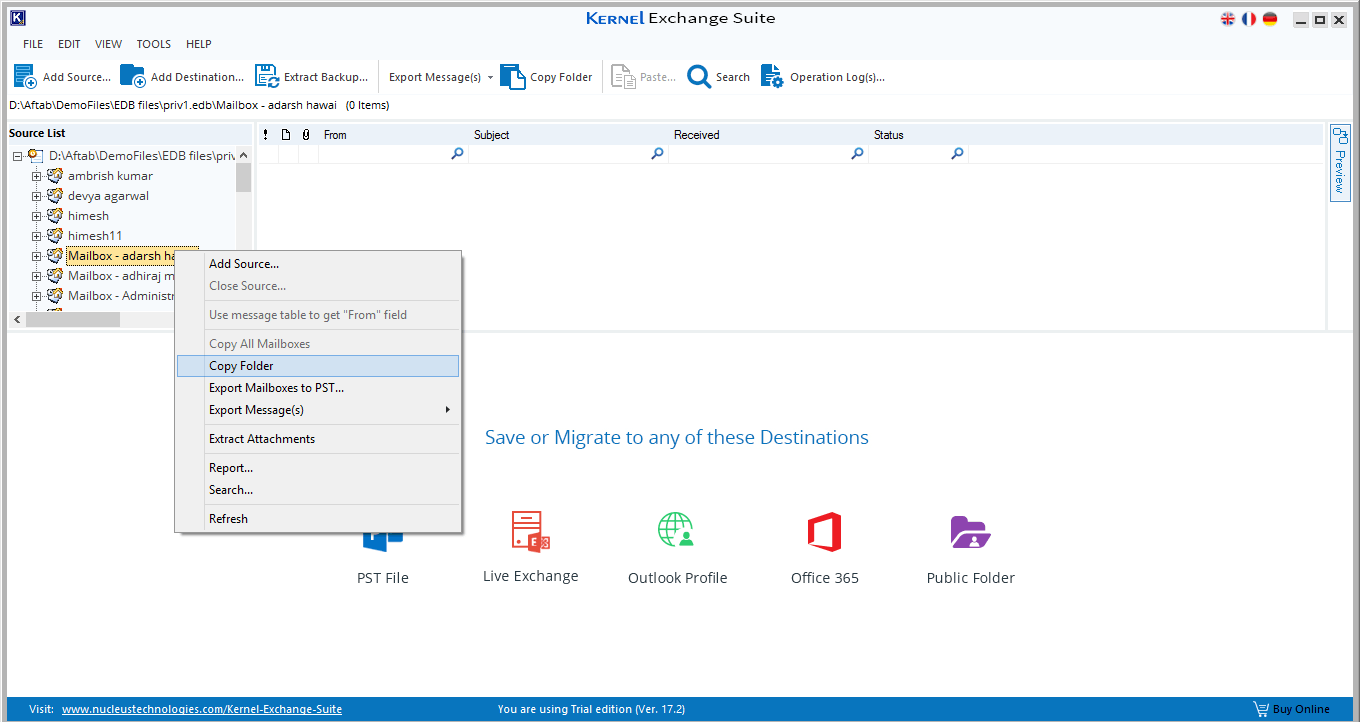
- In the source panel, right-click on a mailbox or mailbox folder and select Copy Folder.
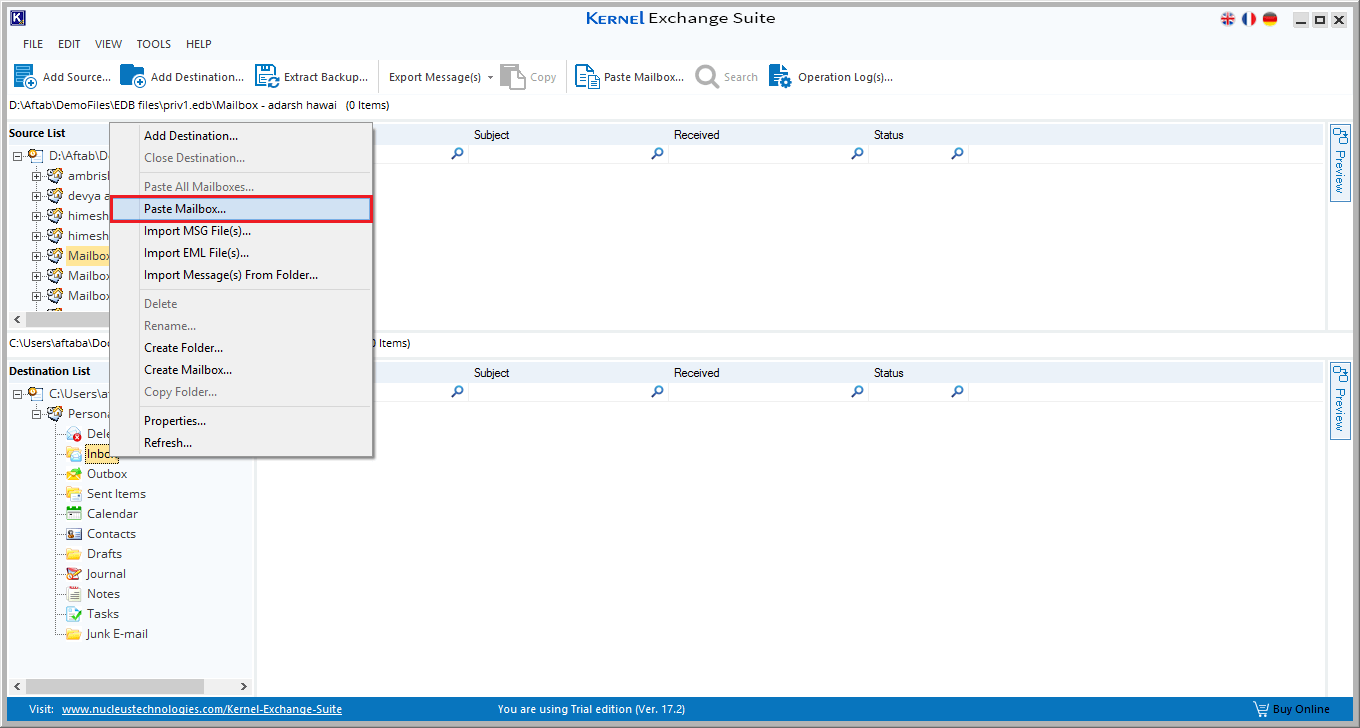
- In the destination panel, go to any folder, right-click on it and select Paste Mailbox (or Paste Folder).
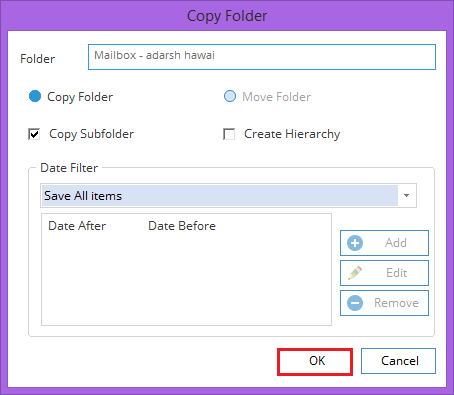
- Select the appropriate filters and click OK.
- A migration report is displayed with the details of the migration.
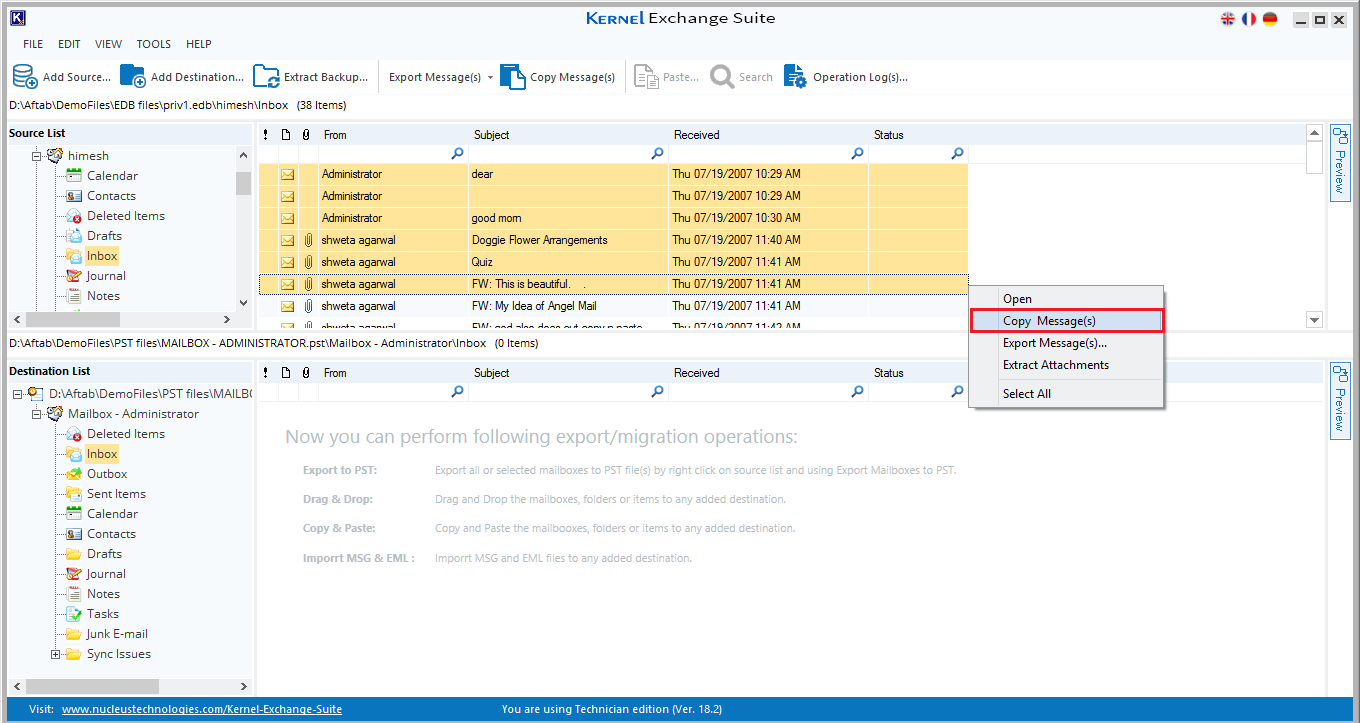
- In the source, go to a mailbox folder, select its messages, and select the option Copy Message(s) from the right-click menu.
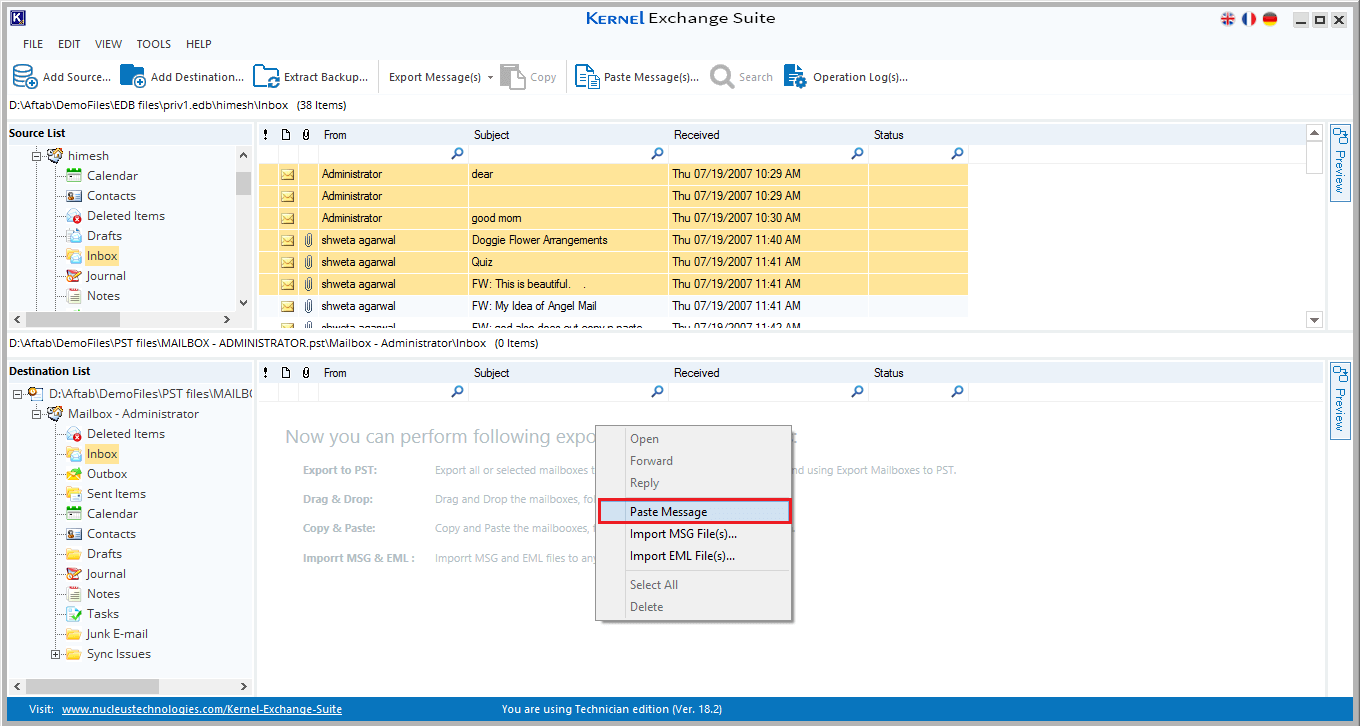
- Go to a mailbox folder in the destination, right-click anywhere, and select Paste Message.
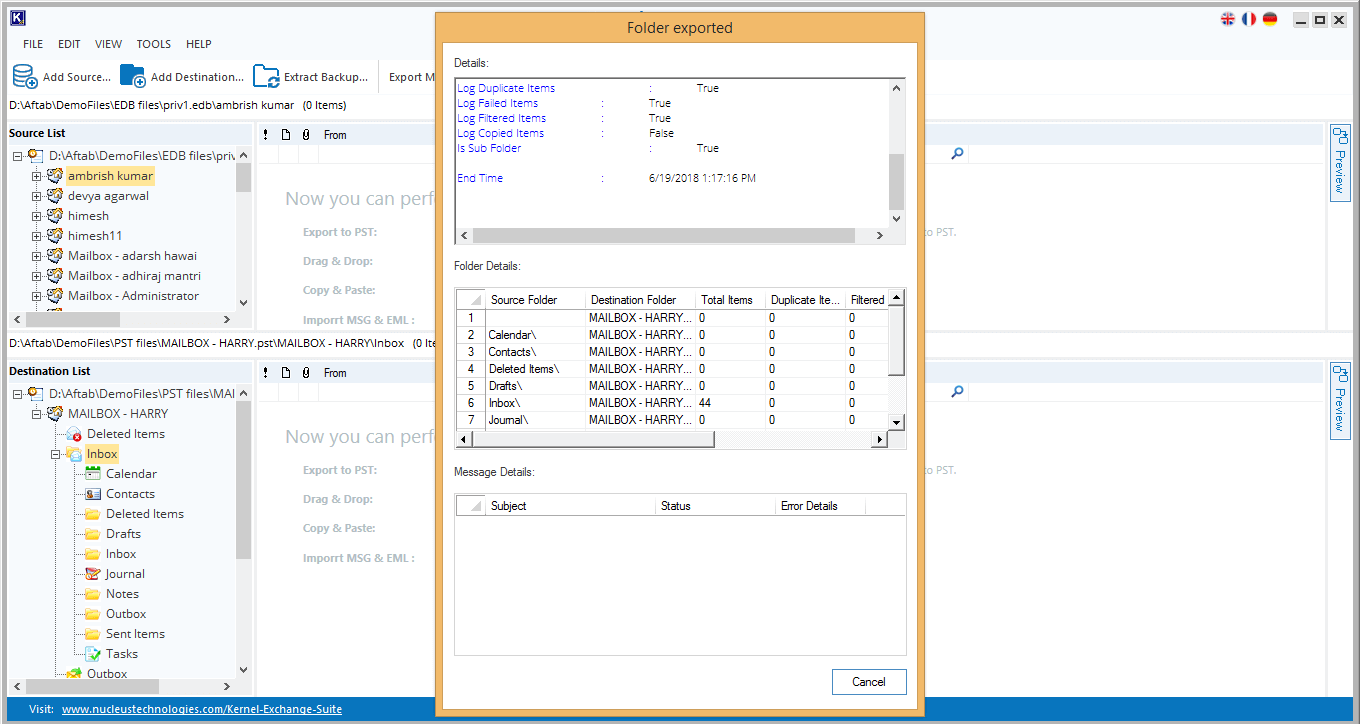
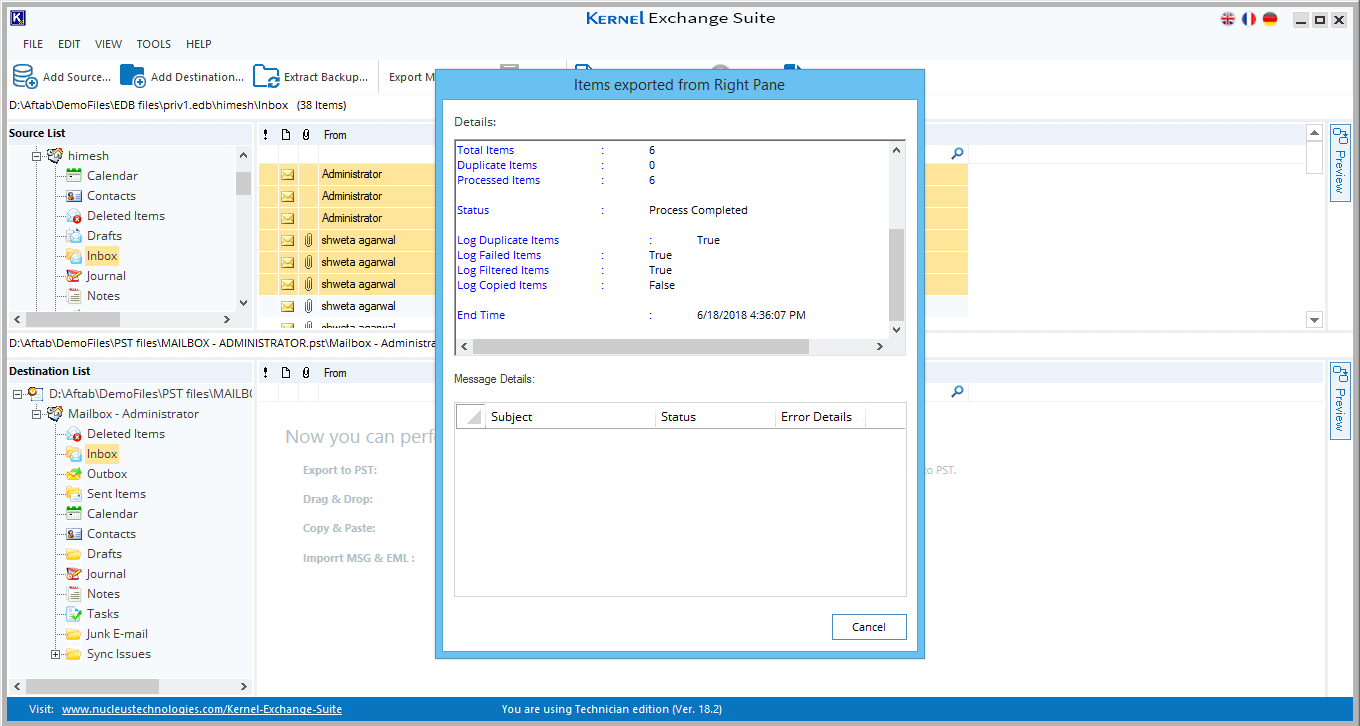
- After copying all the messages, the tool will provide a complete report.
- Thus the files are copied to the destination mailbox folder.
- Go to source mailbox folder, select the required messages, drag them to destination and drop there. After migration, a report will be presented to you.
- Thus messages are moved from a mailbox folder in the source to that in the destination.