Office 365 Migration tool is a professional solution for migrating mailboxes from one Office 365 tenant to another. It offers seamless migration of Office 365 mailboxes with advanced filtering options (to migrate specific mailbox data). What’s more unique about it is that it doesn’t require installation of MS Outlook to perform the migration task.
Office 365 Migration software can help you migrate both single as well as multiple mailboxes from Office 365 tenant at a time.
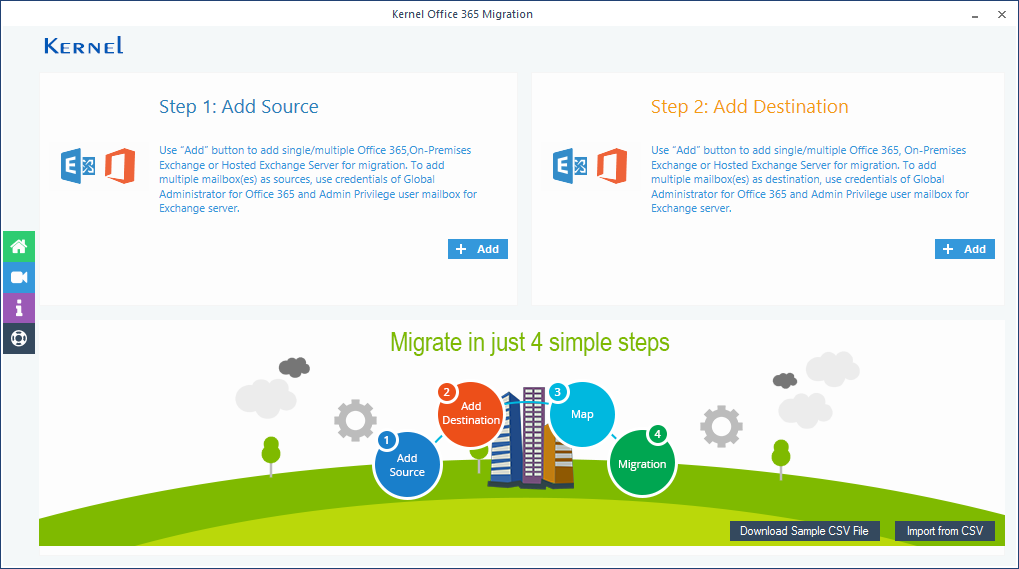
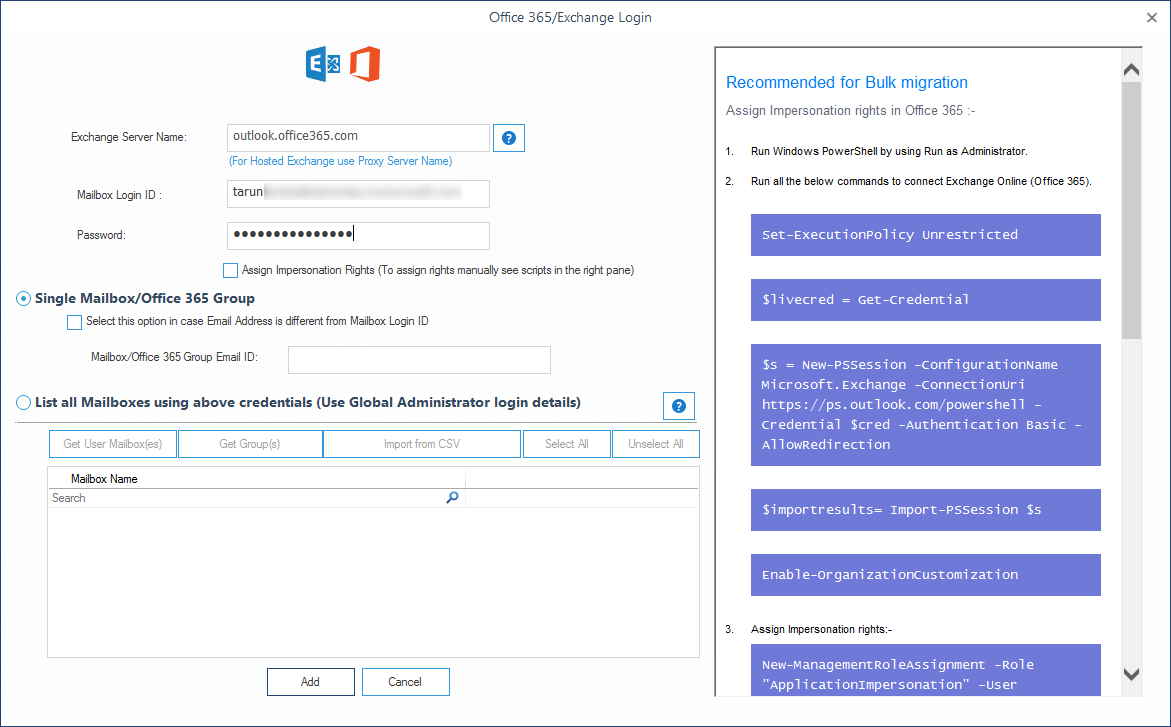
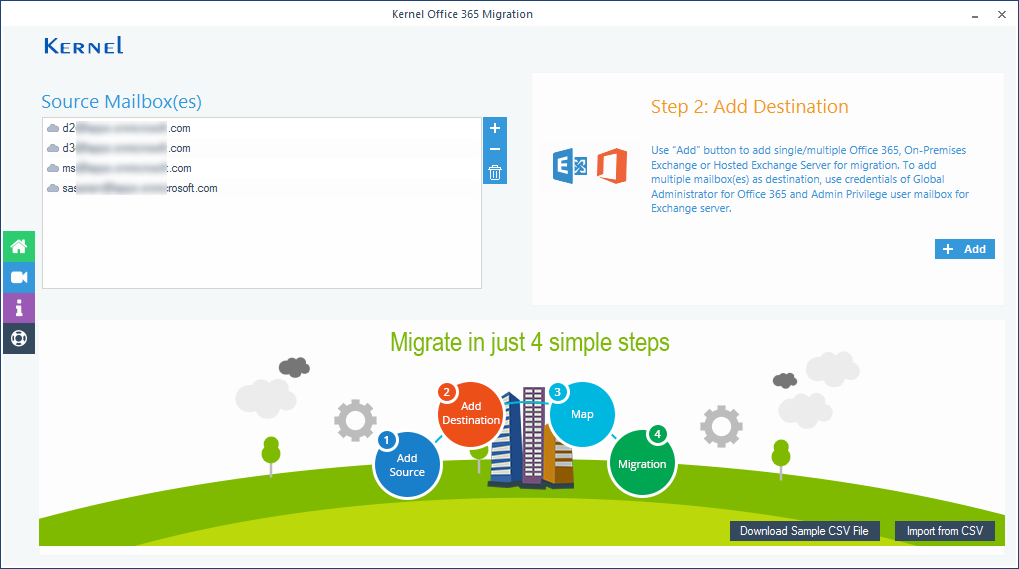
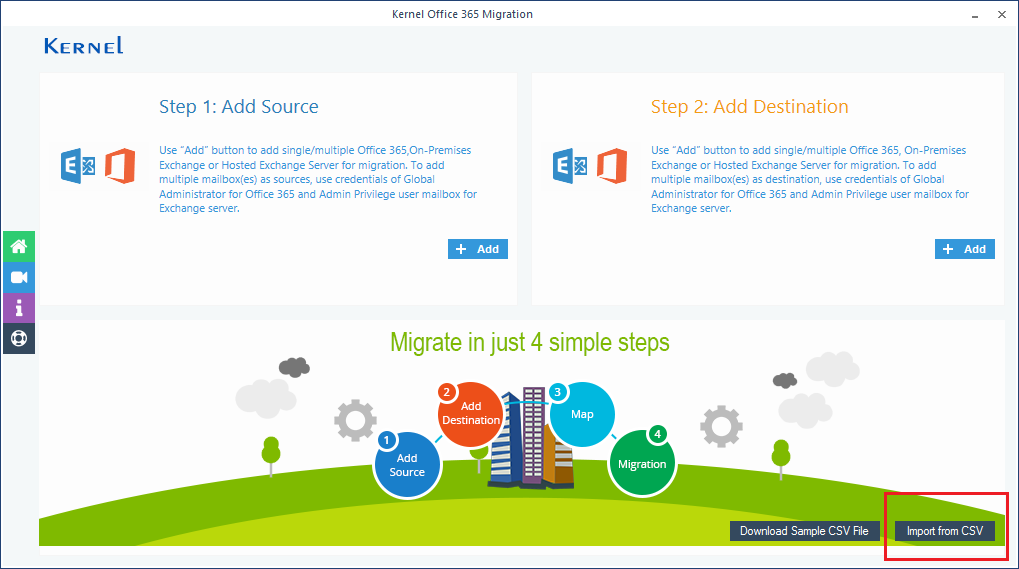
Launch the tool and click Add in the Add source section on the home screen of the tool.
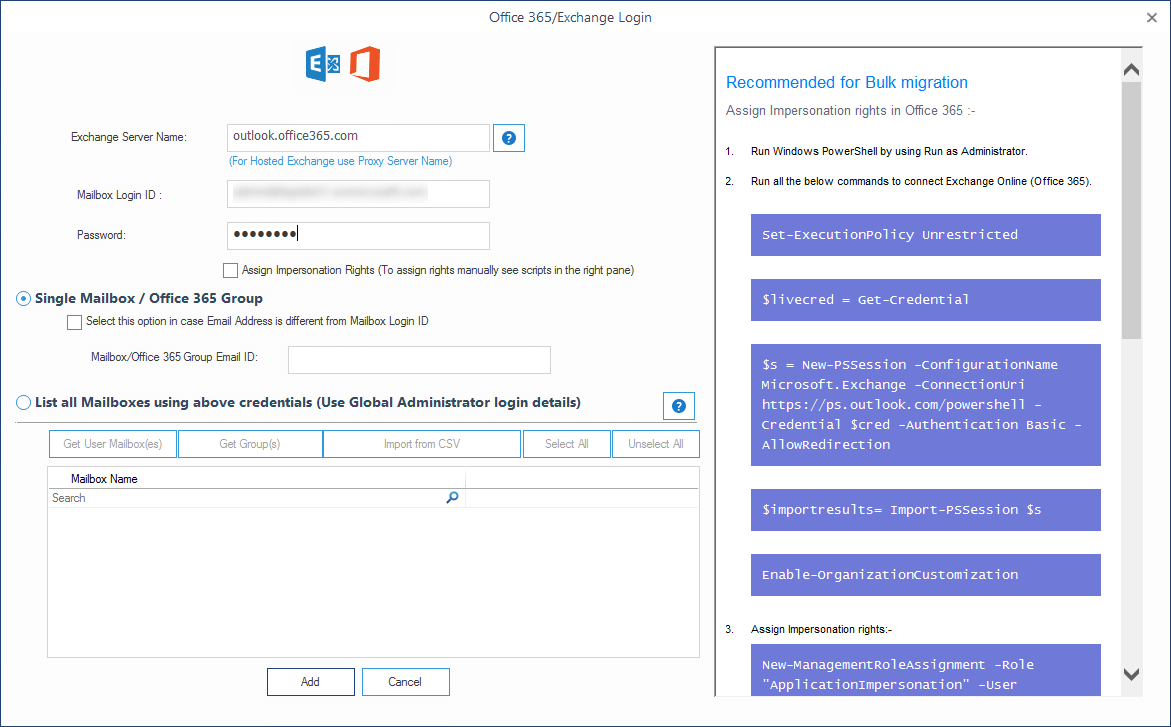
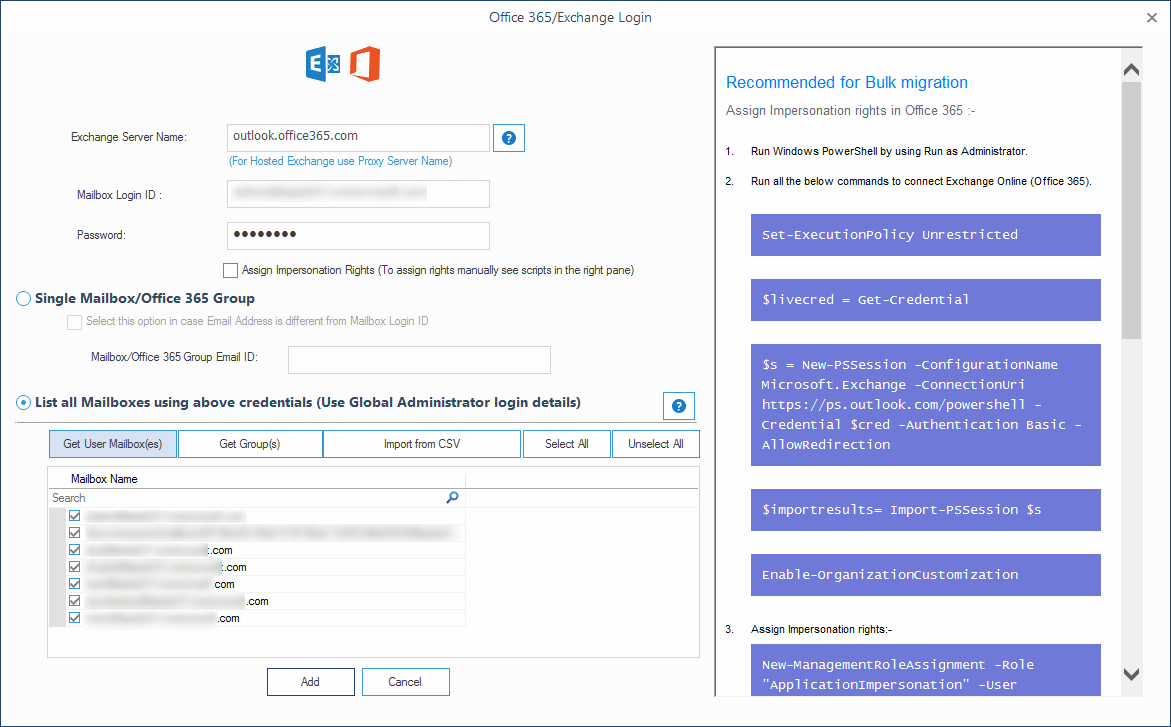
Enter credentials for the Office 365 account that you want to migrate and click Add.
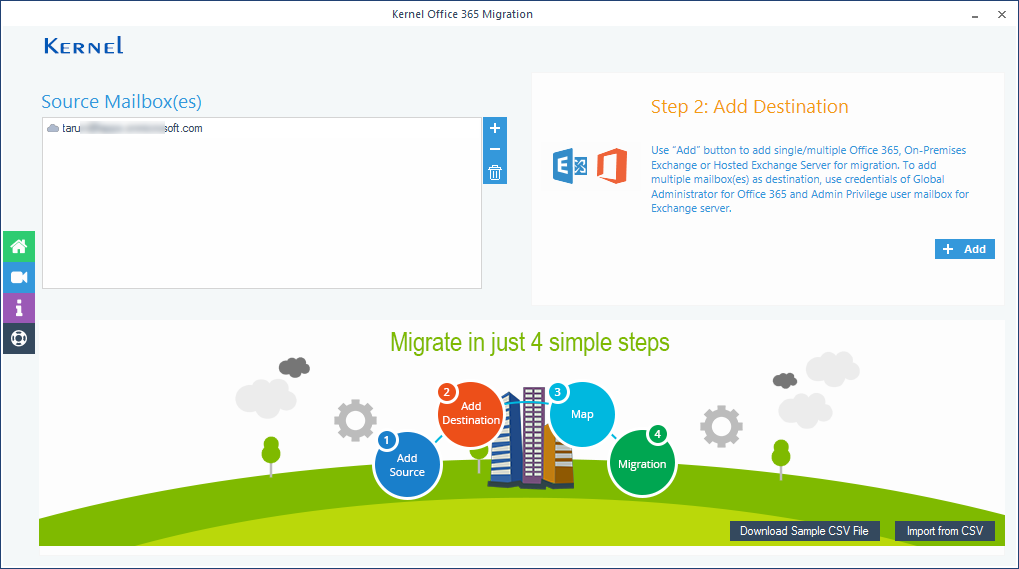
After adding the source, click Add in Add Destination section to add the destination Office 365 mailbox.
Provide the login credentials for the destination Office 365 mailbox and click Add.
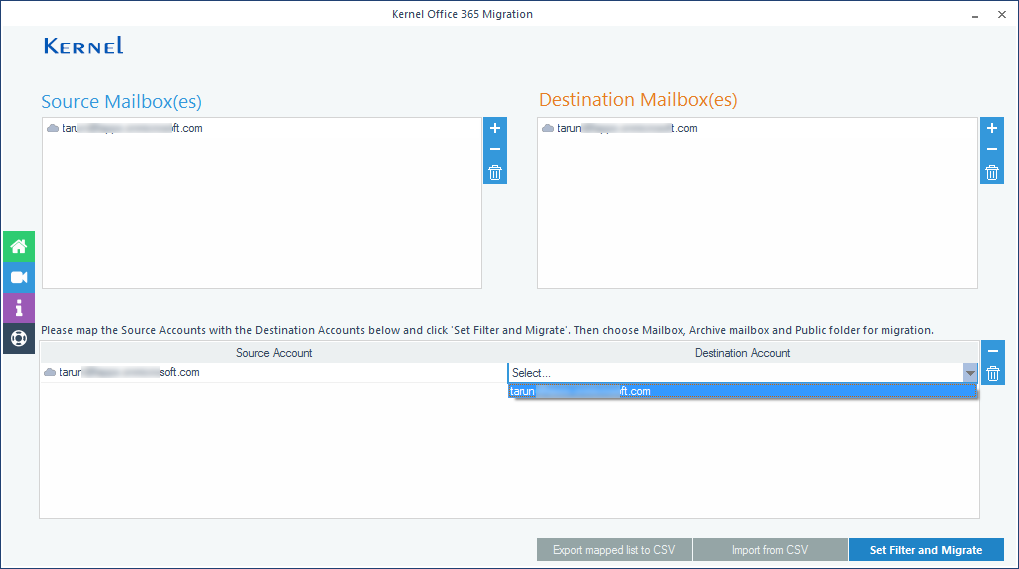
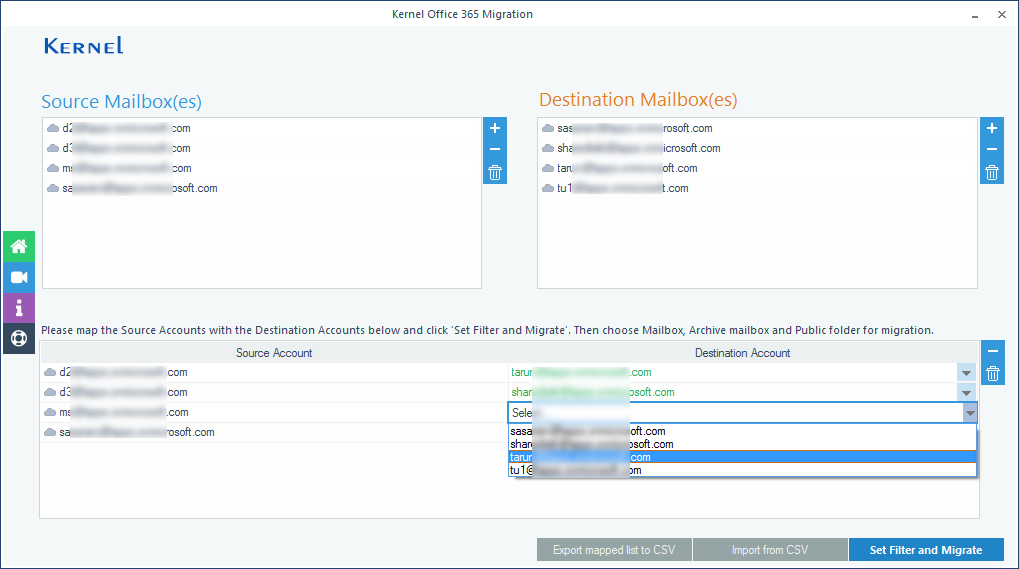
Once both the source and the destination mailboxes are added, map mailboxes to each other and click Set Filter and Migrate.
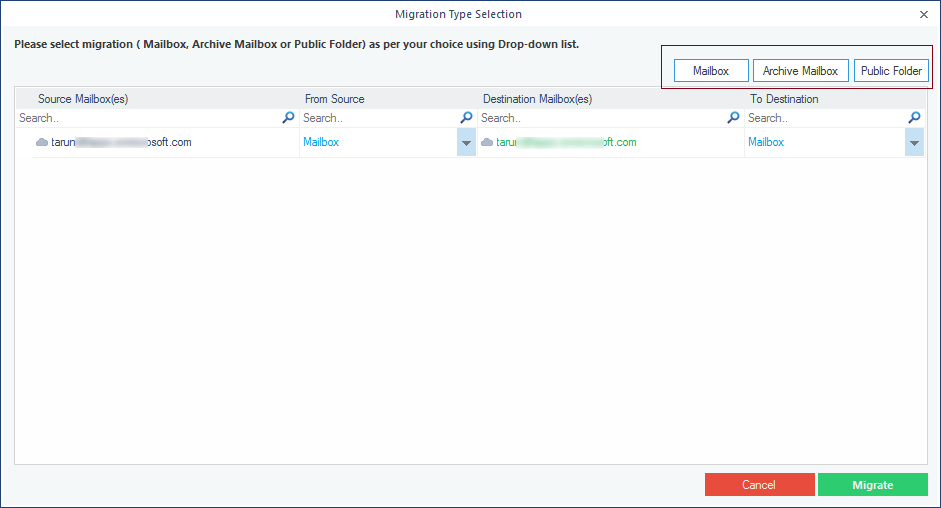
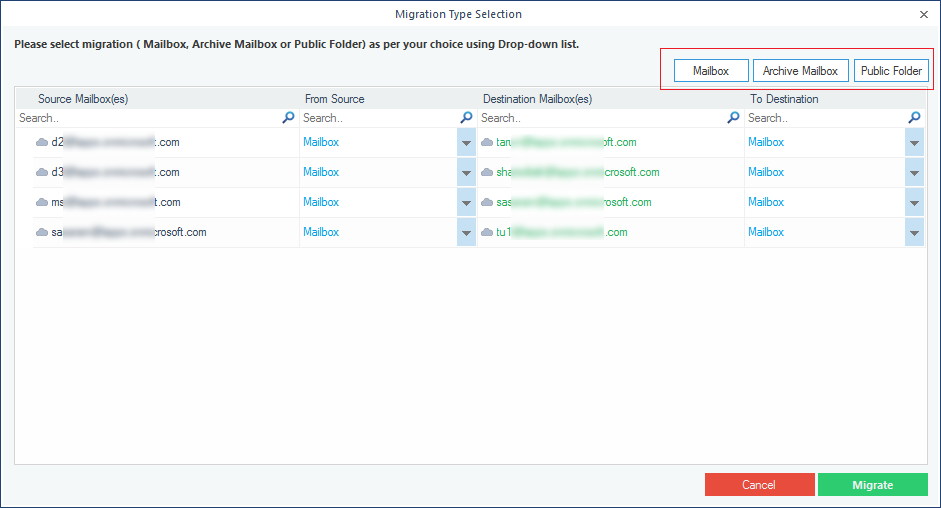
Select the type of data that you want to migrate and to which you want to migrate, and then click Migrate.
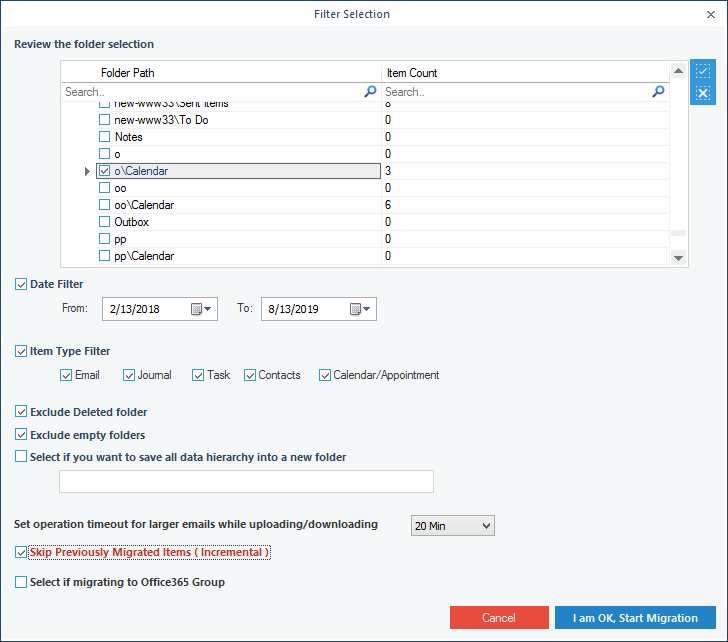
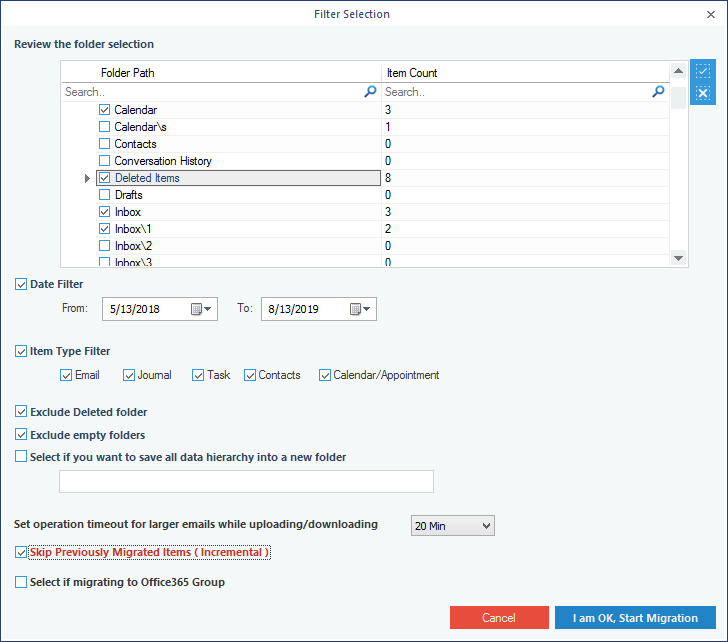
Now, select the required folders, apply filters to Office 365 mailbox, such as date, item type, etc., and then click I am OK Start Migration.
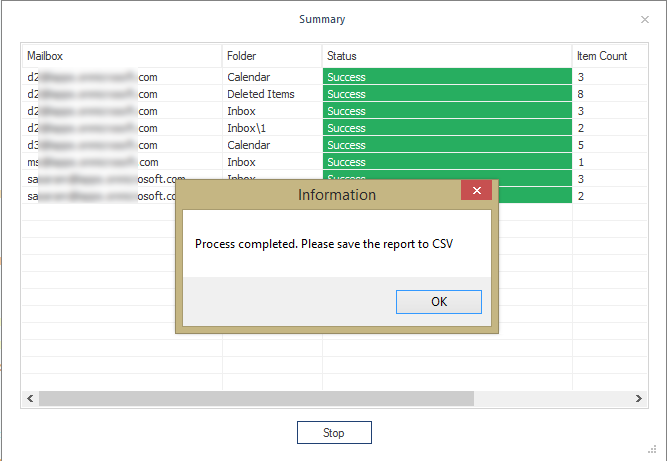
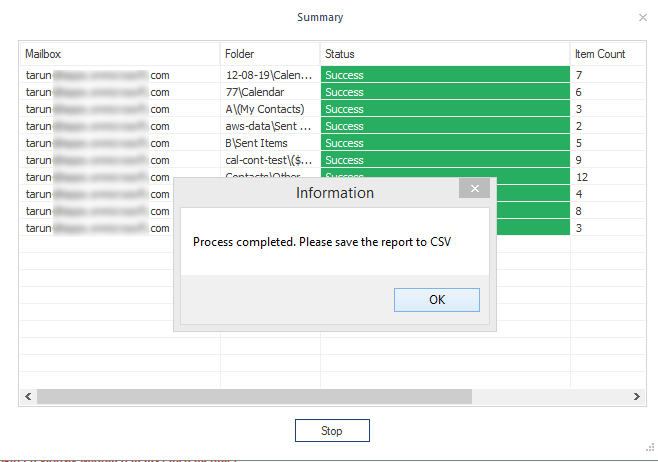
The tool will start the migration. After the migration is complete, a notification will appear on your screen confirming the same; click OK to end the process.
Launch the tool and click Add in the Add Source section on the home screen of the software.

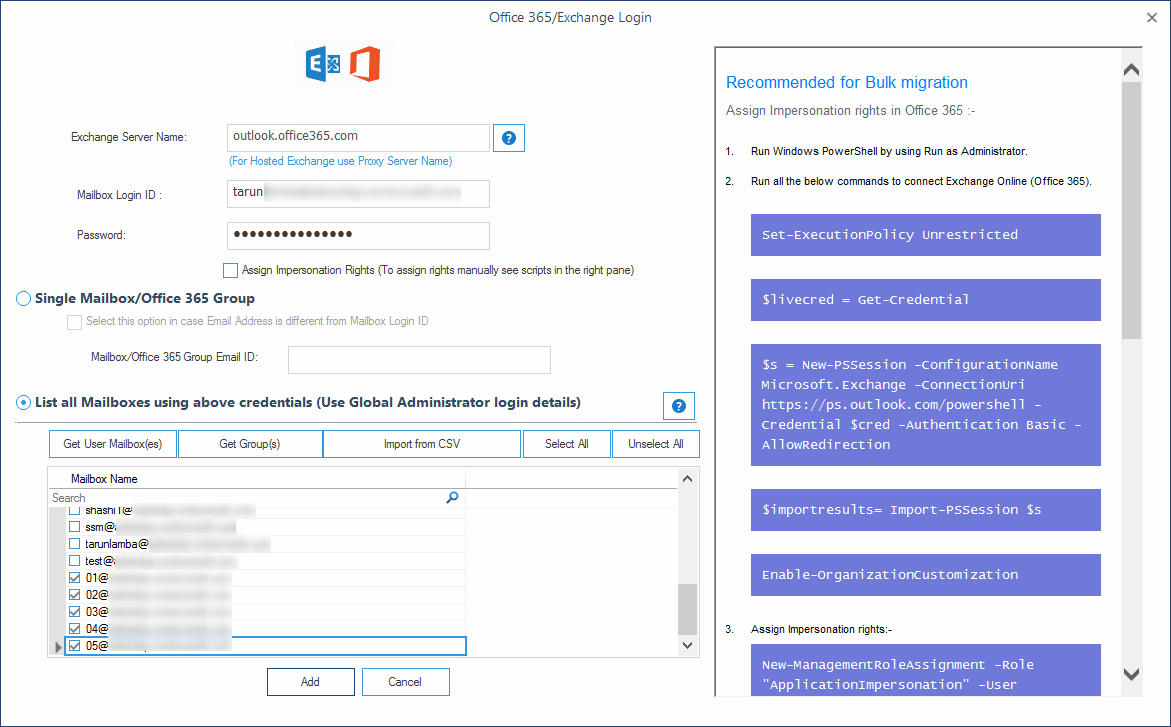
Enter the Office 365 credentials. Now, select List all mailboxes option and click Get User Mailboxes. Once all the related mailboxes appear in the field, select the required mailboxes, and click Add.
After adding source mailboxes, click Add in the Add Destination section to add the destination Office 365 mailbox.
Enter the Office 365 credentials. Select List all mailboxes option and click Get User Mailboxes. Once all the mailboxes appear in the field, select the required mailboxes, and click Add.
Both the source and destination mailboxes will be added to the tool. Now, map mailboxes to each other and click Set Filter and Migrate.
Select the type of data that you want to migrate and to which you want to migrate, and then click Migrate.
The filter section will appear on the screen. Select the required folders, apply specific filters such as date, item type, etc., and then click I am OK Start Migration.
The software will start migrating mailboxes. After the migration is complete, a notification will appear on your screen confirming the same; click OK to end the process.
If you want to save the migration report to CSV format, click Save report to CSV.